The Database CI/CD Best Practice with GitLab
Wanna other VCS providers instead? 👉
- The Database CI/CD Best Practice with GitHub
- The Database CI/CD Best Practice with Azure DevOps
- The Database CI/CD Best Practice with Bitbucket
Database change is a tricky part of the application development process: it usually involves multiple databases from different environments and cross-team collaboration, to add on top of it, databases are touch and go. It got us thinking: can we treat database the same way we treat application code?
DORA (DevOps Research & Assessment) pointed out that integrating database work into the software delivery process positively contributes to continuous delivery. It’s about time to make databases a part of the CI/CD cycle.
But how does it work, really?
A Complete Database CI/CD Workflow
Here, we present a complete Database CI/CD workflow with GitLab. It's similar with GitHub, Bitbucket or Azure DevOps.
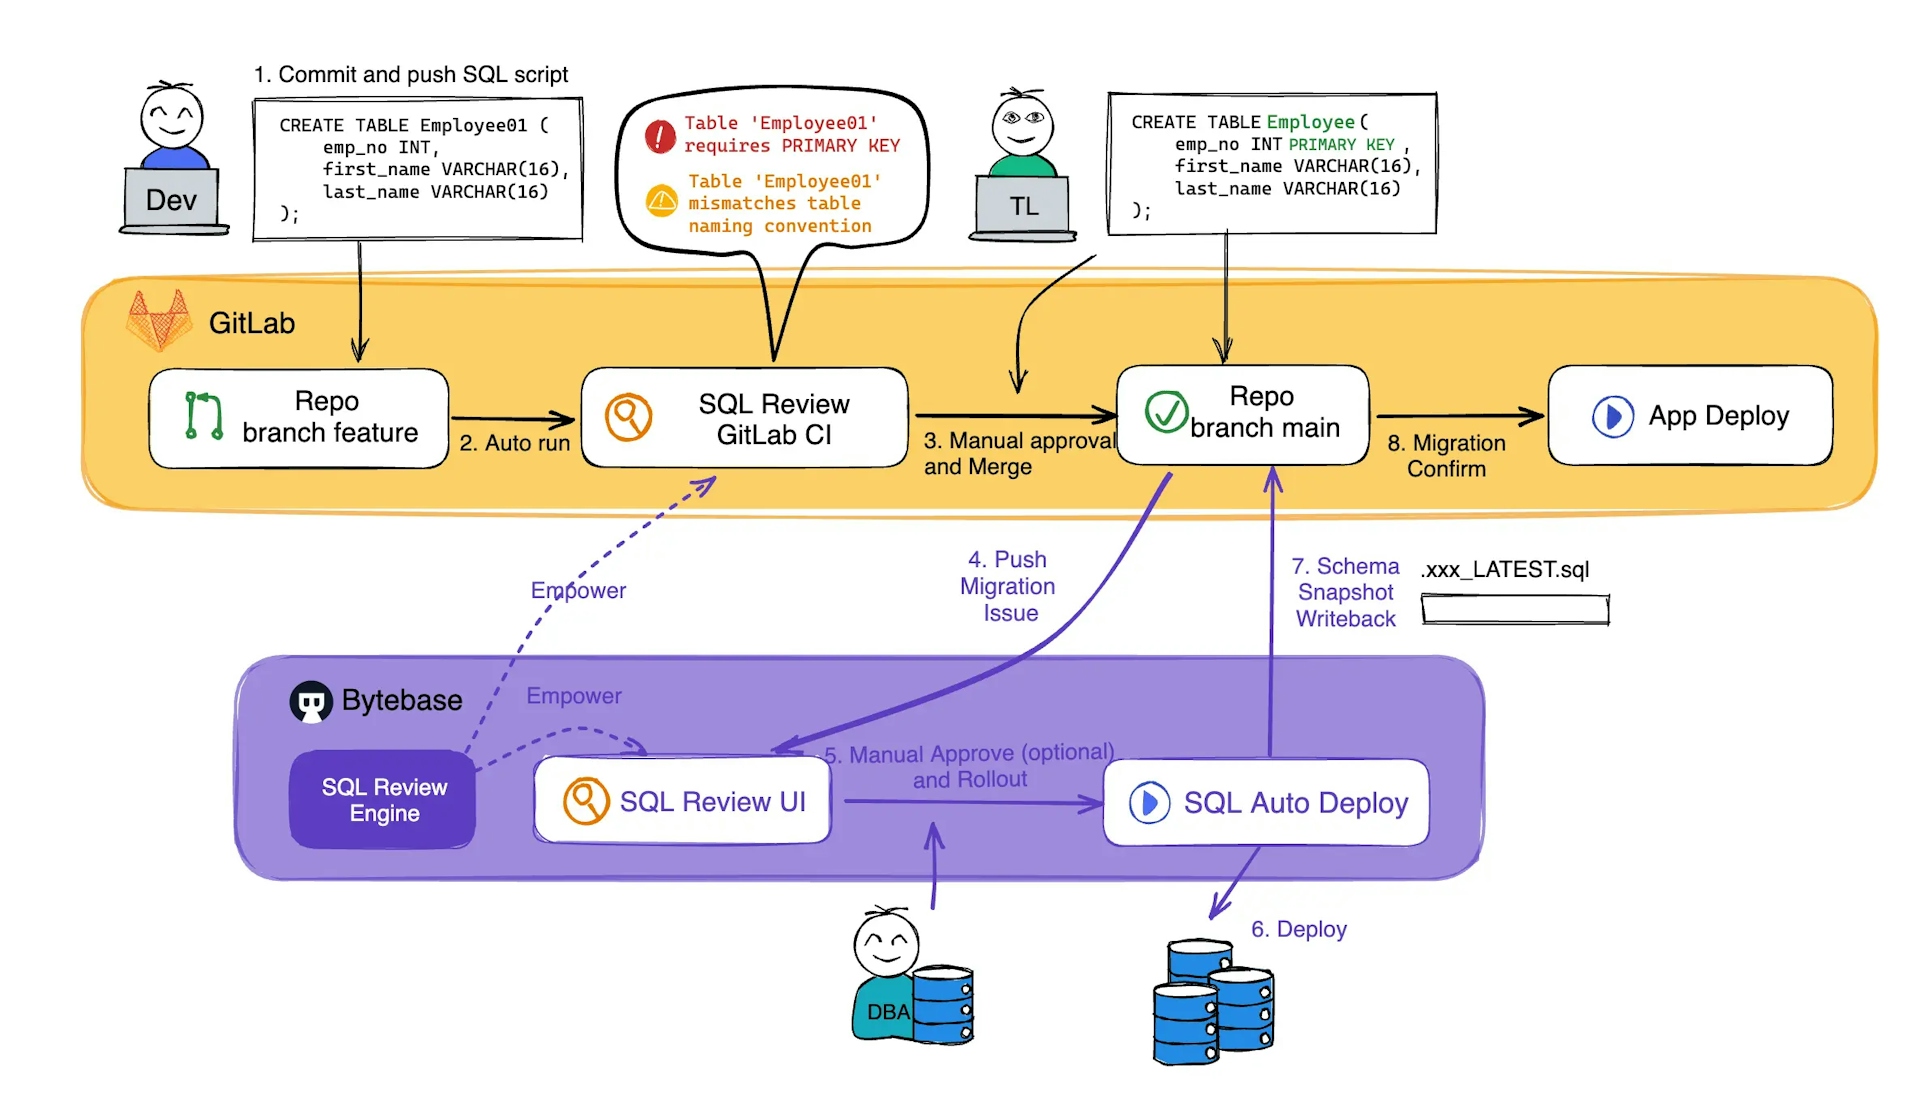
- The developer creates a Merge Request containing the SQL migration script;
- SQL Review CI is automatically triggered to review SQL and offers suggestions to assist the code review;
- After several possible iterations, the team leader or another peer on the dev teams approves the change and merges the SQL script into a branch;
- The merge event automatically triggers the release pipeline in Bytebase and creates a release ticket capturing the intended change;
- (Optional) an approval flow will be auto matched based on the change risk and be followed via Bytebase’s built-in UI;
- Approved scripts are executed gradually according to the configured rollout stages;
- The latest database schema is automatically written back to the code repository after applying changes. With this, the Dev team always has a copy of the latest schema. Furthermore, they can configure downstream pipelines based on the change of that latest schema;
- Confirm the migration and proceed to the corresponding application rollout.
Set Up Database CI/CD with GitLab in Bytebase (Free Plan)
Here's a step-by-step tutorial on how to set up this Database CI/CD with GitLab in Bytebase.
Step 1 - Run Bytebase in Docker and set the External URL generated by ngrok
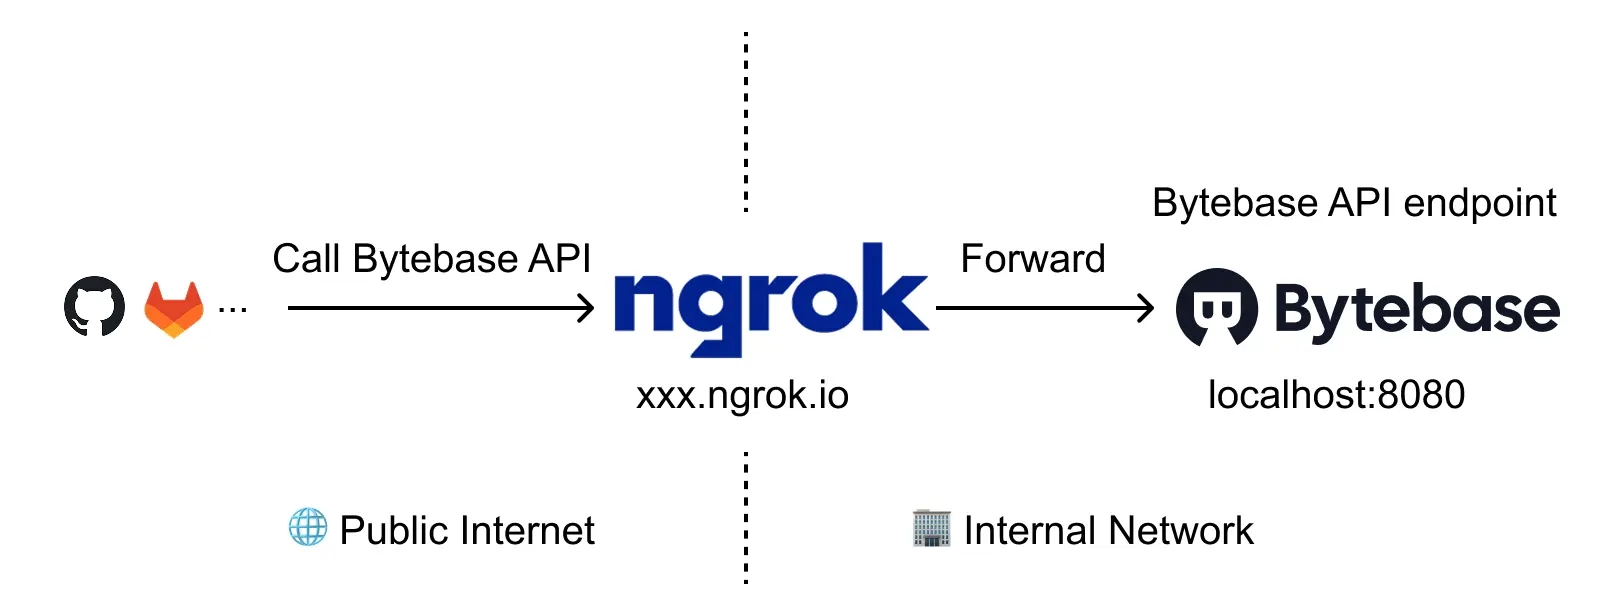
ngrok is a reverse proxy tunnel, and in our case, we need it for a public network address in order to receive webhooks from VCS. ngrok we used here is for demonstration purposes. For production use, we recommend using Caddy.
-
Run Bytebase in Docker with the following command:
docker run --rm --init \ --name bytebase \ --publish 8080:8080 --pull always \ --volume ~/.bytebase/data:/var/opt/bytebase \ bytebase/bytebase:2.16.0 -
Bytebase is running successfully in Docker, and you can visit it via
localhost:8080. Register an admin account and it will be granted theworkspace adminrole automatically. -
Login to ngrok Dashboard and complete the Getting Started steps to install and configure. If you want to use the same domain each time you launch ngrok, go to Cloud Edge > Domains, where you'll find the domain
<<YOURS>>.ngrok-free.applinked to your account. -
Run the ngrok command
ngrok http --domain=<<YOURS>>.ngrok-free.app 8080to start ngrok with your specific domain, and you will see the output displayed below: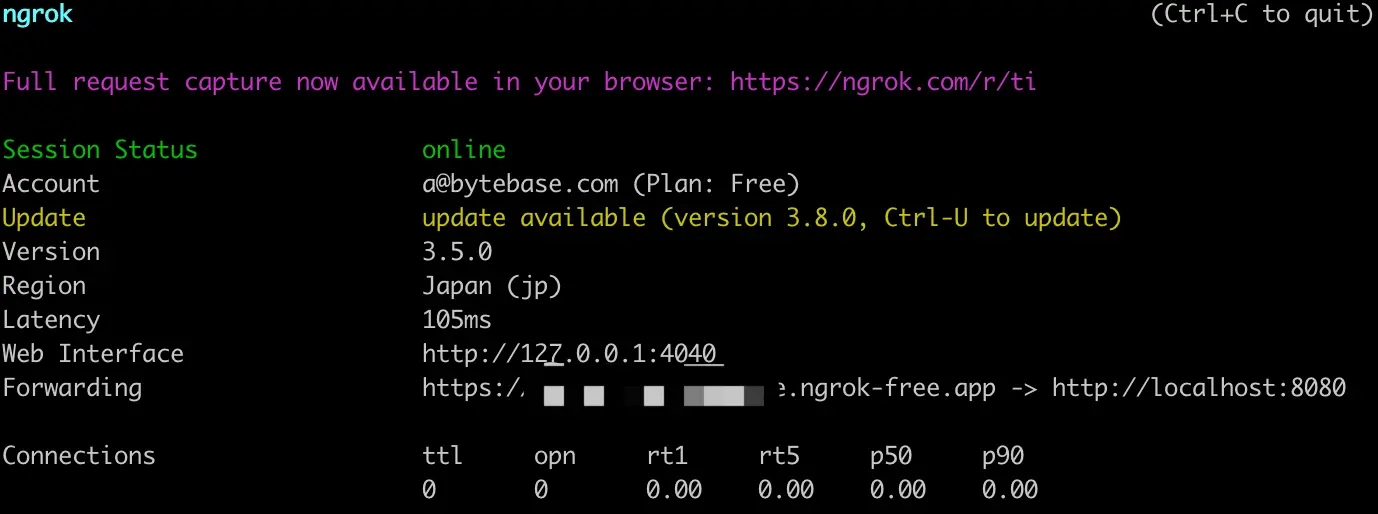
-
Log in Bytebase and click the gear icon (Settings) on the top right. Click General under Workspace. Paste
<<YOURS>>.ngrok-free.appas External URL under Network section and click Update.
-
Now you can access Bytebase via
<<YOURS>>.ngrok-free.app.
Step 2 - Add GitLab.com as a Git provider in Bytebase
-
Visit Bytebase via your ngrok URL. Click gear icon (Settings) > Integration > GitOps, choose
GitLab.com, and click Next. You will see STEP 2. Copy the Redirect URI.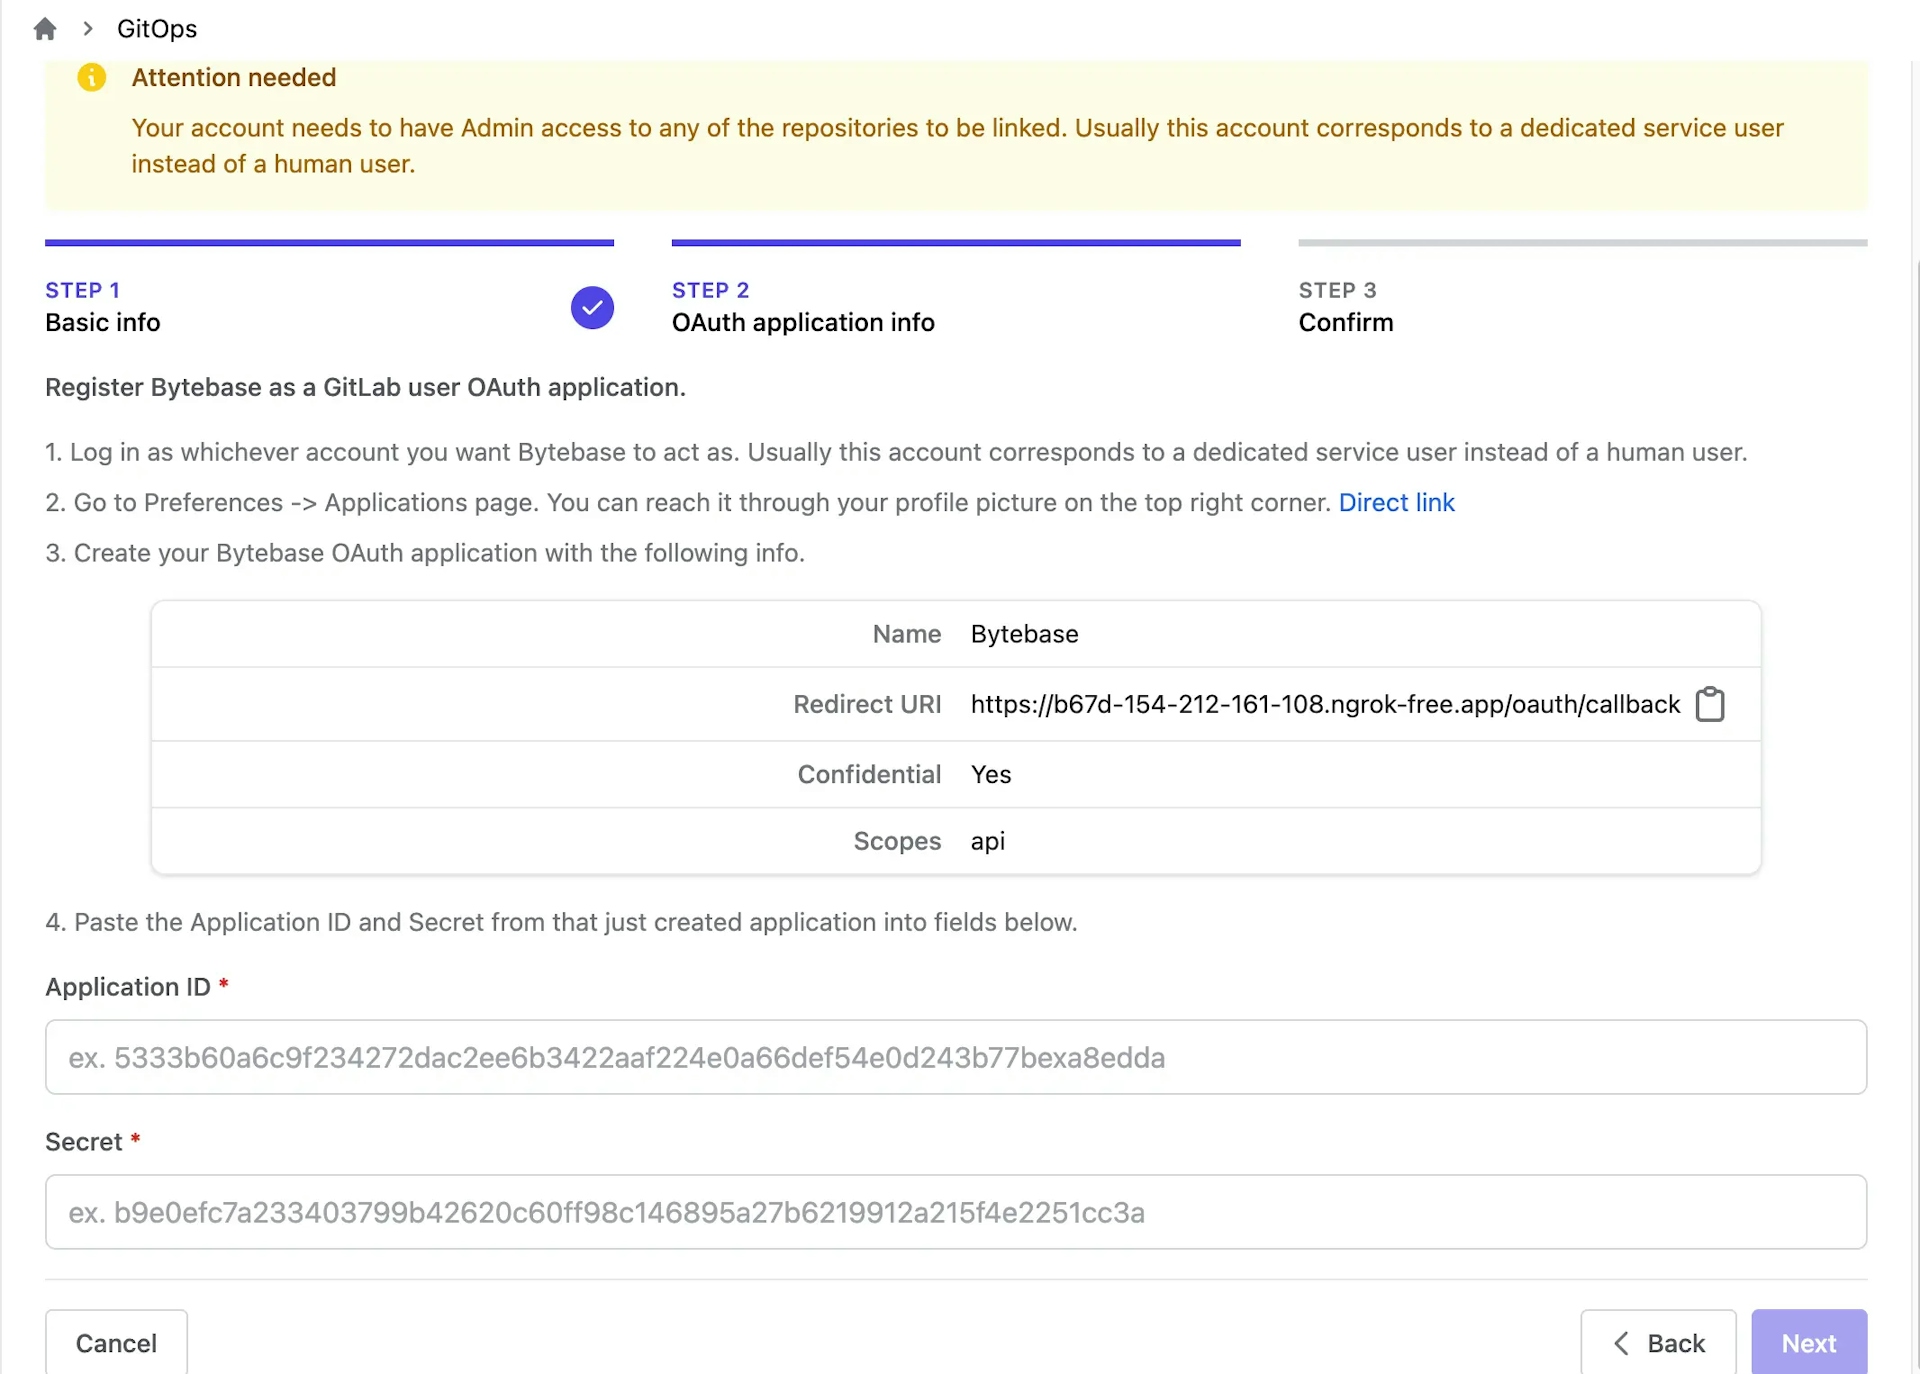
-
Go to
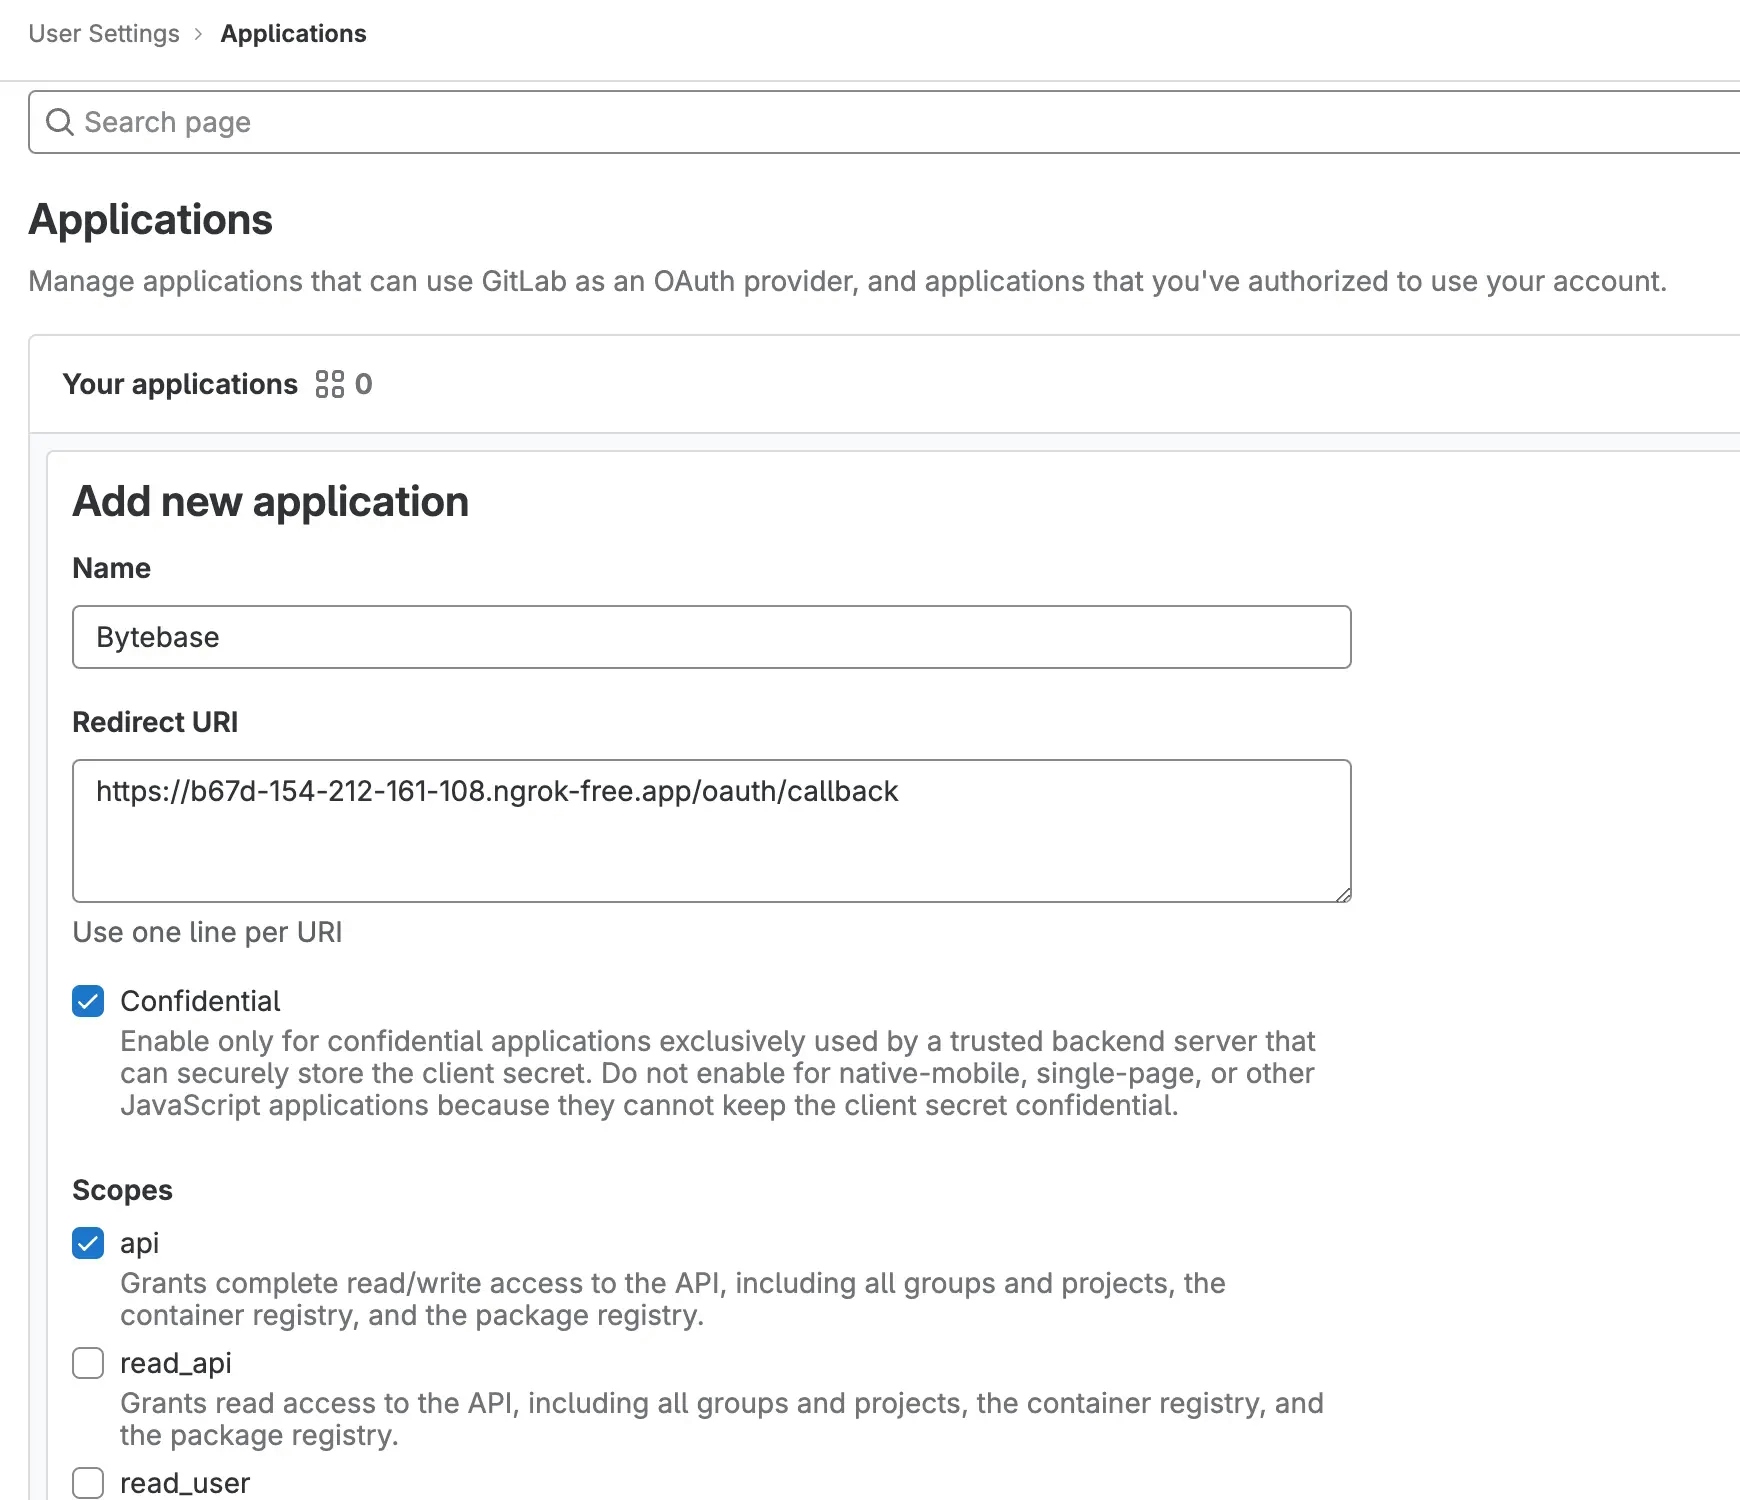
https://gitlab.com/, click your avatar and choose Preferences on the dropdown menu. Click Applications on the left bar. Click Add new application. Fill in the following fields:- Name:
Bytebase - Redirect URI: Copied from Bytebase GitOps config STEP 2
- Confidential:
Yes - Scope:
api
Click Save application.
- Name:
-
Copy the Application ID and Secret from the GitLab application page and paste them into the Bytebase GitOps config page. Click Next. Click Authorize on popup. You will be redirected to the confirmation page. Click Confirm and add, and the Git provider is successfully added.

Step 3 - Configure a GitOps Workflow in Bytebase
-
Go to
https://gitlab.com/and create a new projectbytebase-gitlabcom-demo. Set the Visibility Level toPublic. Click Create project. -
Go to Bytebase, go to the
Sample Project. Click GitOps tab and chooseGitOps workflow. Click Configure GitOps. -
Choose
GitLab.com(the git provider you just configured) and the repository you just created. You'll be redirected to STEP 3. Keep everything as default, scroll down to the bottom and checkEnable SQL Review CI via GitLab CI. Click Finish.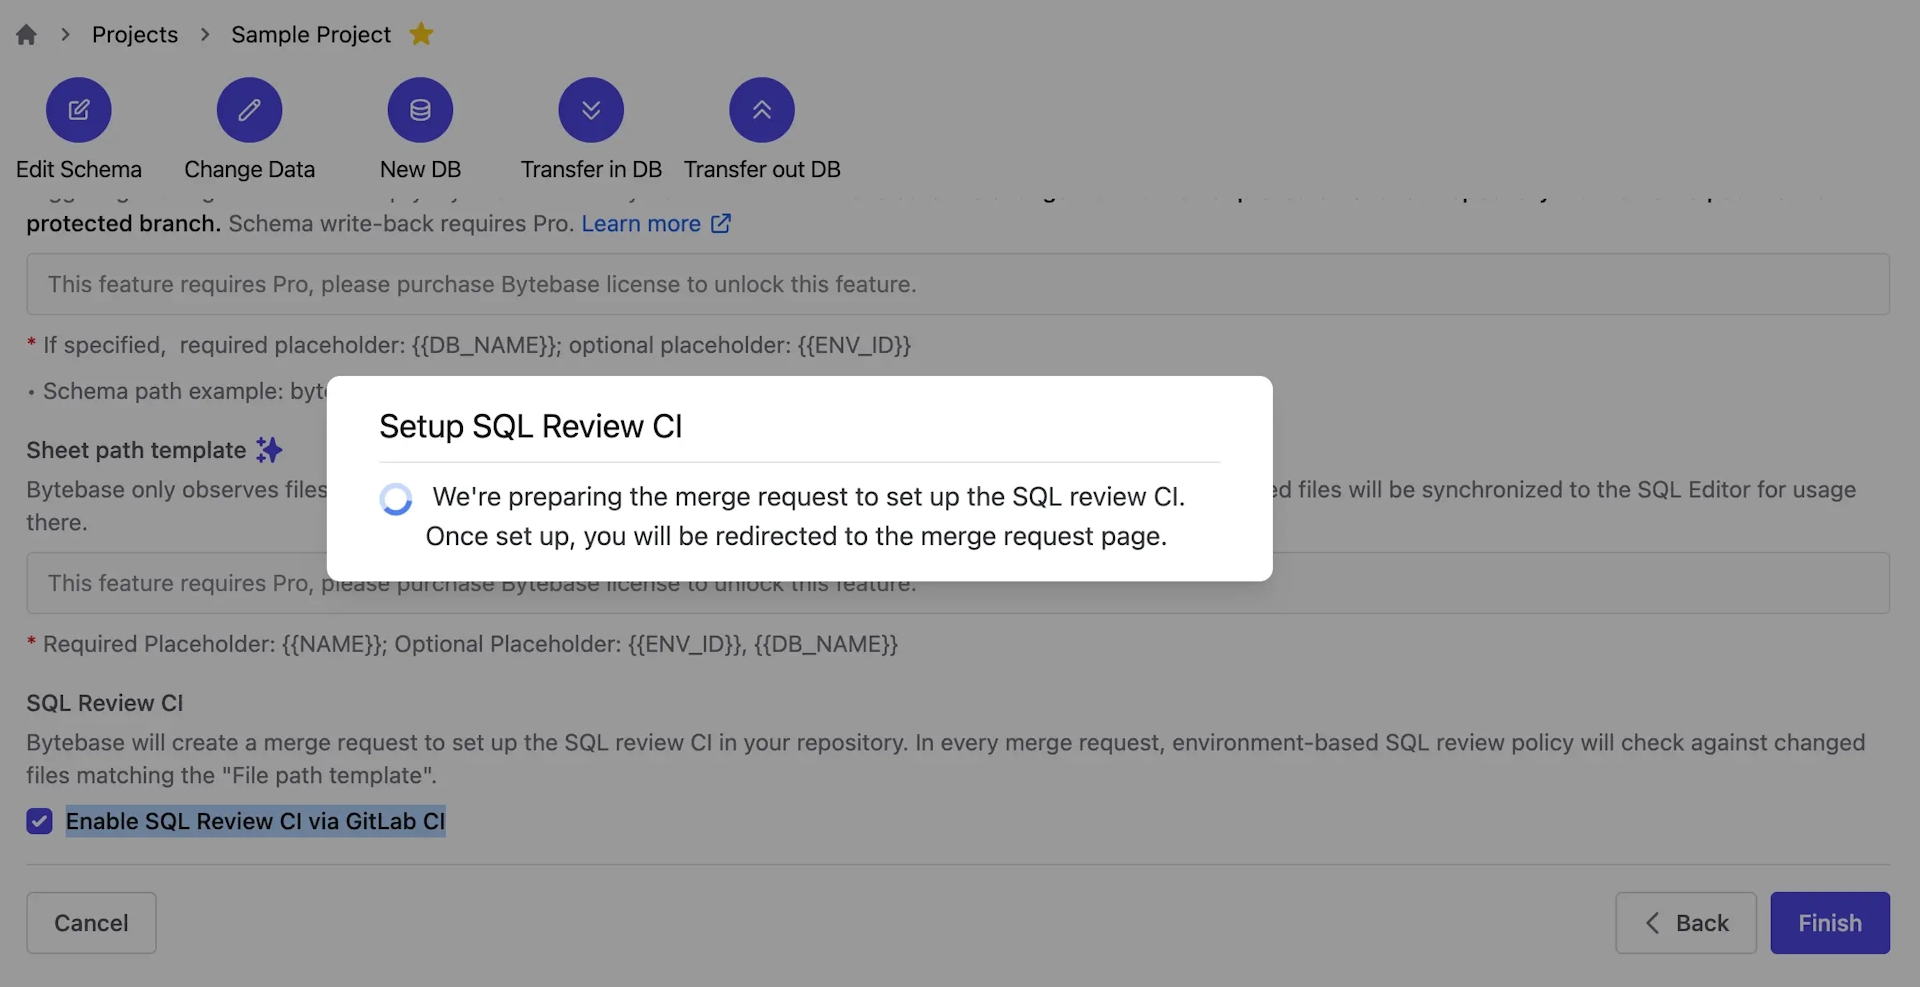
-
After SQL Review CI is automatically setup, click Review the merge request. You'll be redirected to GitLab. Click Merge and you'll see the CI is automatically configured. It will be triggered later once a new merge request is created.

-
Go back to Bytebase, you'll see the GitOps workflow is configured successfully.
Step 4 - Create a Merge Request and Trigger SQL Review CI
-
Go to Environments, you'll see there's a SQL Review policy attached with
Prod. Click Edit, you'll see three activated SQL Review rules which will be applied via CI.
-
To test SQL Review CI, we'll create a merge request to change the
Proddatabase schema. However, it will voliate the SQL Review policy first. Go tobytebase-gitlabcom-demoon GitLab. Click New branch, name itadd-nickname-table-employee. Click Create branch. -
On the new branch, create a subdirectory
bytebase, and create a sub-subdirectoryprod. Within theproddirectory, create a fileemployee##202309262500##ddl##add_nickname_table_employee.sql. Copy the following SQL script into the file and commit the change.ALTER TABLE "public"."employee" ADD COLUMN "nick_name" text; -
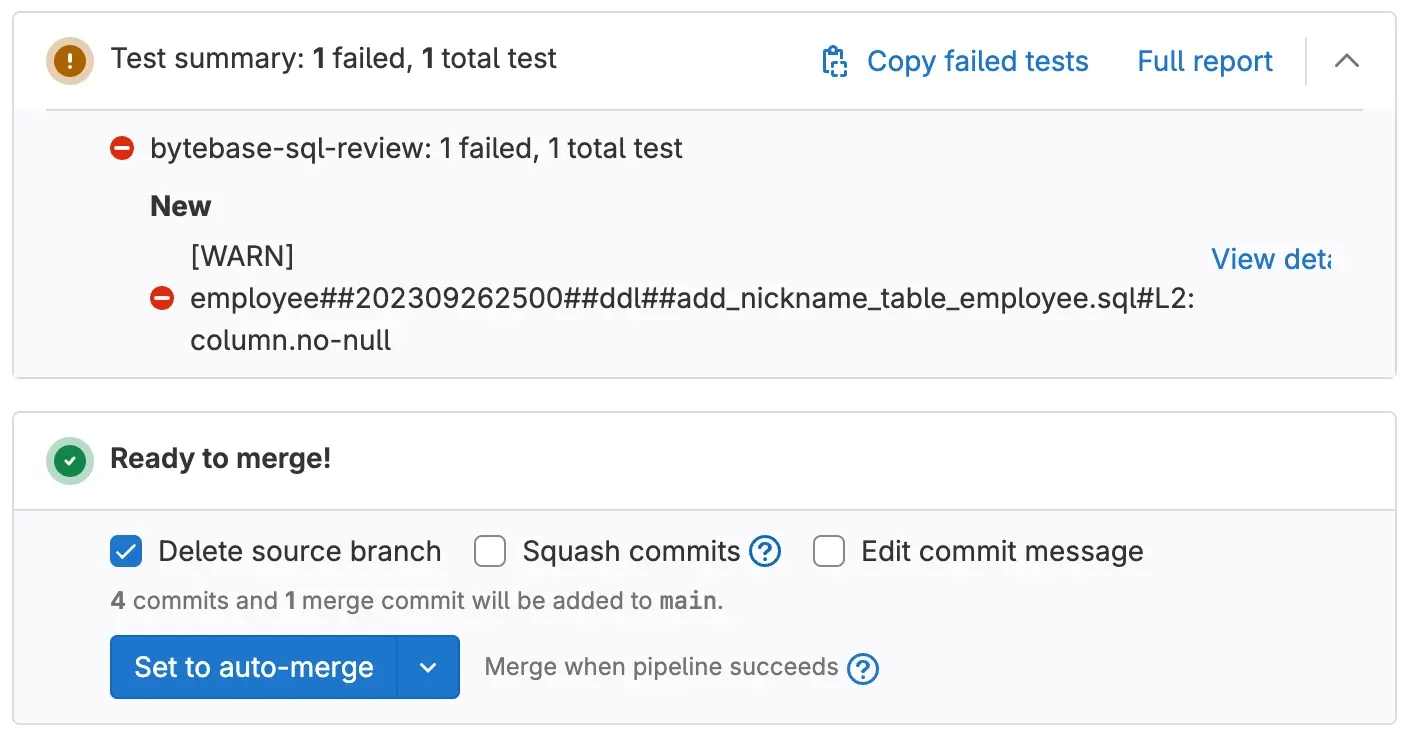
Create a merge request including the above commits. The SQL Review CI will run automatically and show the fail message. However you can still merge it regardless of the CI result.
-
Update the SQL script and commit in the current branch. The SQL Review CI will run again and show the pass message. Click Merge.
ALTER TABLE "public"."employee"
ADD COLUMN "nick_name" text NOT NULL DEFAULT '';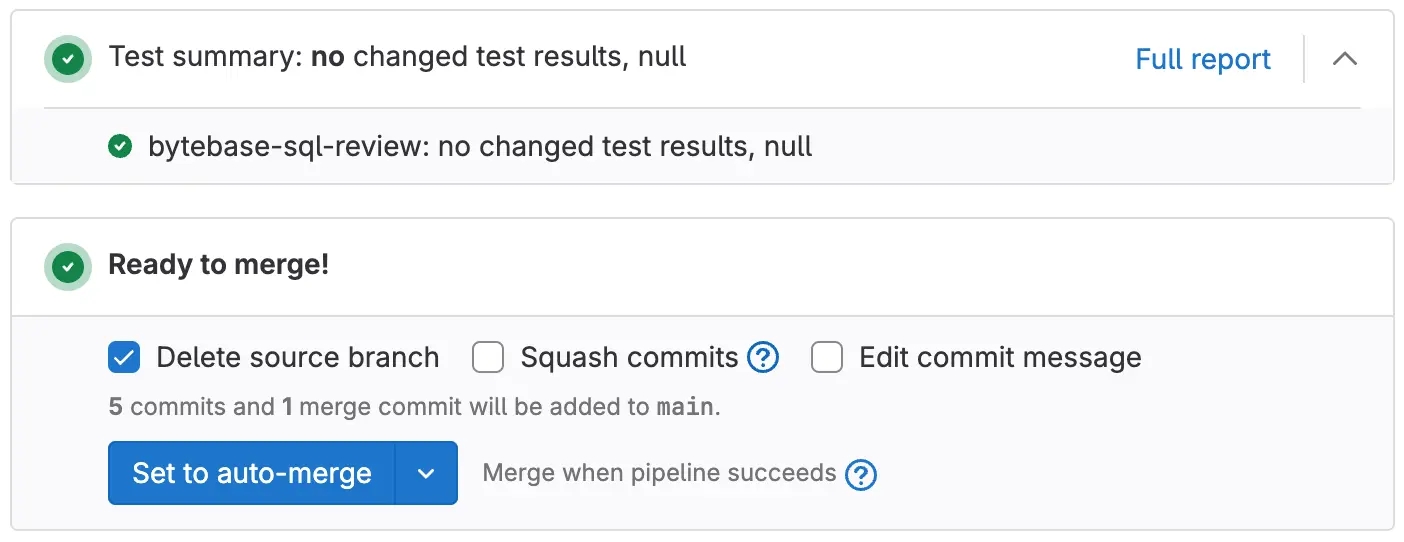
-
Go back to project
Sample Projectin Bytebase, you'll see there's an issue created by a push event.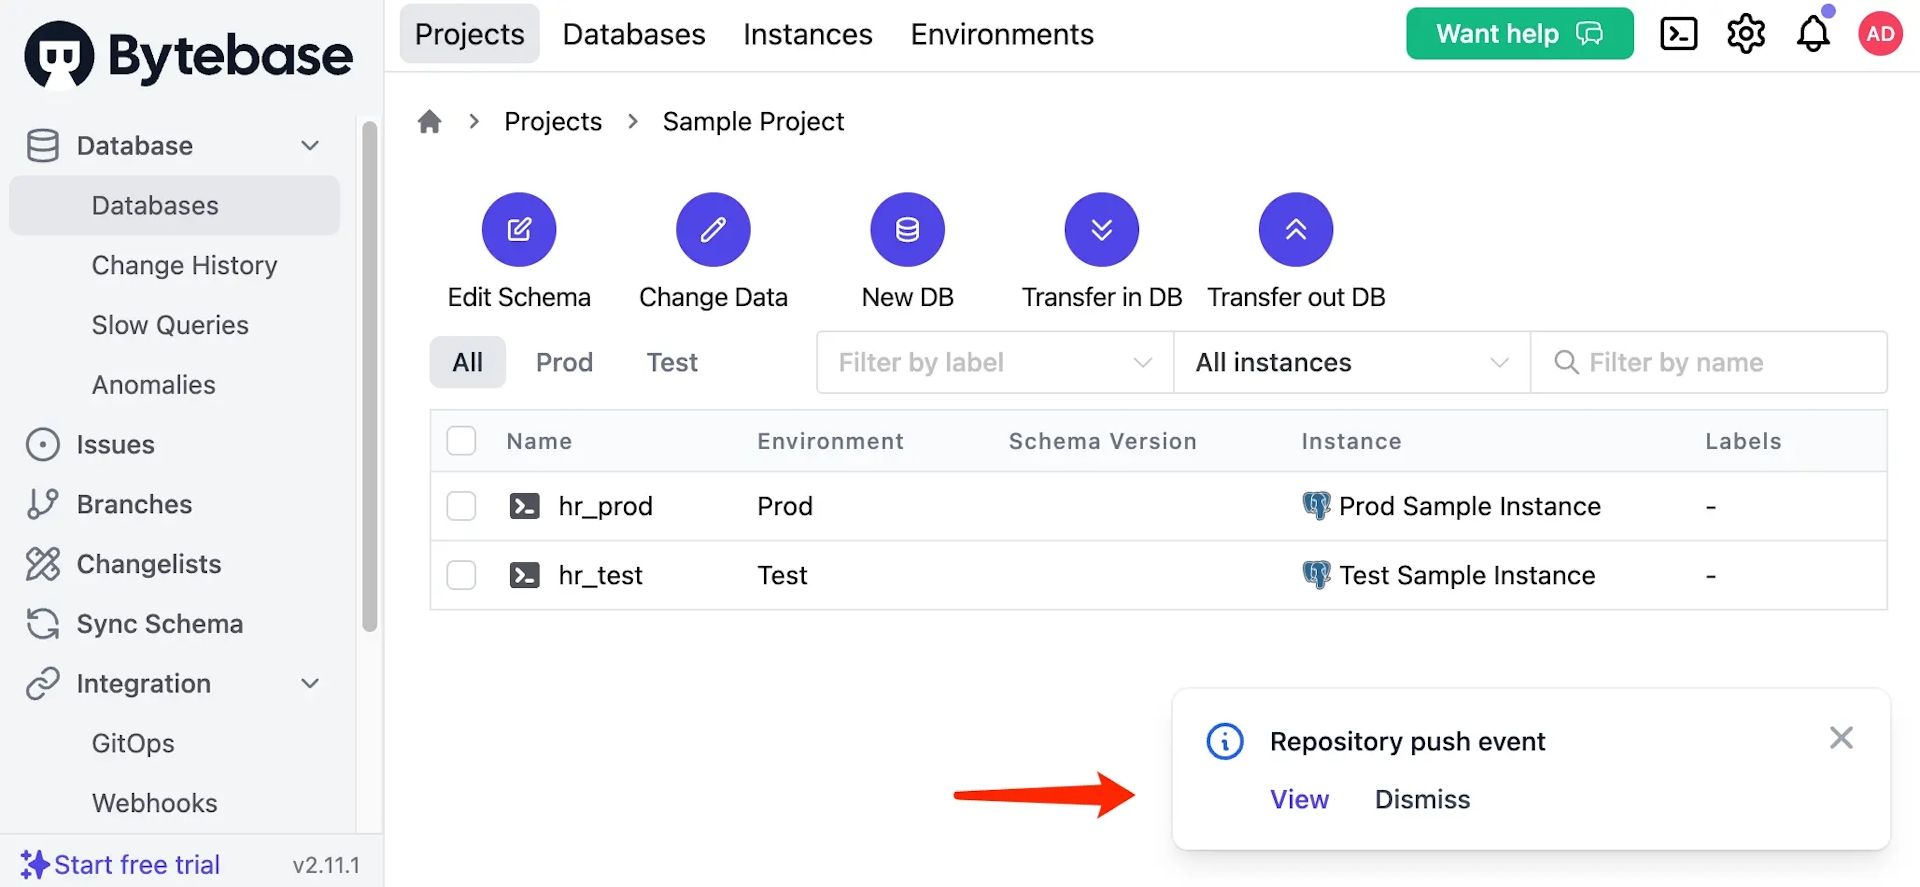

-
Click
issue/102and redirect to the issue. Because there is no approval flow or manual rollout configured. The issue rollouts automatically. You may click View change to see the diff.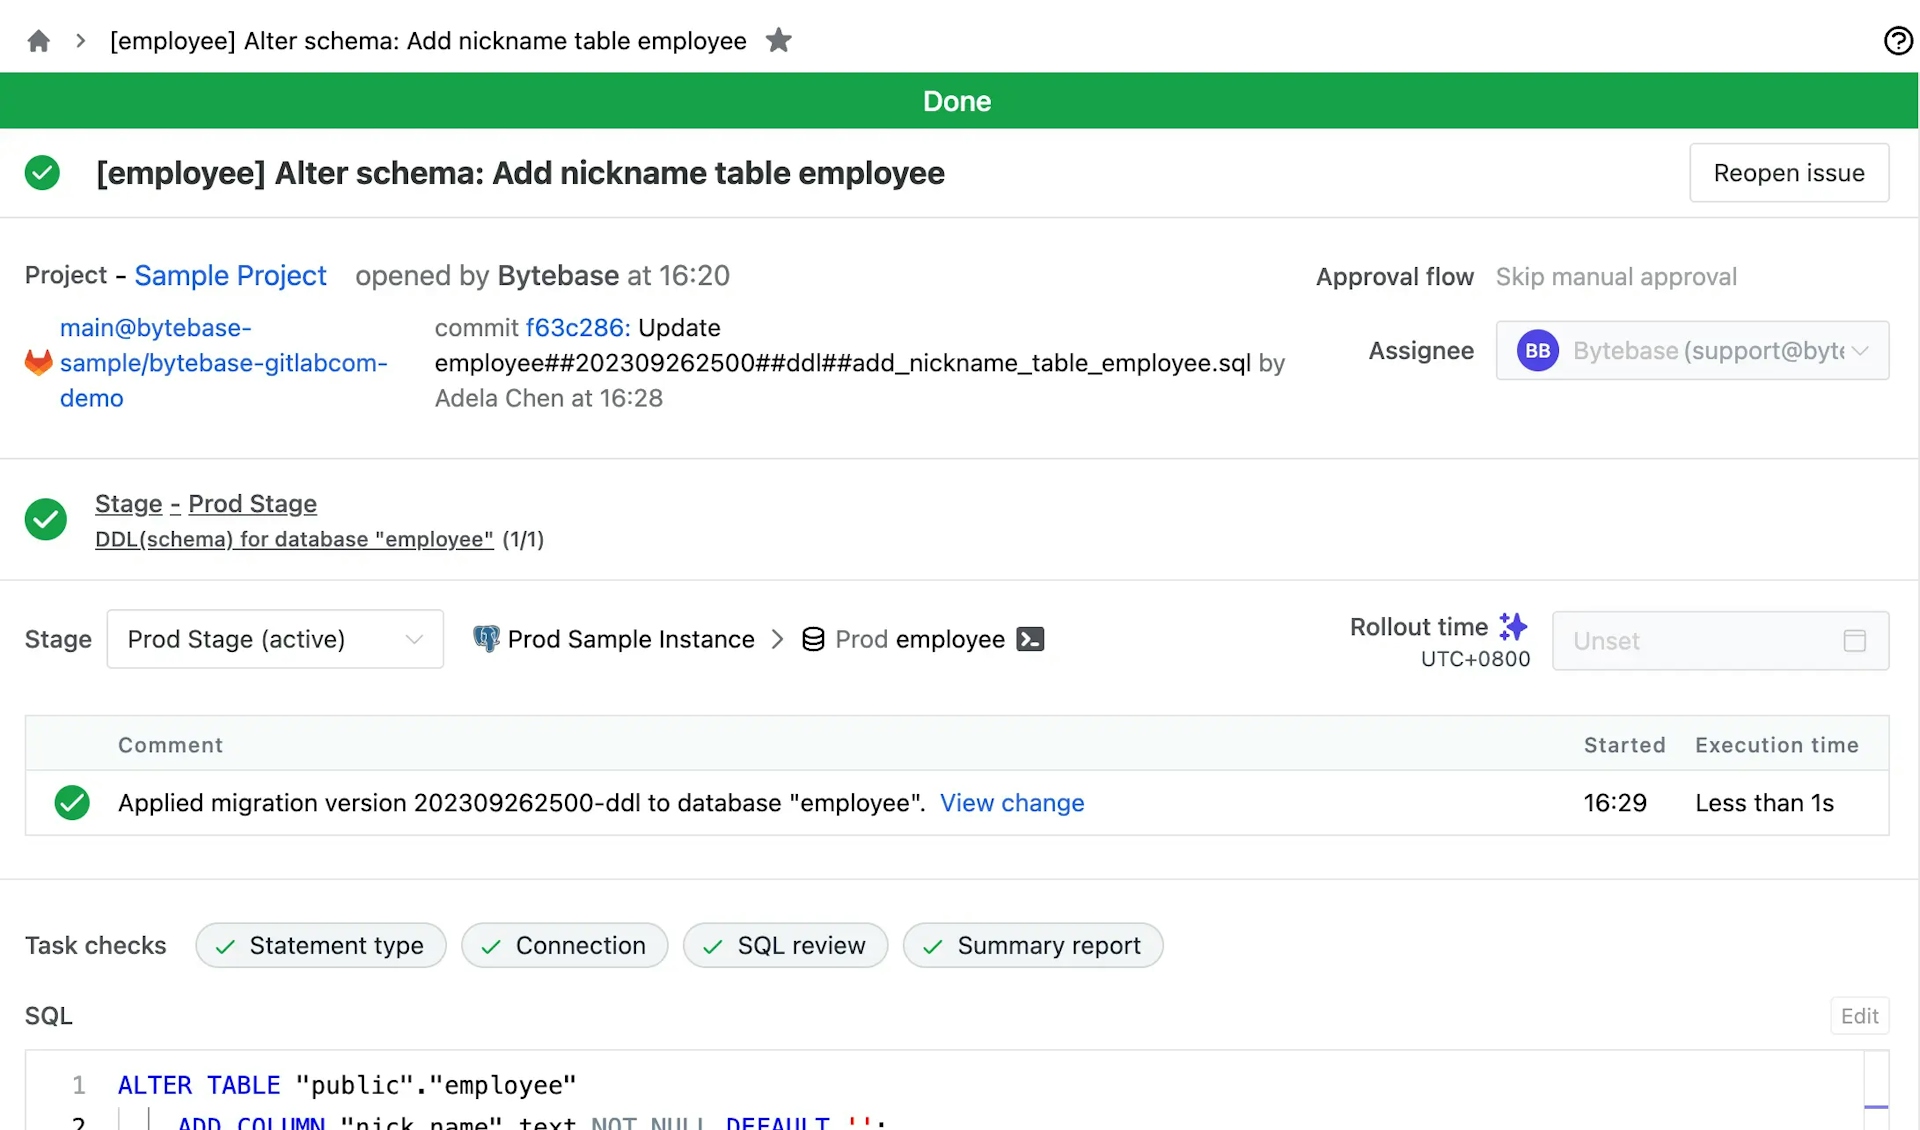
Advanced Features (Enterprise Plan)
You may upgrade to Enterprise plan to explore more features.
Click Start free trial on the left bottom and upgrade to Enterprise plan, Go to Instances to Assign License for the existing two instances.
Manual Rollout
Go to Environments > 2.Prod, Find Rollout policy section, and choose Manual rollout > Require rolling out from DBA or workspace admin.
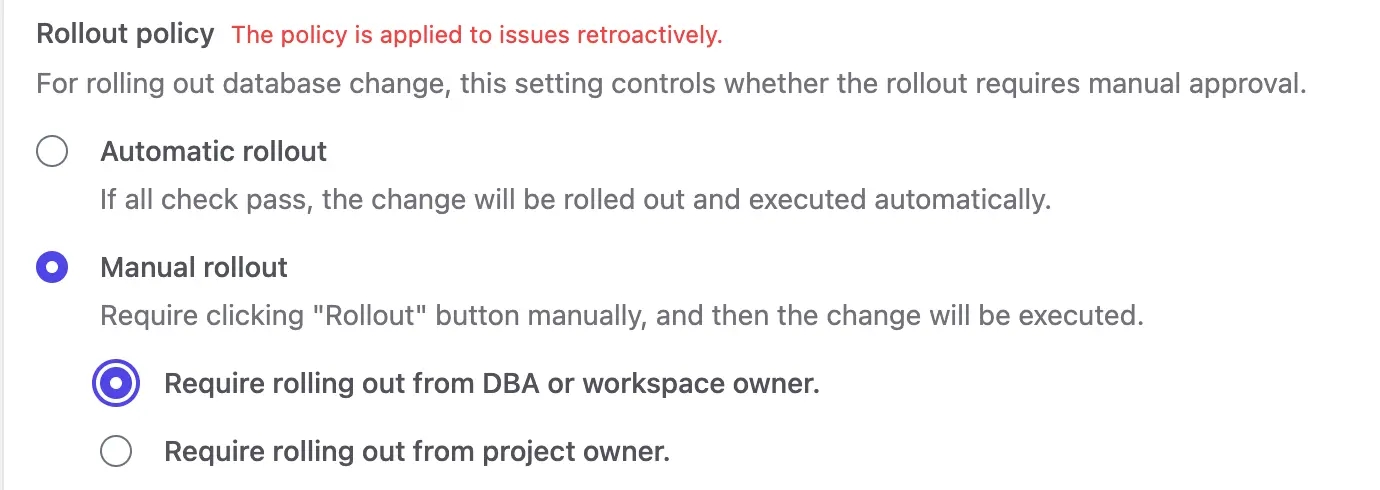
Custom Approval
-
Go to Settings > Security & Policy > Custom Approval. Set
Project Owner -> DBAas Approval flow for DDL > High Risk.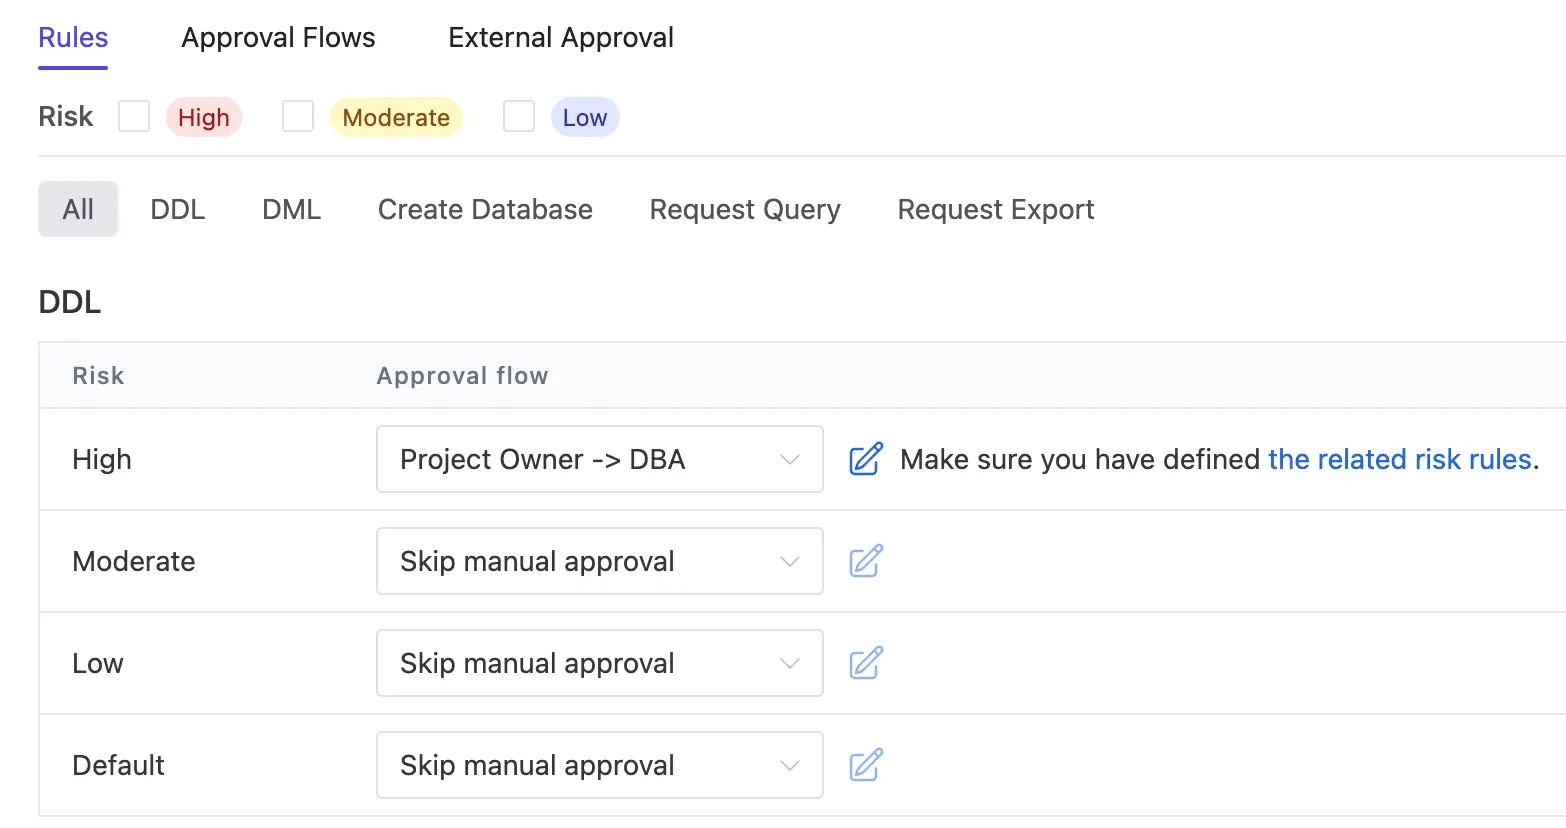
-
Go to Settings > Security & Policy > Risk Center. Click Add rule and click Load for the first template. Click Add.

LATEST Schema Write-back
After schema migration completes, Bytebase will write the latest schema back to the Git repository. So that the team always has a canonical source of truth for the database schema in Git.
-
Go back to GitLab, and create a new branch
add-country-table-employee. Create a fileemployee##202309261700##ddl##add_country_table_employee.sqlunderbytebase/proddirectory. Copy the following SQL script into the file and commit the change.ALTER TABLE "public"."employee" ADD COLUMN "country" text NOT NULL DEFAULT ''; -
Go back to Bytebase, and go to the newly created issue. Because of the settings we made above, it matches the approval flow
Project Owner -> DBA,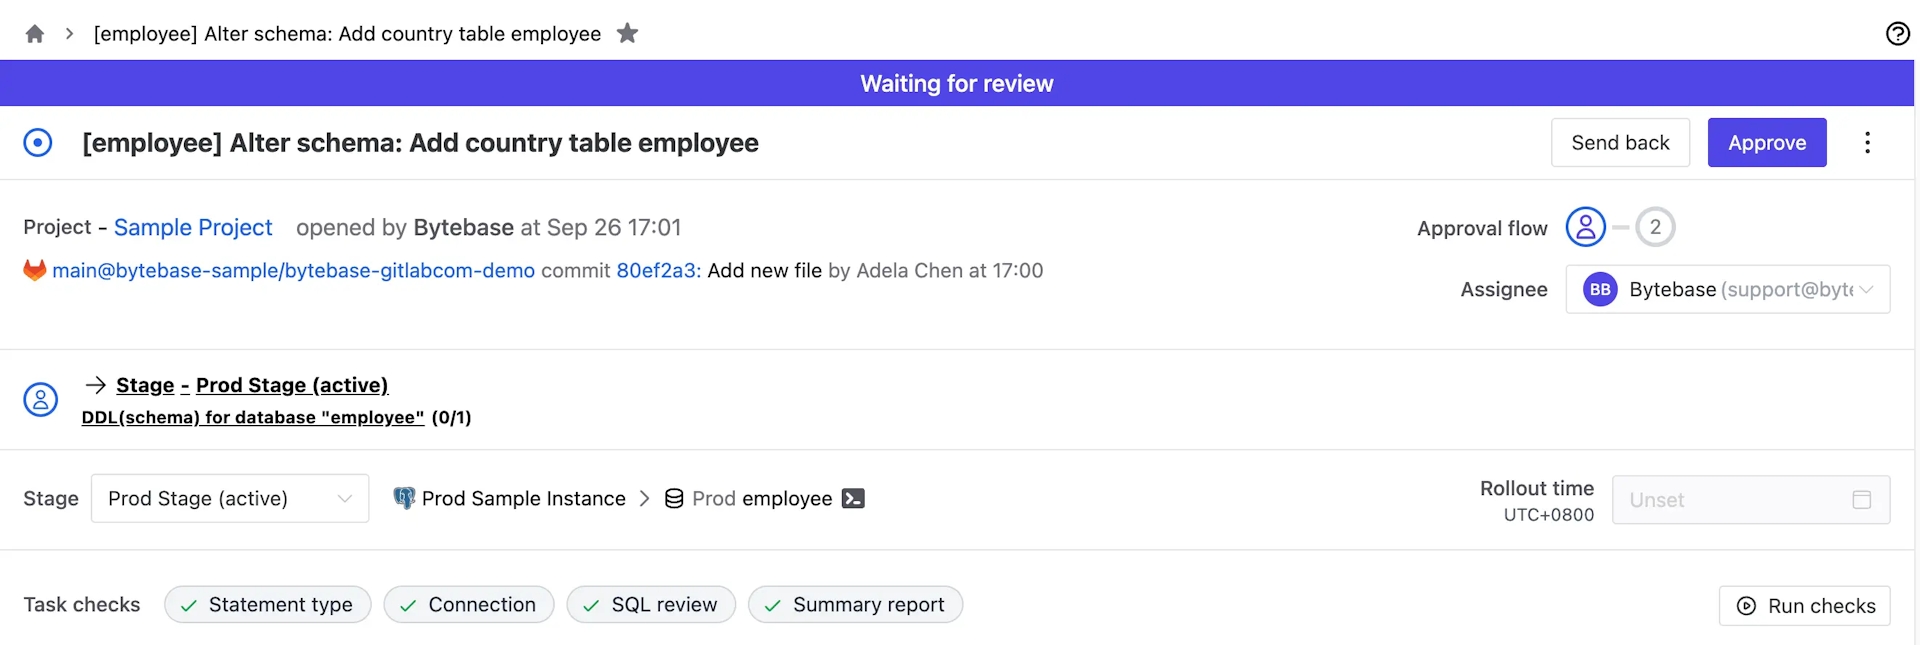
-
After following the approval flow to click Approve, the banner will show Waiting for Rollout instead. The Assignee then can click Rollout.
-
Go back to GitLab, you'll notice there's a new file
.employee##LATEST.sqlunderbytebase/prod/with the latest schema written back by Bytebase.
Schema Drift
Bytebase has built-in schema drift detection to detect unexpected schema changes. Let's use the SQL Editor Admin Mode to simulate this.
-
Click terminal icon (SQL Editor) on the top right. You'll be redirected to SQL Editor. Click Admin mode. Everything you do in this mode is the same as connecting directly to the server, which is not recorded by Bytebase.
-
Select
(Prod) employeeon the left, and paste and run the following script:ALTER TABLE "public"."employee" ADD COLUMN "city" text NOT NULL DEFAULT ''; -
Go back to Bytebase Console, and click Databases >
employeeunderProd. Click Sync Now. After seeing the success message, refresh the page. You'll see the schema drift. You may configure auto scan on instance detail page to avoid manual sync.
-
Go to Anomaly Center, and you'll see the Schema drift there too.
Summary
Now with Bytebase, you have a complete Database CI/CD workflow with GitLab. You can apply this workflow to your own project and customize it to fit your needs. If you have any questions, please feel free join and discuss in Discord.
