While Snowflake revolutionizes data management and analytics, effectively managing schema changes, CI/CD and tracking change history becomes increasingly crucial.
For schema change management, the default recommendation is schemachange, a handy open-source Python library from Snowflake itself. It assists users in implementing database changes and keeps a record of metadata changes in a dedicated history table. This script is frequently recommended for DevOps pipelines for Snowflake.
The only viable schemachange alternative is Bytebase, a GUI-based database CI/CD tool.
I have followed both tutorials and, in this article, I will provide you with a brief overview of their differences, helping you get a sense of each tool before you decide to try them out. A high-level comparison:
| schemachange | Bytebase | |
|---|---|---|
| Interface | CLI | GUI |
| GitOps workflow | Manual | Integrated |
| Change history | Stored in separate place | Integrated |
| Custom review rules | ❌ | ✅ |
| RBAC | ❌ | ✅ |
| Drift detection | ❌ | ✅ |
| Custom approval flow | ❌ | ✅ |
| Audit log | ❌ | ✅ |
Schemachange
The tutorial I followed can be found here. For the sake of presentation, I have summarized the key steps below. If you wish to give it a try, please follow the tutorial.
Preparation
-
Manually fill in GitHub secrets and variables.

-
Manually create a GitHub Action Workflow.
-
Manually run the workflow to verify the connection is working.

How to change
- Create a subfolder
migrations, create a SQL file and push it tomain. The sql file title is likemigrations/V1.1.2__updated_objects.sql.
What you will get
- Any commit to the
mainbranch will trigger the workflow and apply the change to the database. - The change history is recorded in the
schema_historytable.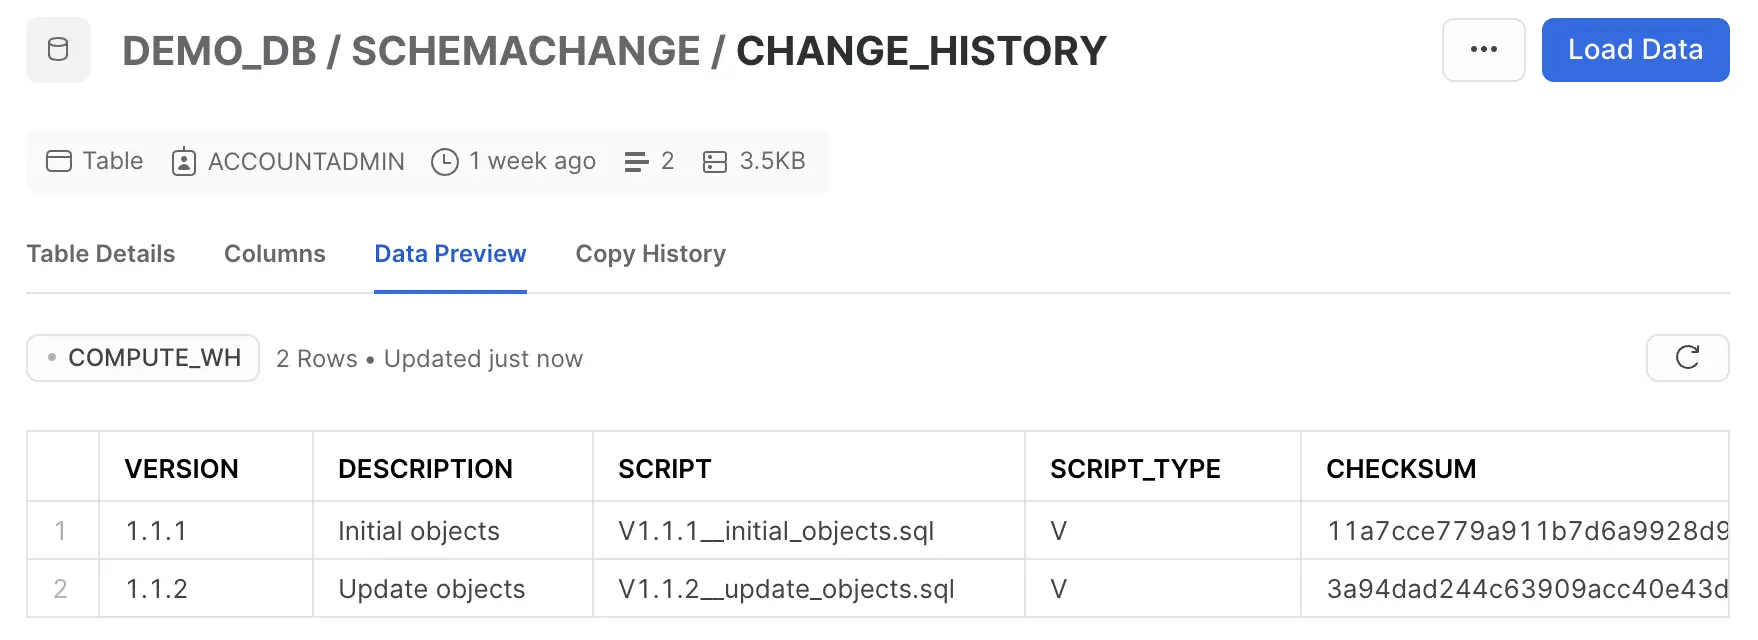
Bytebase
The tutorial I followed can be found here. For the sake of presentation, I have summarized the key steps below. If you wish to give it a try, please follow the tutorial.
Preparation
- Run Bytebase locally with ngrok running to expose it to the internet or deploy it on a server directly.
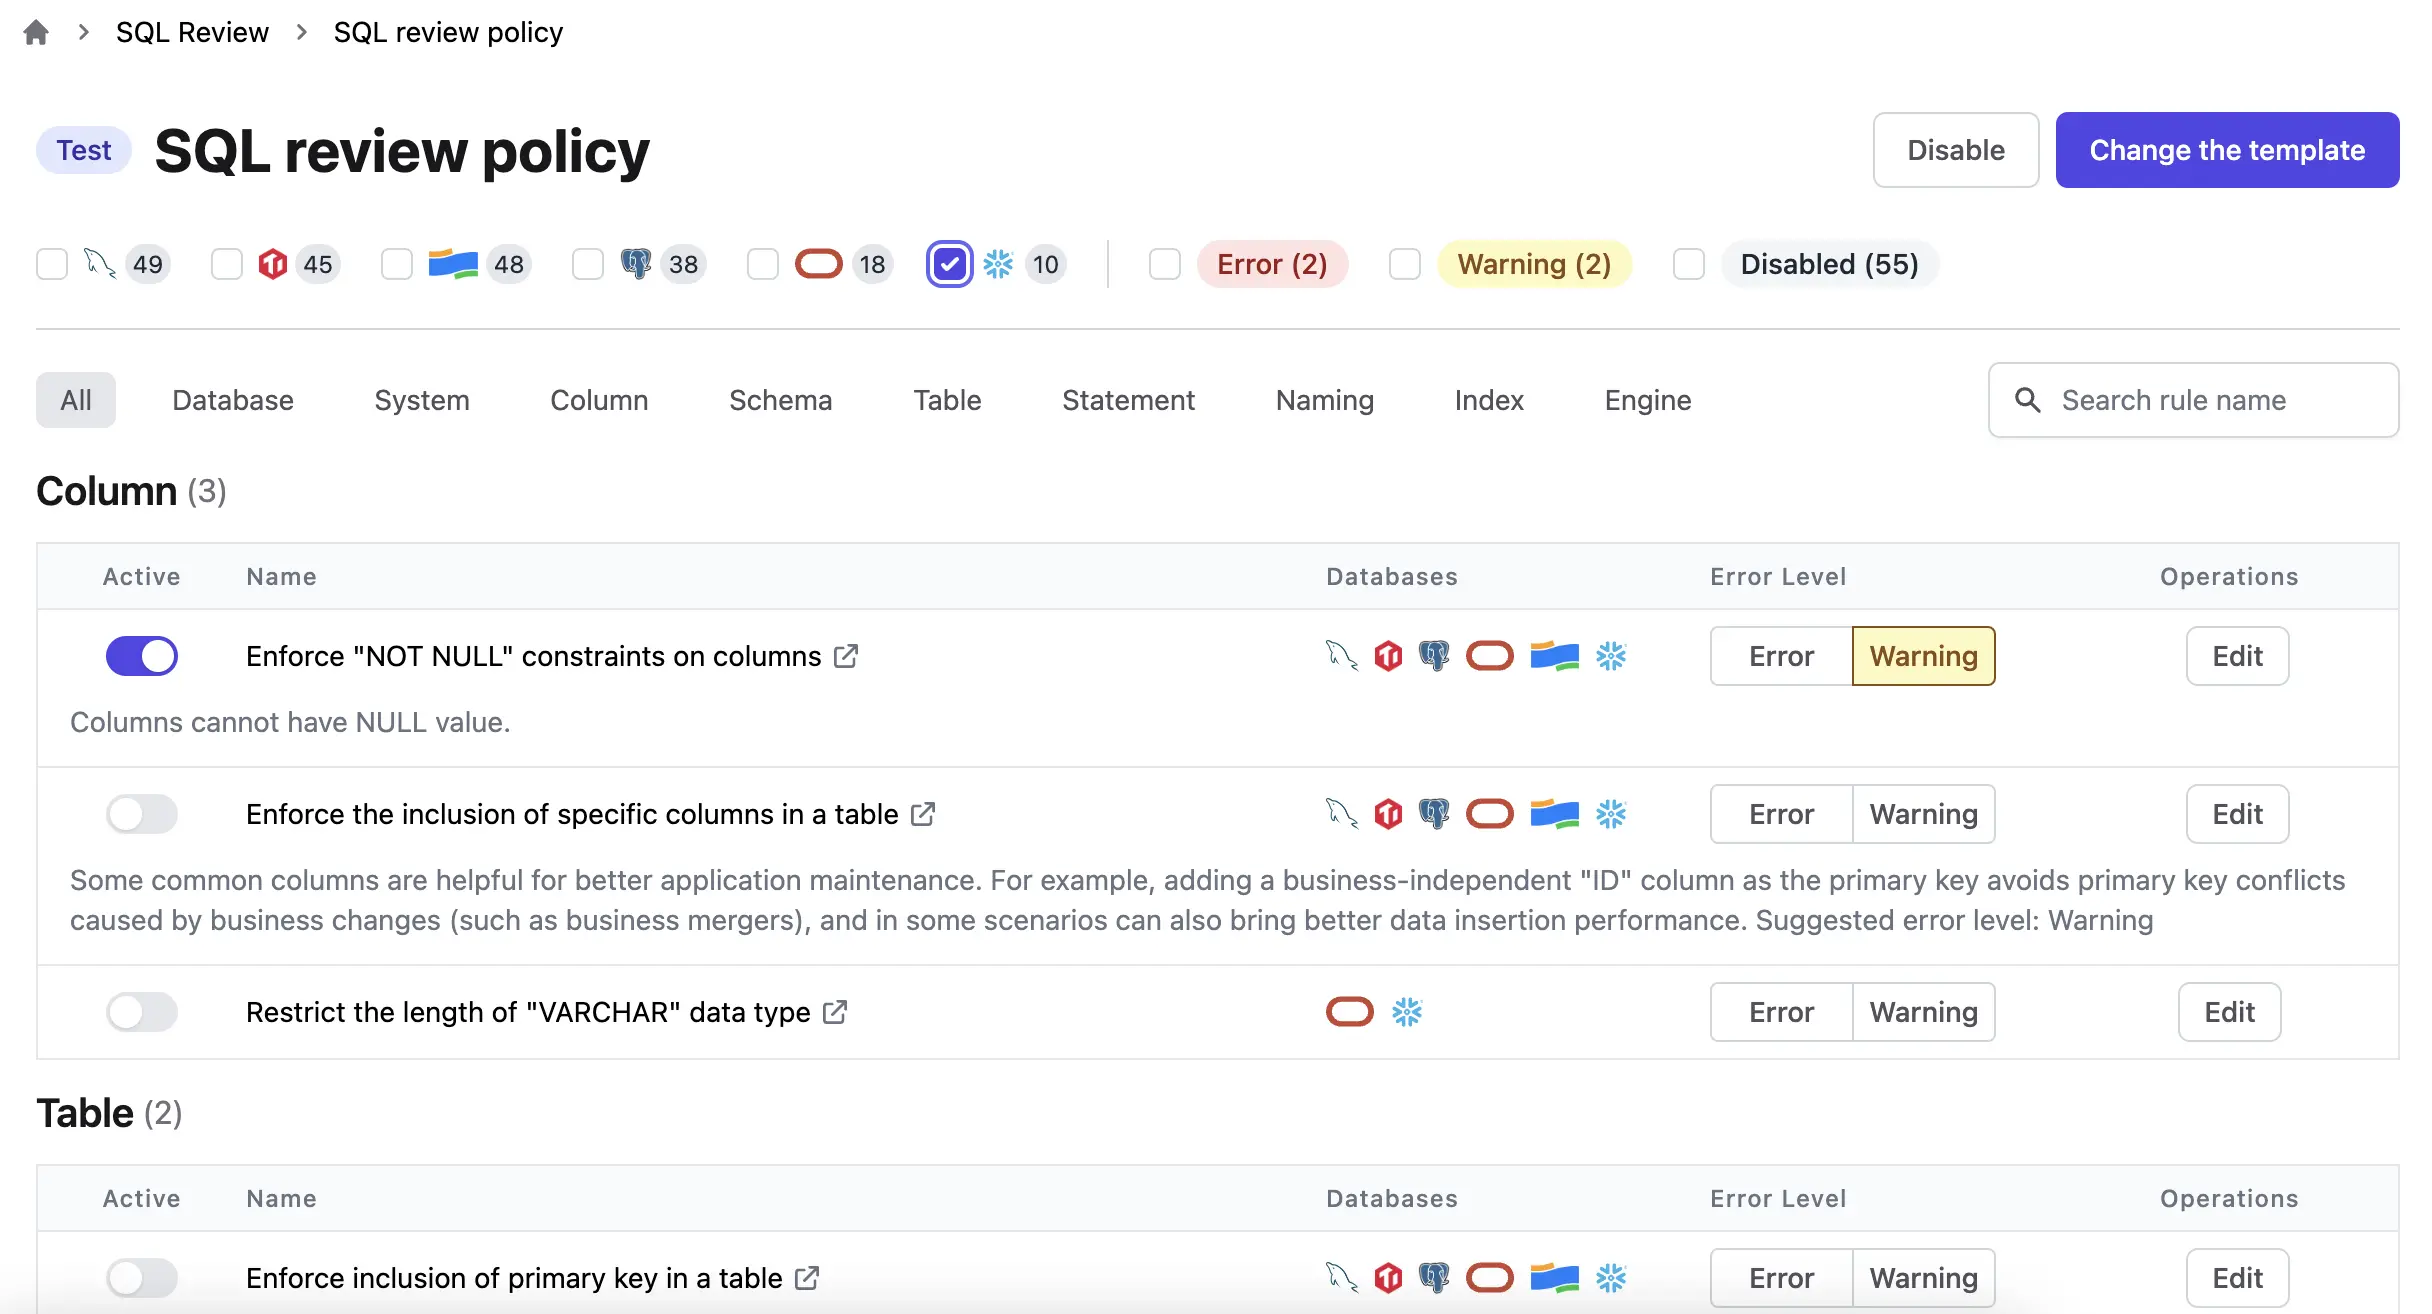
- Activate the SQL Reviews rules you want to build SQL Policy and attach them to the environment.
- Configure a git provider to build the connection to GitHub.com.
- Add an instance of Snowflake and test the connection to make sure it works.

- Create a project, create a database on the instance and enable GitOps workflow in the project with SQL Review CI enabled.

How to change
- Create a branch. Create a subfolder
bytebase, create a SQL script and push it to branch. Merge it tomain. The sql file title is likebytebase/test/demo##202101131000##ddl##create_tablefoo_for_bar.sql.
What you will get
- Only a PR merged into
mainbranch will create an issue in Bytebase. - If it's approved (you can configure it to skip approval too), it will apply the change to the database.
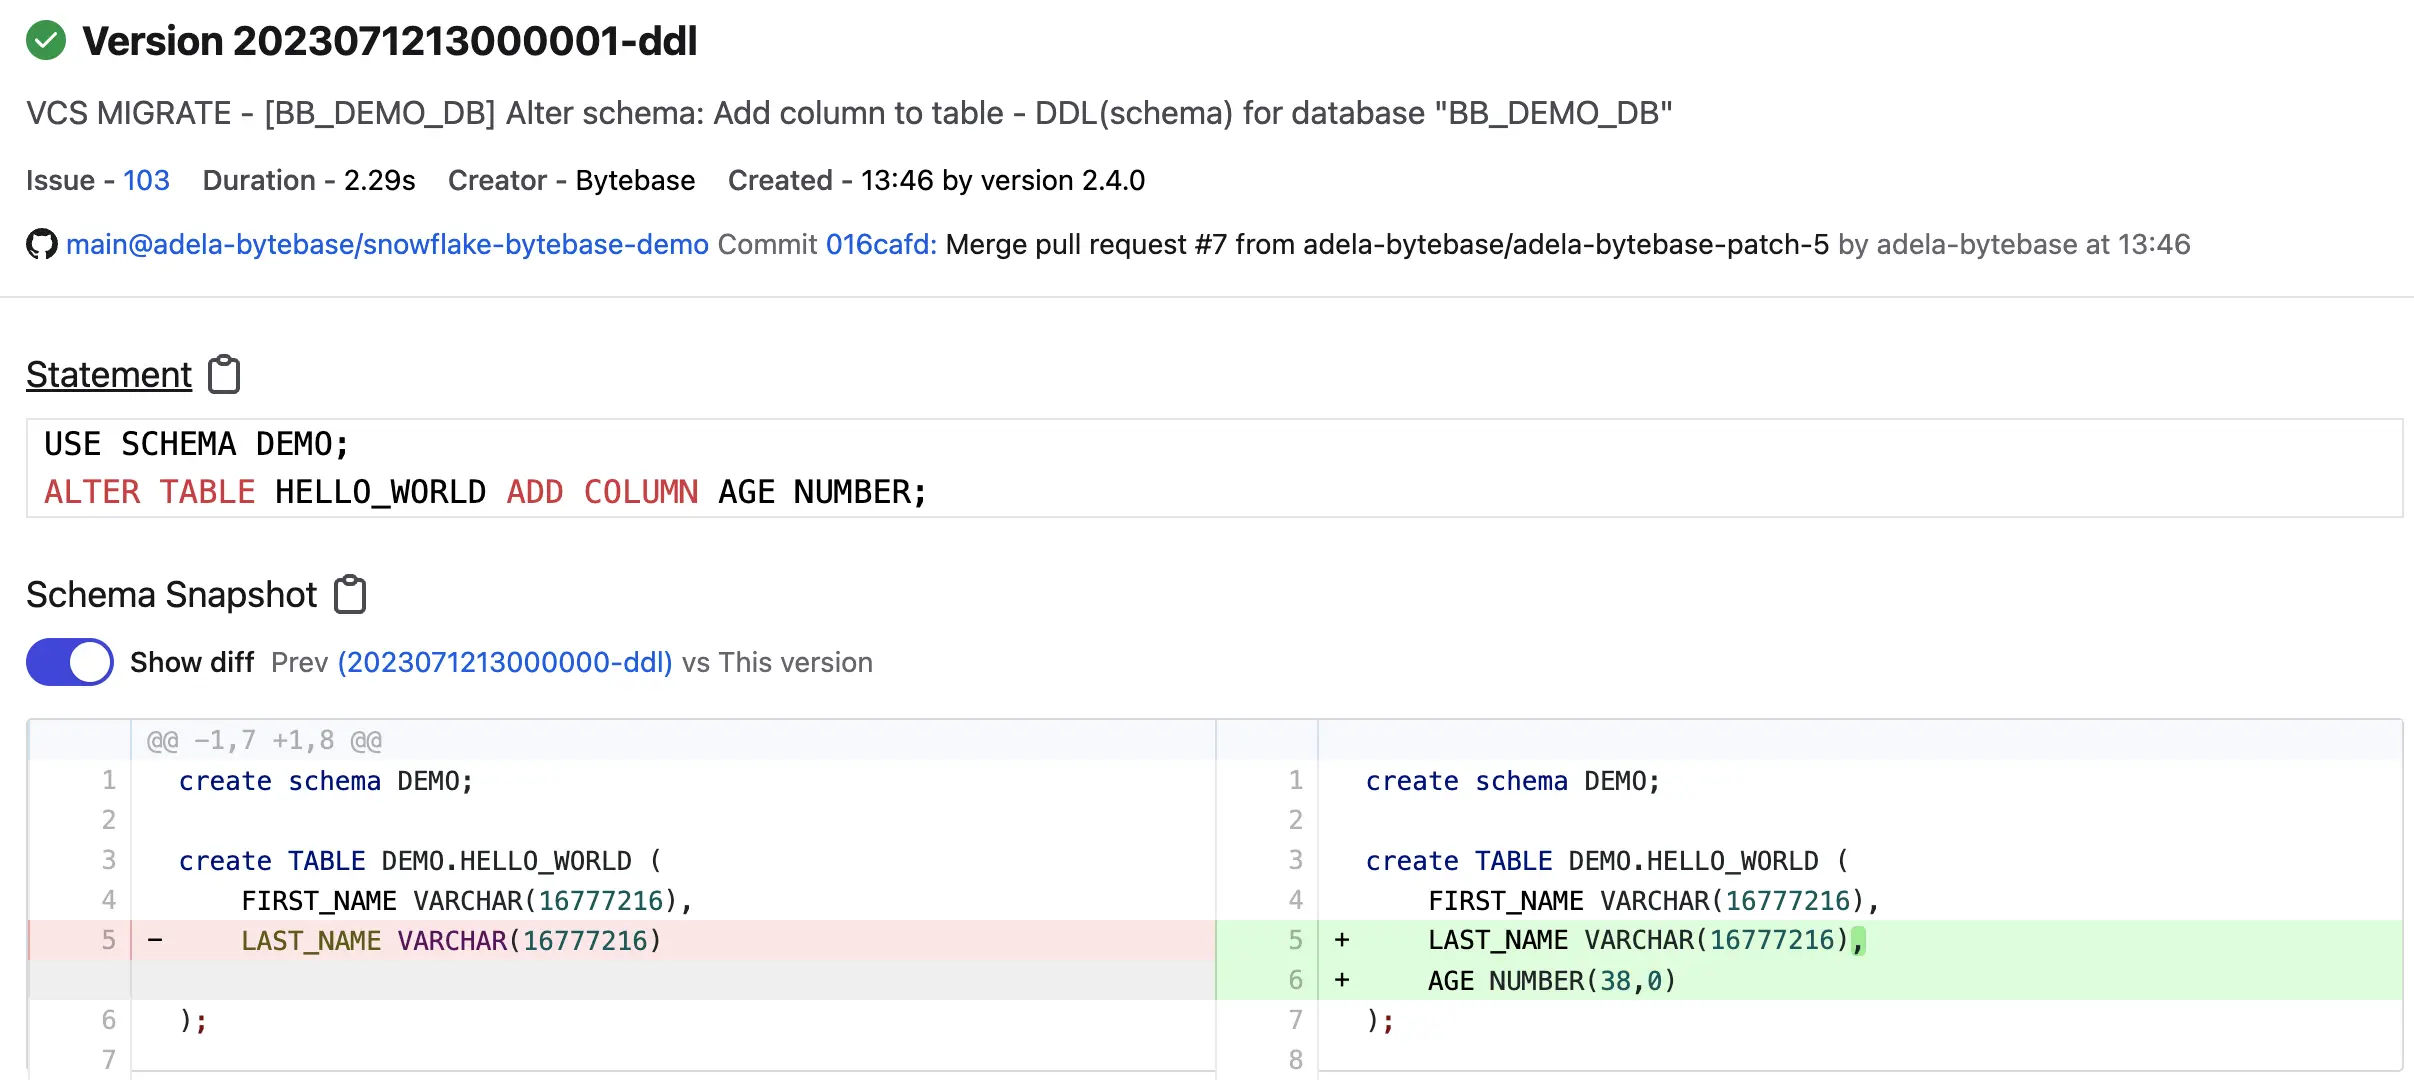
- You can view the change history in the Bytebase UI. Click any change, you can see the corresponding issue in detail.

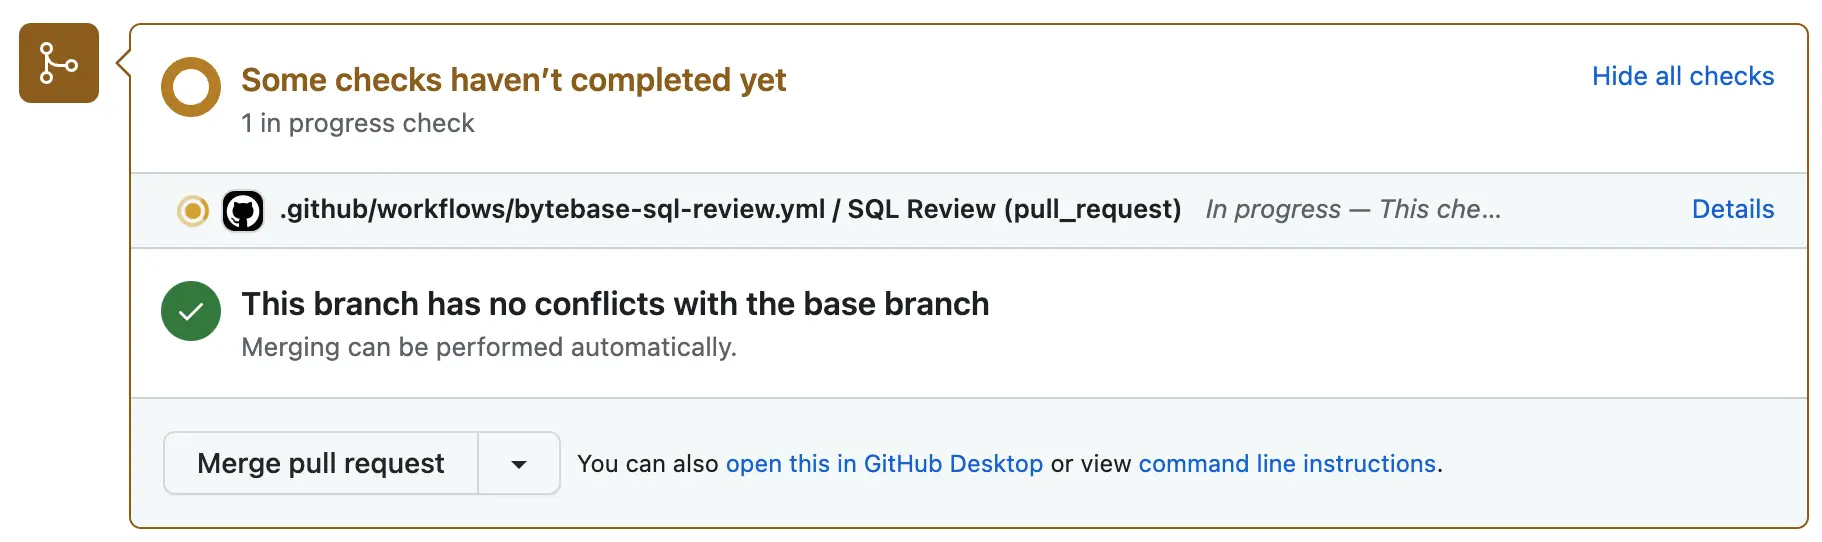
- Because the SQL Review CI is enabled, before the PR is merged, the SQL Review will run automatically before the reviewer approve.
The Comparison
Effort
The preparation phase of Bytebase requires more effort compared to Schemachange.
User-friendly
However, due to its GUI-based design, Bytebase offers a more intuitive and user-friendly experience. While using Schemachange, I had to manually fill in GitHub secrets and variables, and could not confirm if it worked until running the workflow manually. With Bytebase, I can easily test the connection.
Default workflow
The default workflow script provided by Schemachange is designed for any push to main branch, whereas Bytebase's default GitOps workflow is triggered by any PR merged to main branch.
Change history
Schemachange records the change history in the schema_history table, requiring you to navigate to Snowflake to view the table and to GitHub to access the SQLs.
On the other hand, Bytebase records the change history in the interactive UI. By simply clicking on links, you can directly view the SQLs and the corresponding issues.
SQL Review
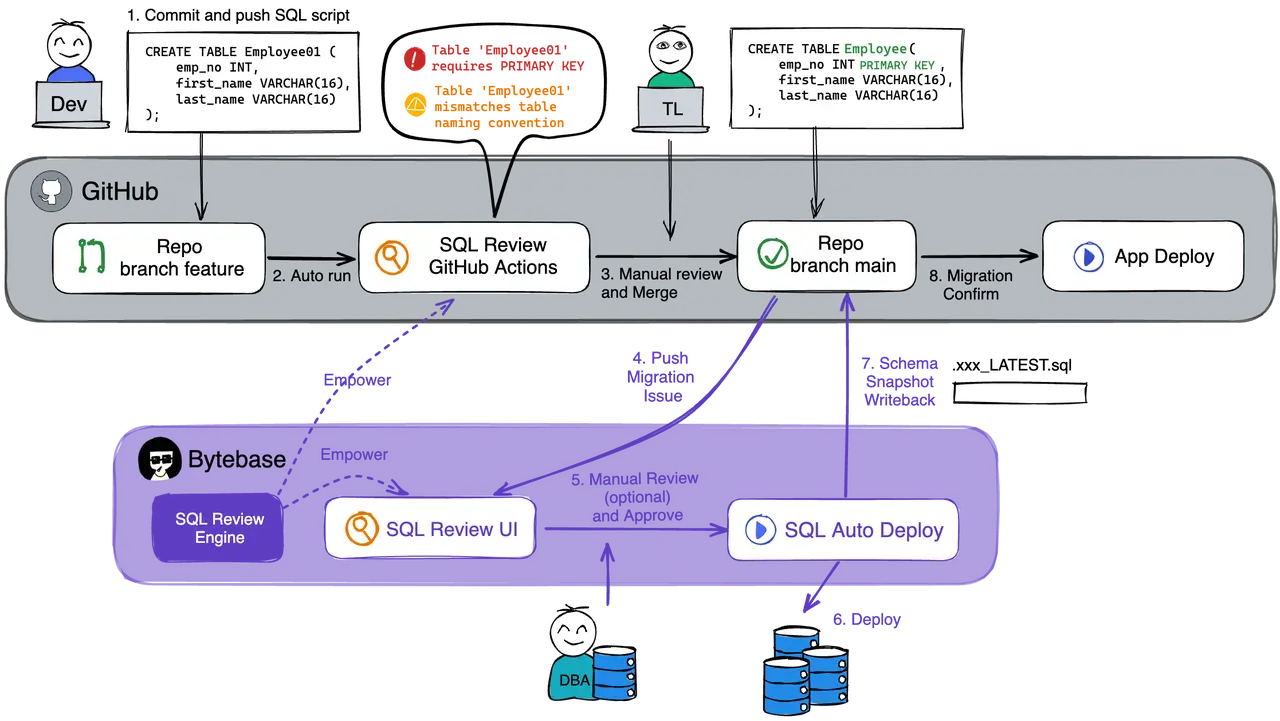
Schemachange doesn't include SQL Reviews. In contrast, Bytebase offers predefined rules for Snowflake SQL Review. You can select some of these rules as the environment SQL Review policy. By one click enabling SQL Review CI in the GitOps configuration, GitHub Actions are automatically built. Any PR involving SQL will then be reviewed automatically before it's merged. For a more detailed understanding of SQL Review in Bytebase CI/CD workflow, refer to this article.
Summary
If you are in need of a quick solution, Schemachange is a excellent choice. It's easy to set up and use. However, if you're seeking a more enhanced experience, Bytebase offers a user-friendly interface and a wider range of features. All the mentioned capabilities are included in the Bytebase Free Plan. Additionally, Bytebase Enterprise Plan offers more capabilities:
- Schema drift detection: Any changes made outside of Bytebase will be automatically detected.
- Database access control: By default, developers are restricted from accessing production data or exporting data.
- Custom approval flow based on risk level: e.g., if it's a DDL on Prod -> High risk -> require longer approval flow.
- Audit log: All activities within Bytebase are diligently recorded for comprehensive tracking and auditing purposes.
You may check the pricing page here for more details.