Connect Your Database
Only Workspace Admin or Workspace DBA role can configure database instance.
To allow Bytebase to execute operations on behalf the end user, you need to supply Bytebase with the connection info for your database instance.
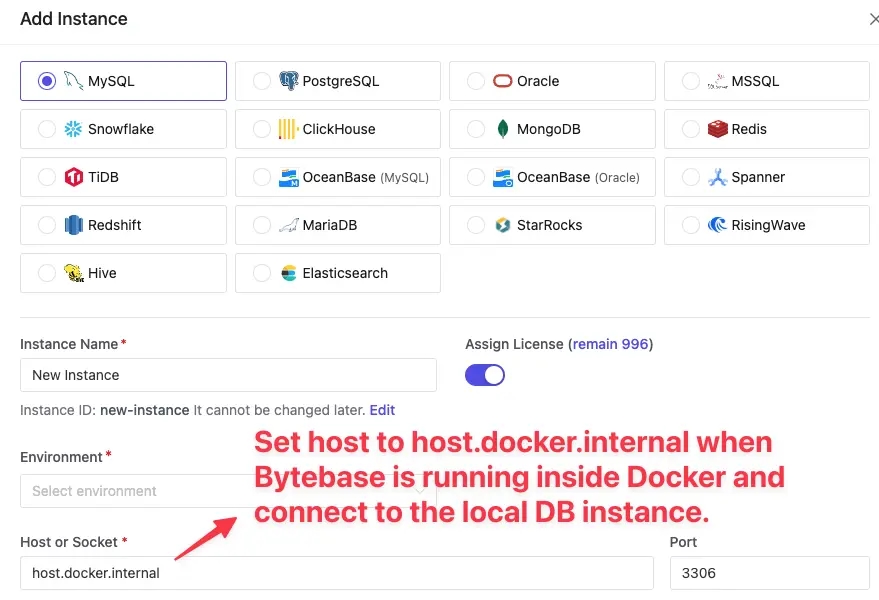
Connect to the instance on the same host
If you run Bytebase inside Docker and try to connect to a database instance on the same host, then you need to set host as host.docker.internal.
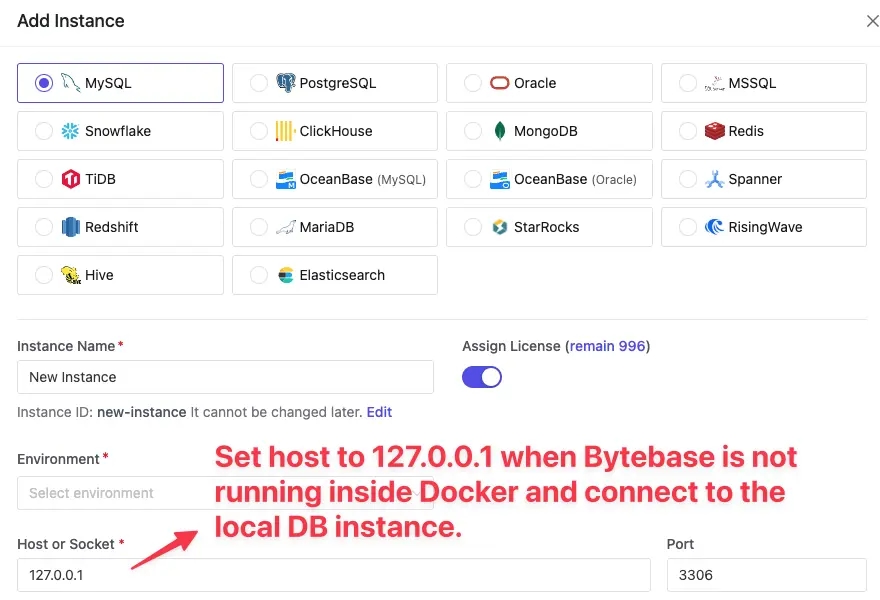
- If you run Bytebase without Docker and try to connect to a database instance on the same host, then
you need to set host as
127.0.0.1
Connect to the instance from Bytebase Cloud
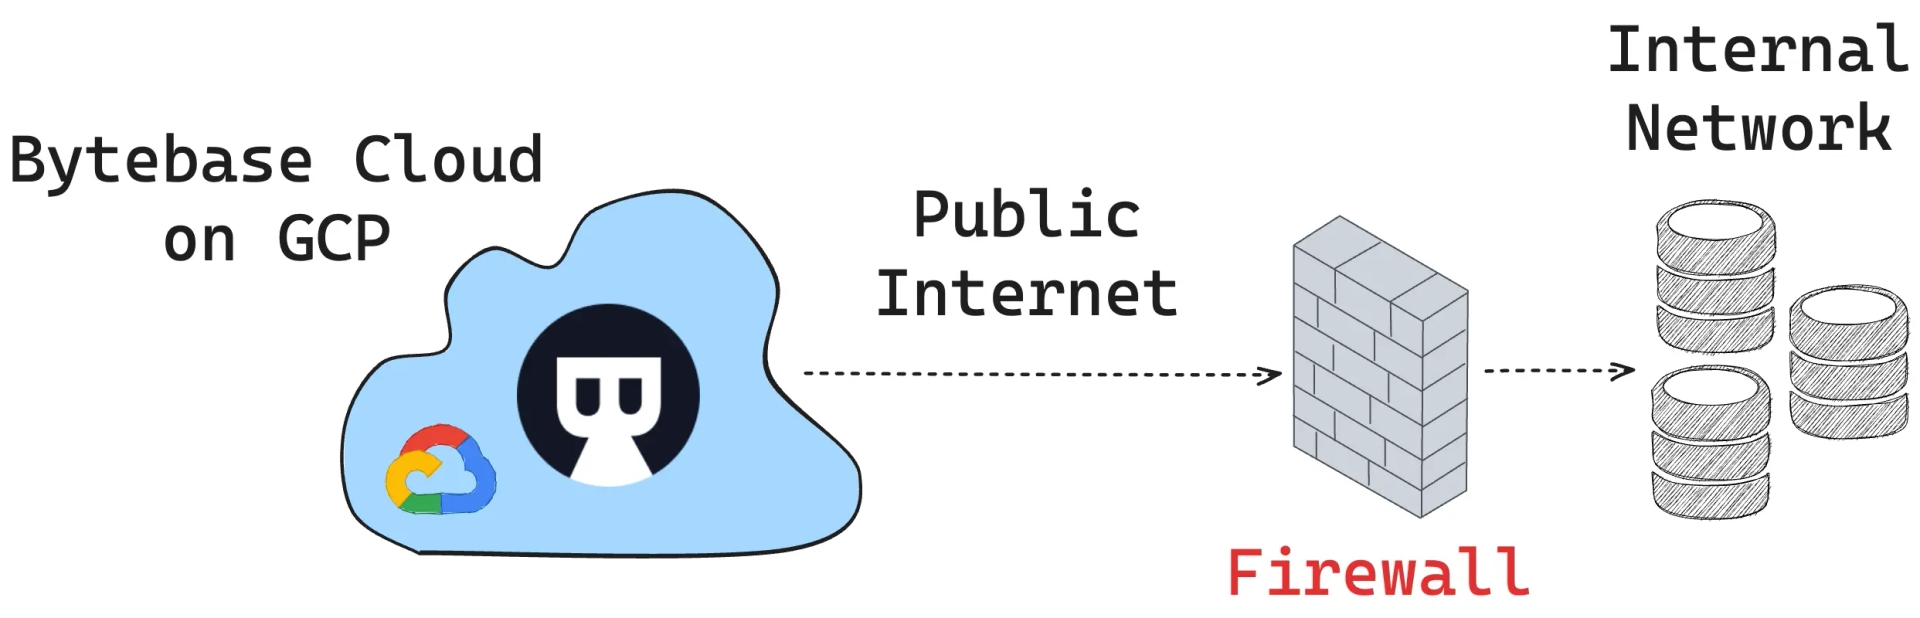
To make your Bytebase Cloud instance connect to your databases in your internal network, you need to whitelist the following Bytebase Cloud IPs:
34.27.188.162
Configure SSL
SSL connection configuration only supports PostgreSQL, MySQL, TiDB and ClickHouse for now.
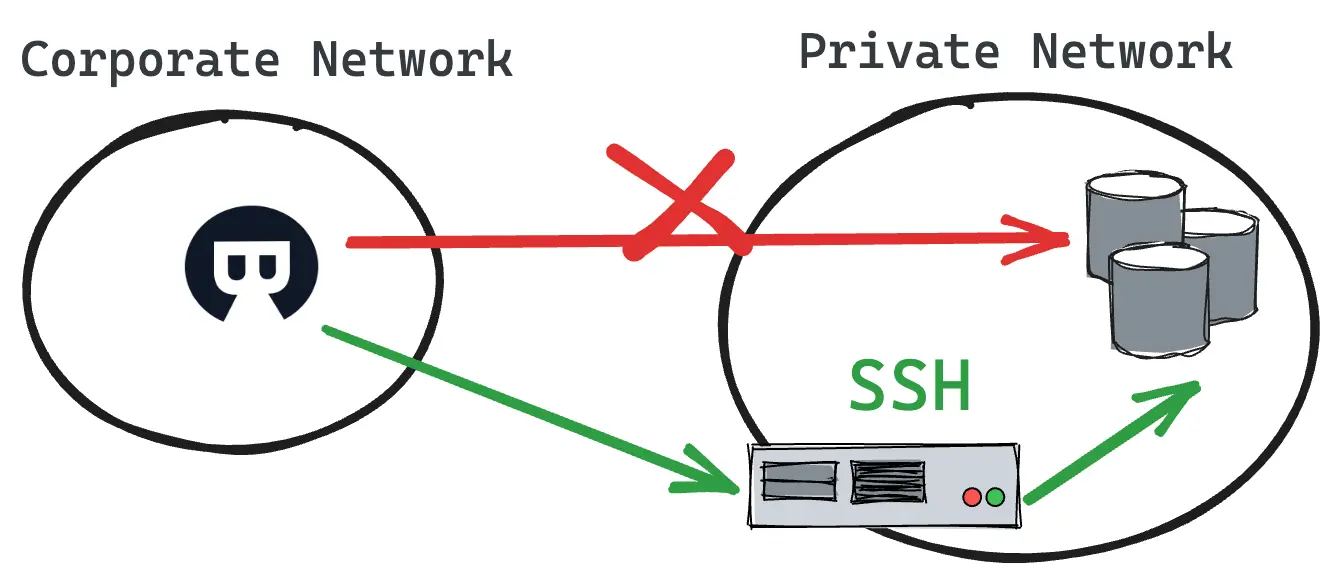
Configure SSH tunnel
To protect their databases, some hosting providers block direct remote access. However, they often enable SSH, which allows users to connect to their servers remotely using an SSH client. If you want to connect to a database on one of these servers from Bytebase, you will need to create an SSH tunnel. This will allow you to connect to the database without compromising security.
- After filling in the standard database connection information, click SSH Connection > Tunnel + Private Key.
- Fill in the SSH connection information. The Private Key is used to authenticate the SSH connection. You can also use a password instead.
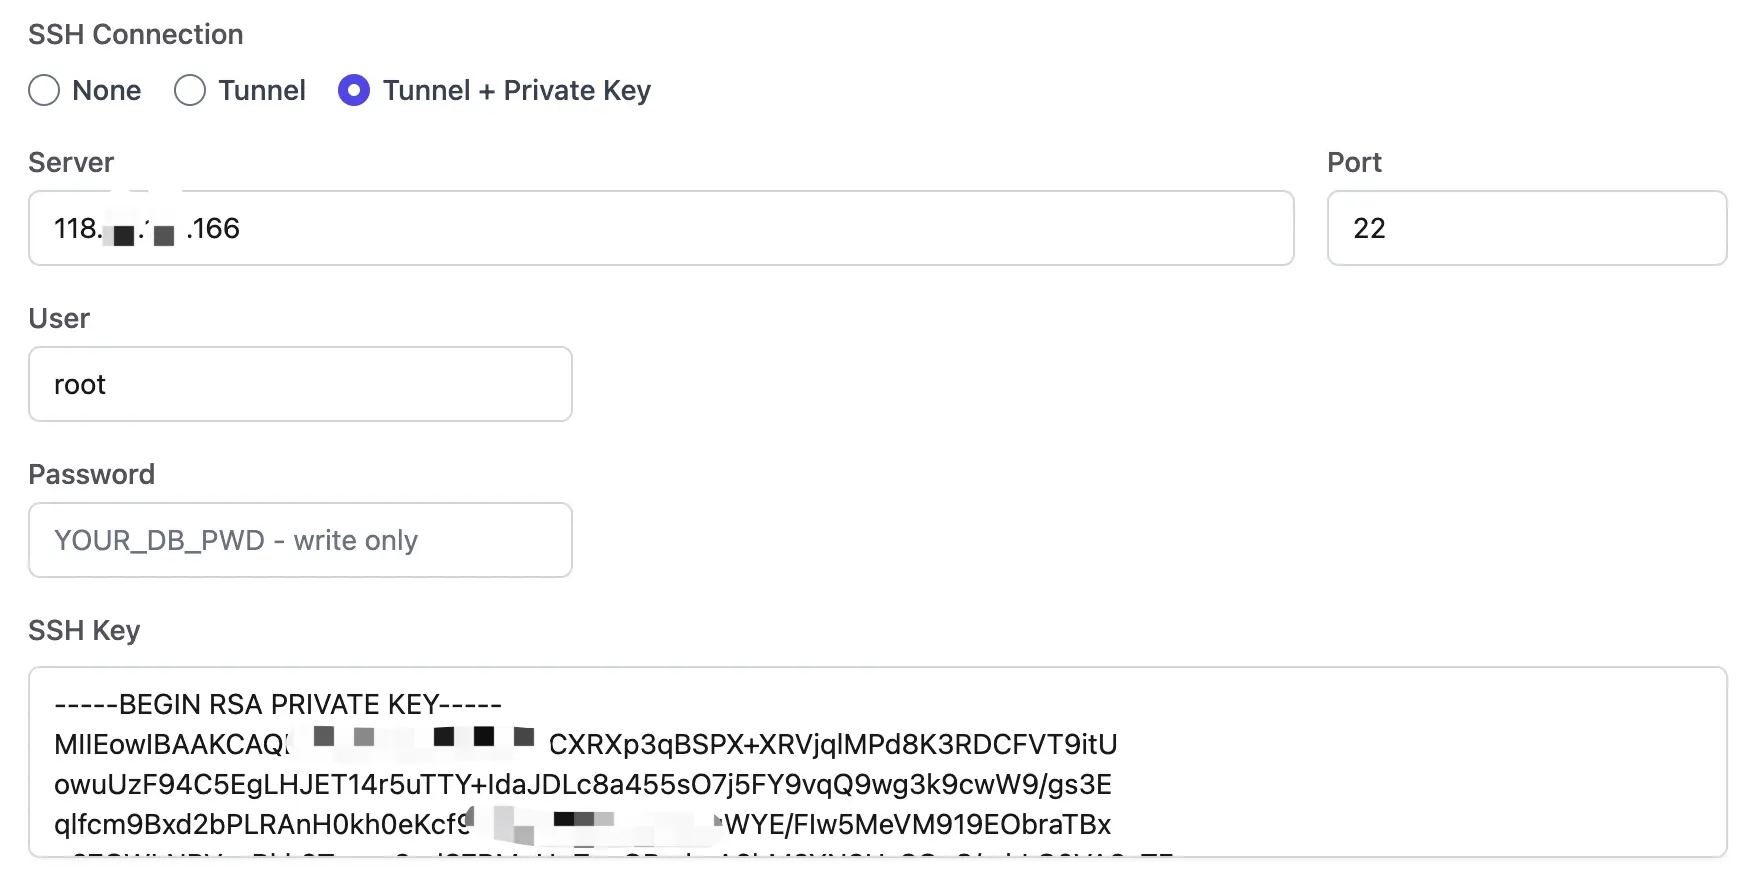
- Click Test Connection. If the connection is successful, click Create to create this instance.
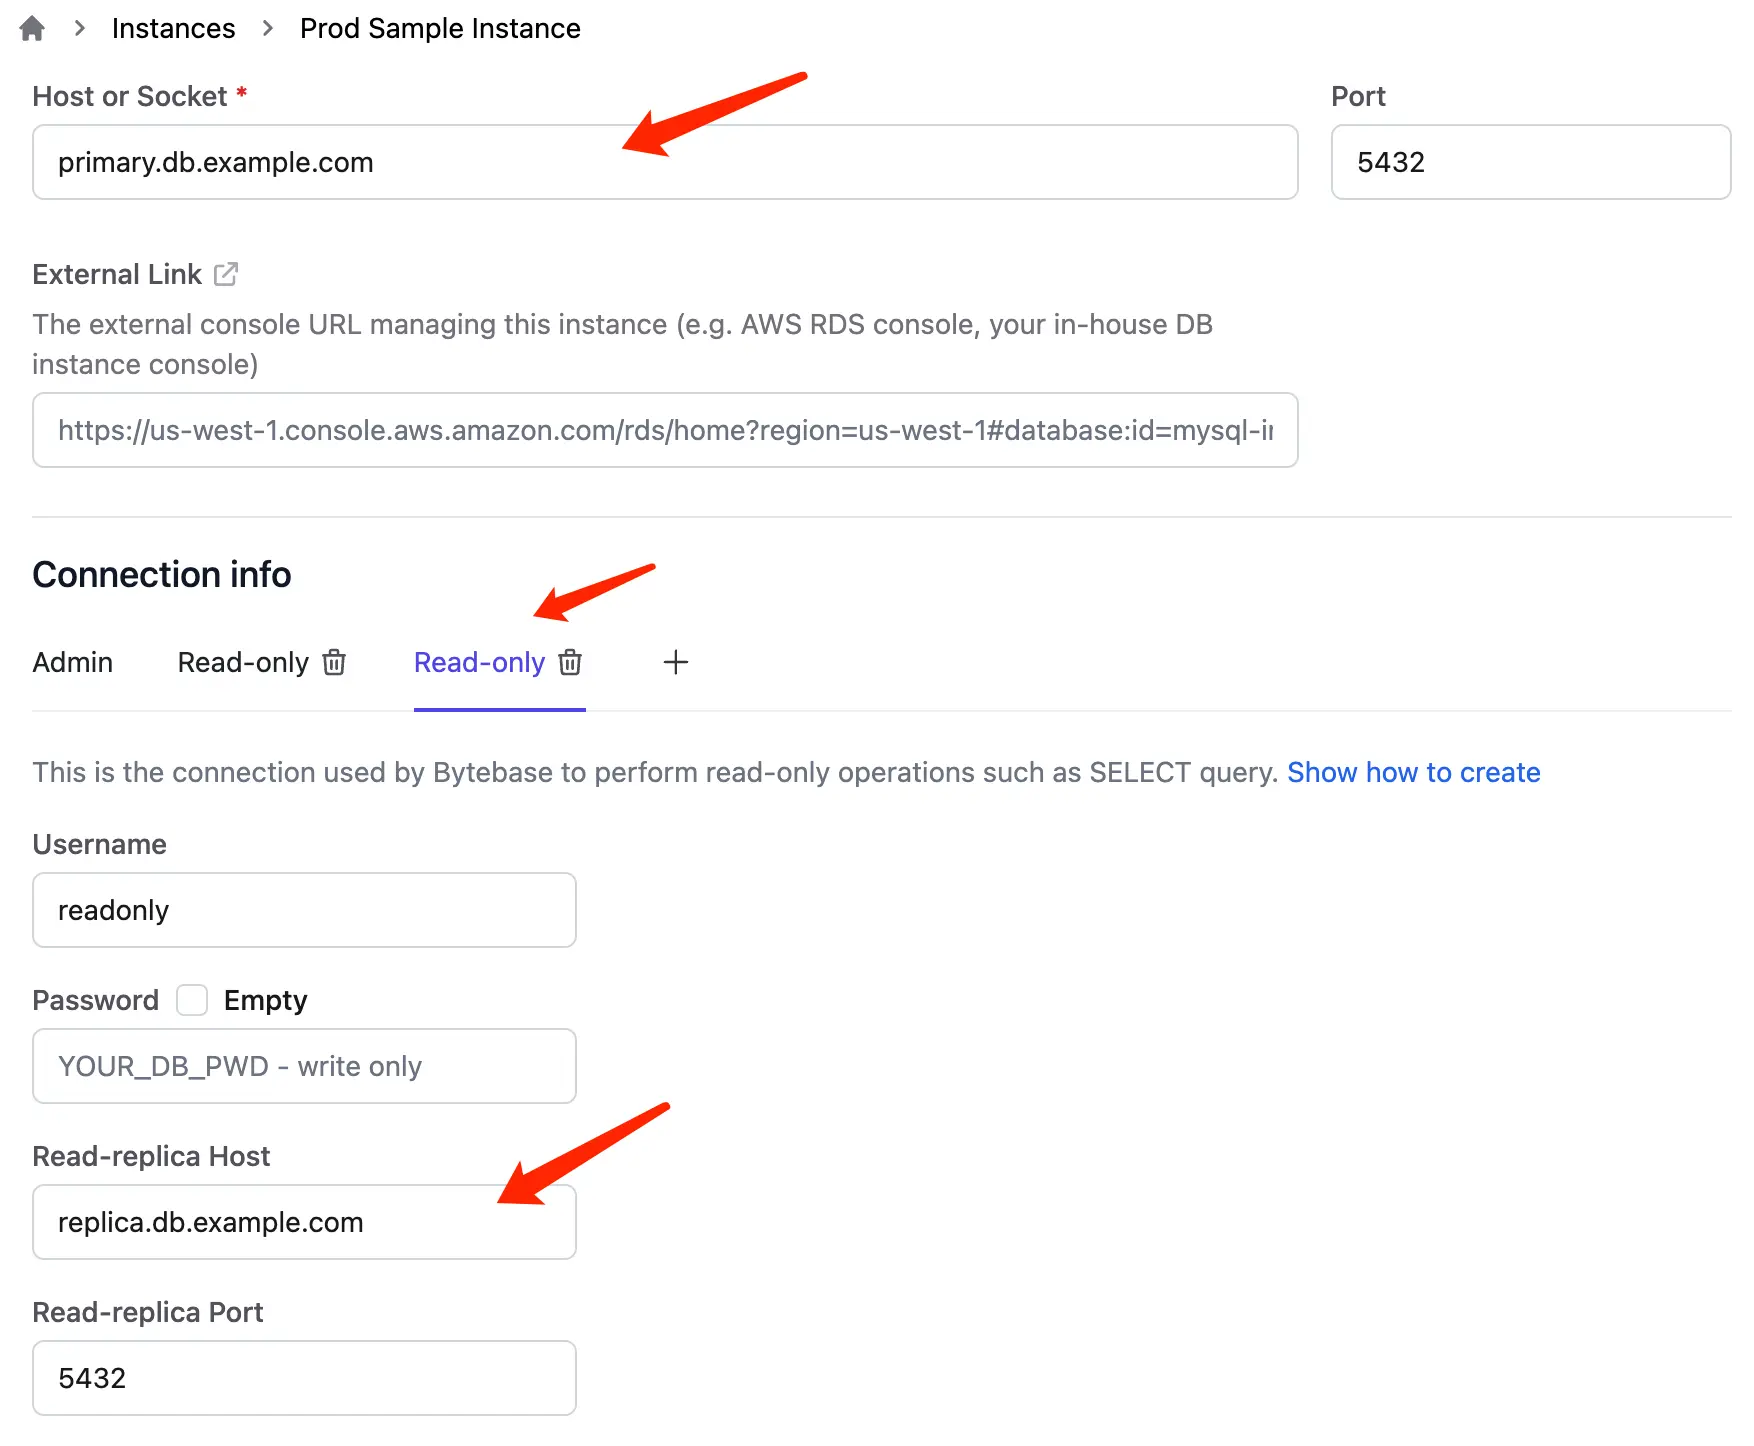
Configure read-only connection
To separate from admin connection, you can configure read-only connections used by SQL Editor once an instance is added. This separation can be configured at the database user/role access control level or replication instance level.
- Create a new role with read-only access or a read-replica instance.
- Click Create or + on Connection info.
- Enter read-only connection info. If this is a read-replica instance, you need to enter its host and port information.
- Click Update to finish the configuration.
- Click + to add more, or click trash icon to delete.
Use external secret manager
By default, Bytebase stores the database credentials in an obfuscated format in its own meta store. You can also instruct Bytebase to retrieve the database credential from an external secret manager.
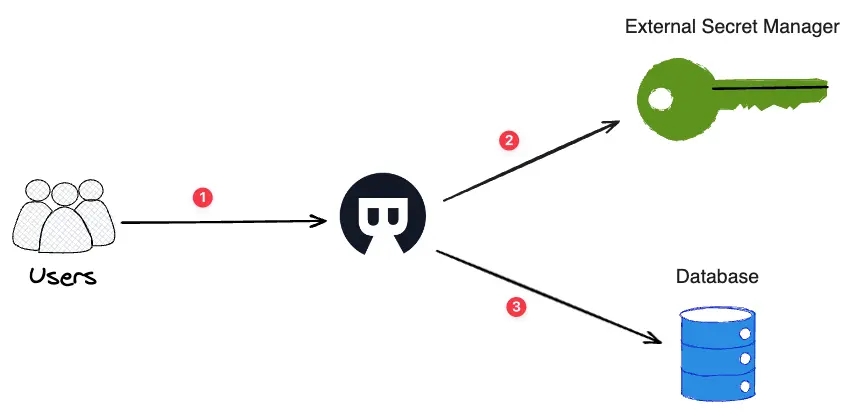
- User tries to access database from Bytebase.
- Bytebase calls the external secret manager to exchange the configured key for the database password.
- Bytebase retrieves the password and connect the database.
HashiCorp Vault
Bytebase only supports KV v2 engine.
Create the secret in Vault like below:
-
Secret engine name:
secret -
Secret path:
bytebase -
Secret key:
DB_PASSWORD -
Secret:
<<YOUR_PASSOWRD>>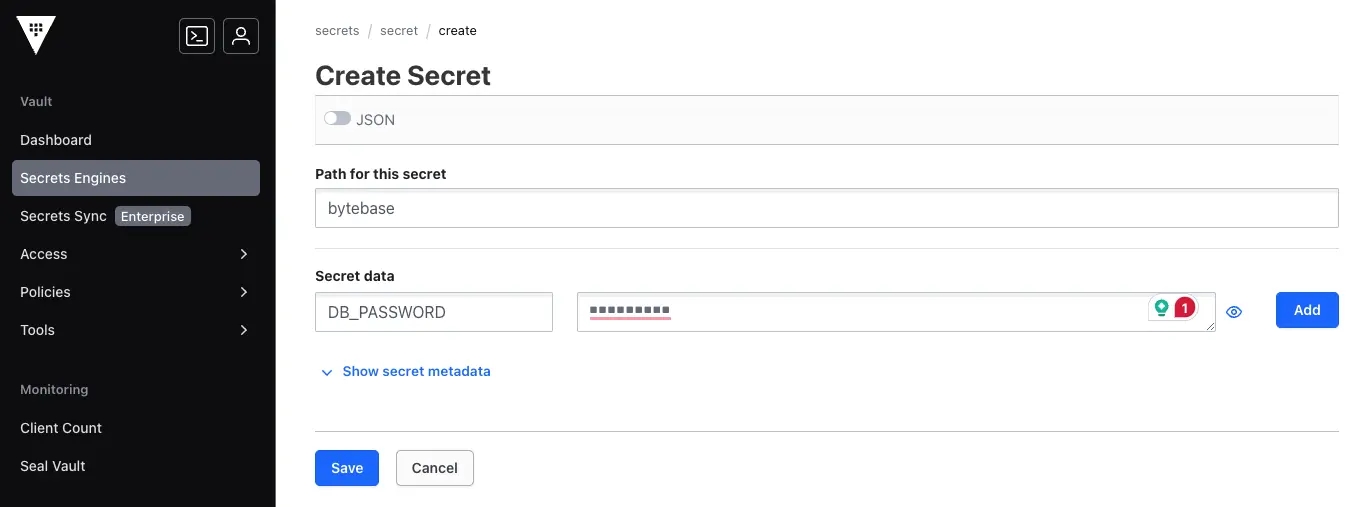
Configure instance to retrieve database password from vault:
-
Specify the Vault URL.
-
Specify the Vault auth method.
-
Specify the secret engine name
secret, secret pathbytebaseand secret keyDB_PASSWORD.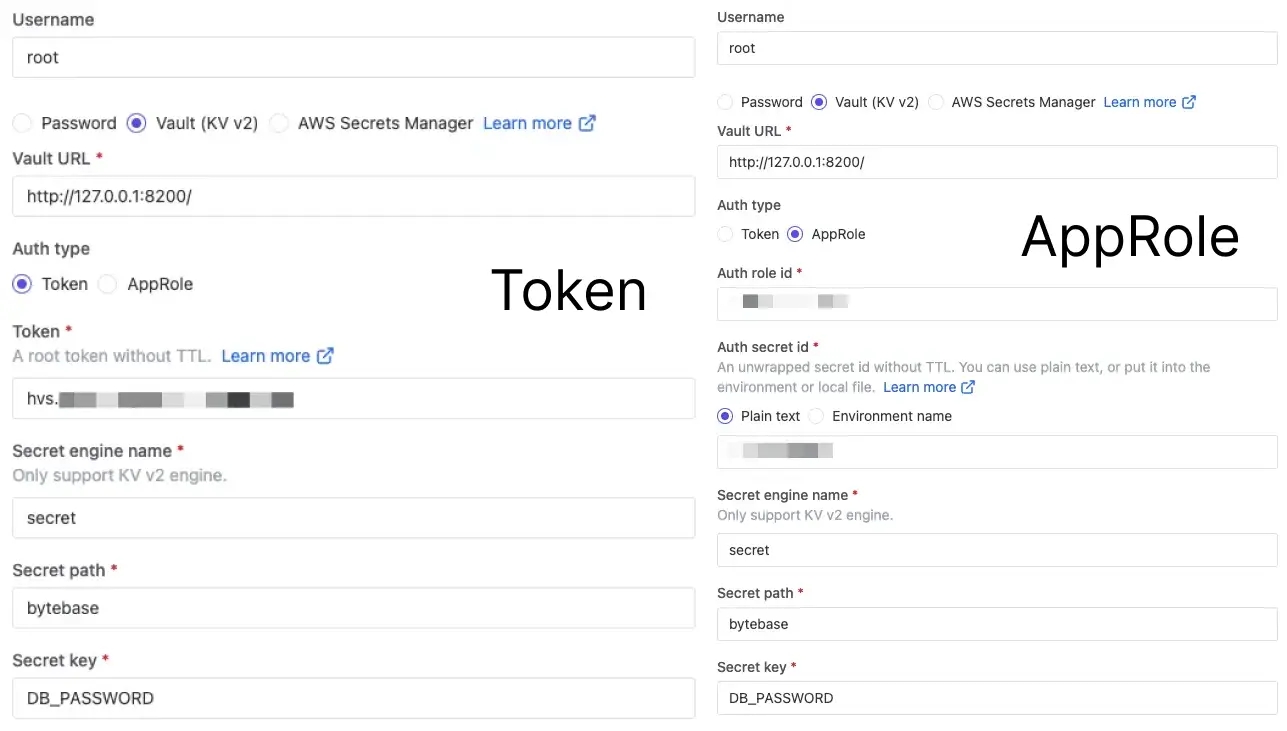
AWS Secrets Manager
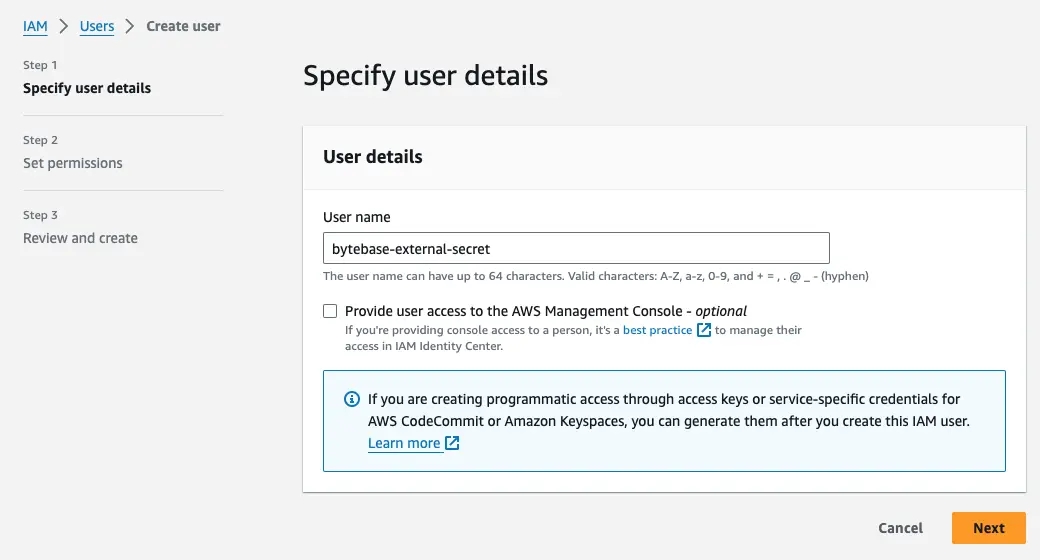
Create an IAM user to access the Secrets Manager
It's recommended to create a dedicated IAM user for Bytebase to retrieve the secrets. You only need to do this once .
Visit IAM to create a new IAM user. Name it bytebase-external-secret.
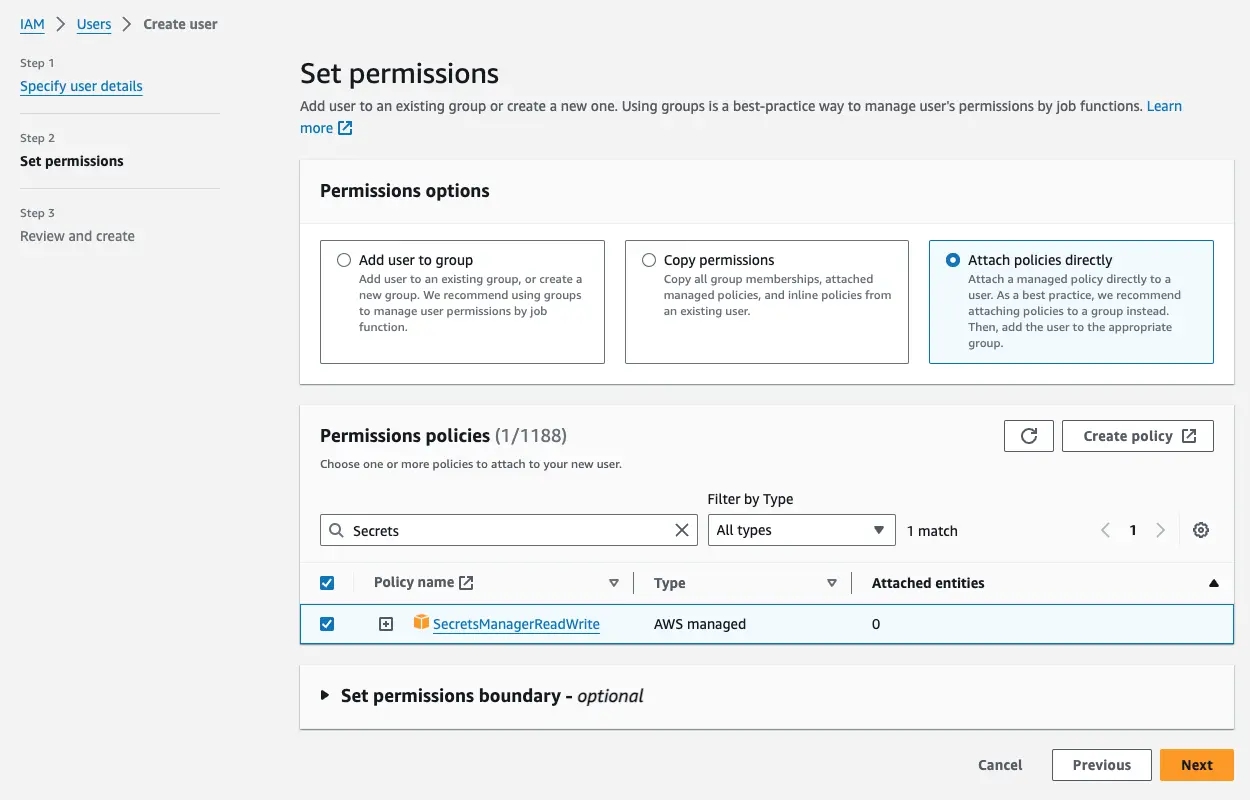
Attach SecretsManagerReadWrite permission.
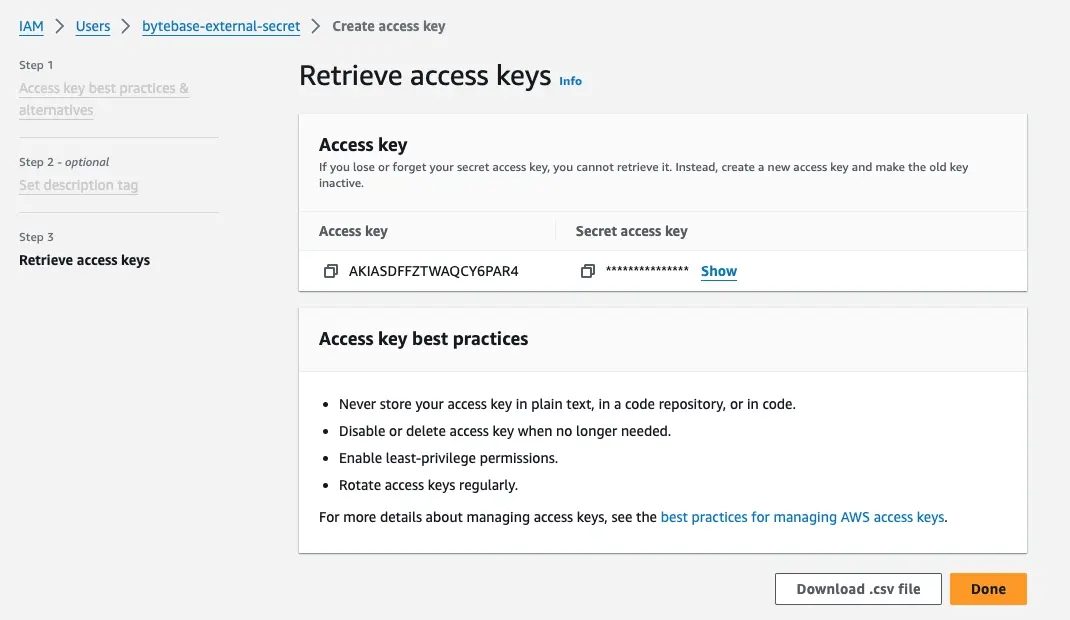
After creating the IAM user, create an Access Key to be used by Bytebase later.
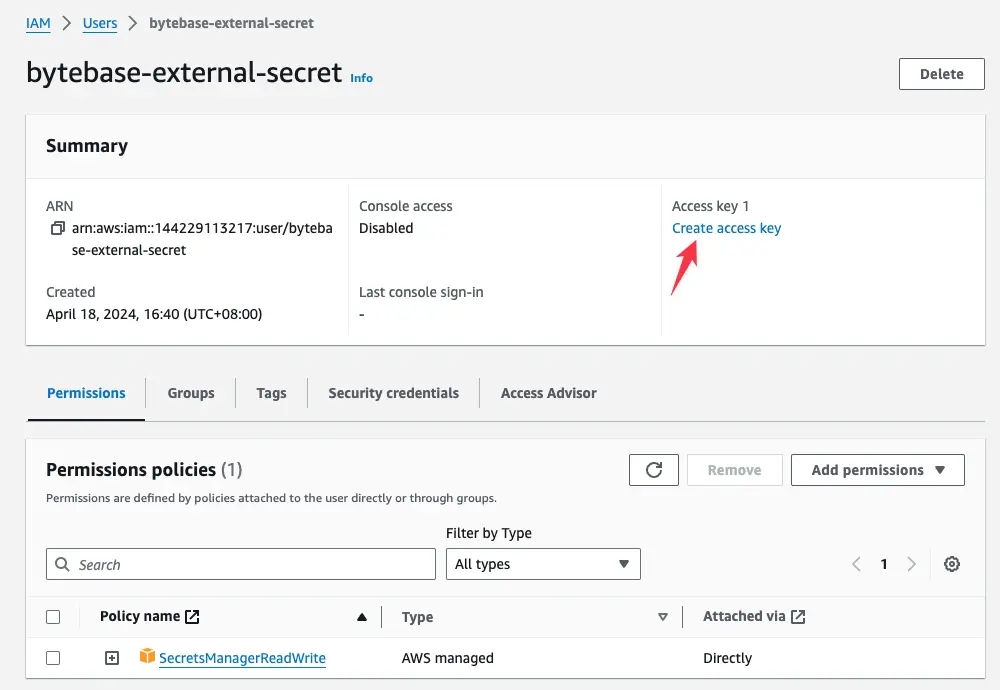
Select Third-party service as the use case.
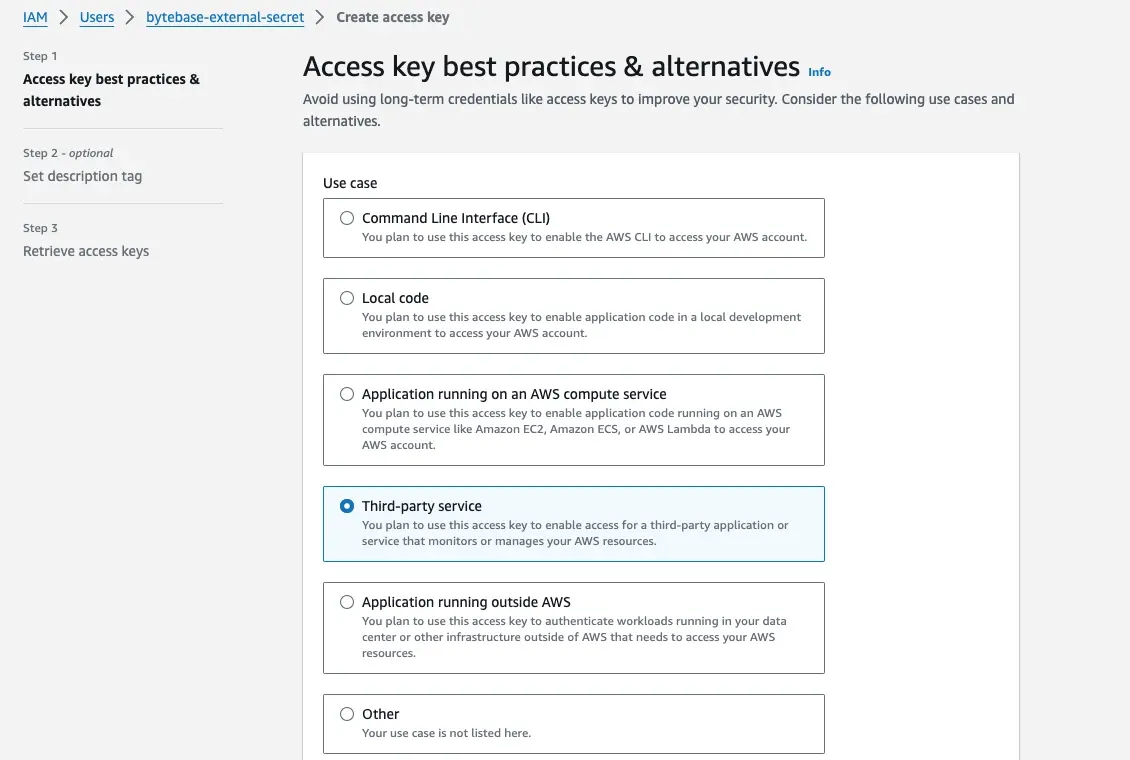
Optionally set the description tag and in the Retrieve access keys screen, record Access key and
Secret access key. They will be passed as environment variables when starting Bytebase.
Create secret
Visit AWS Secrets Manager to store a new secret. Select
Other type of secret, and add a key/value pair. The key is DB_PASSWORD and the value is your
database user password.
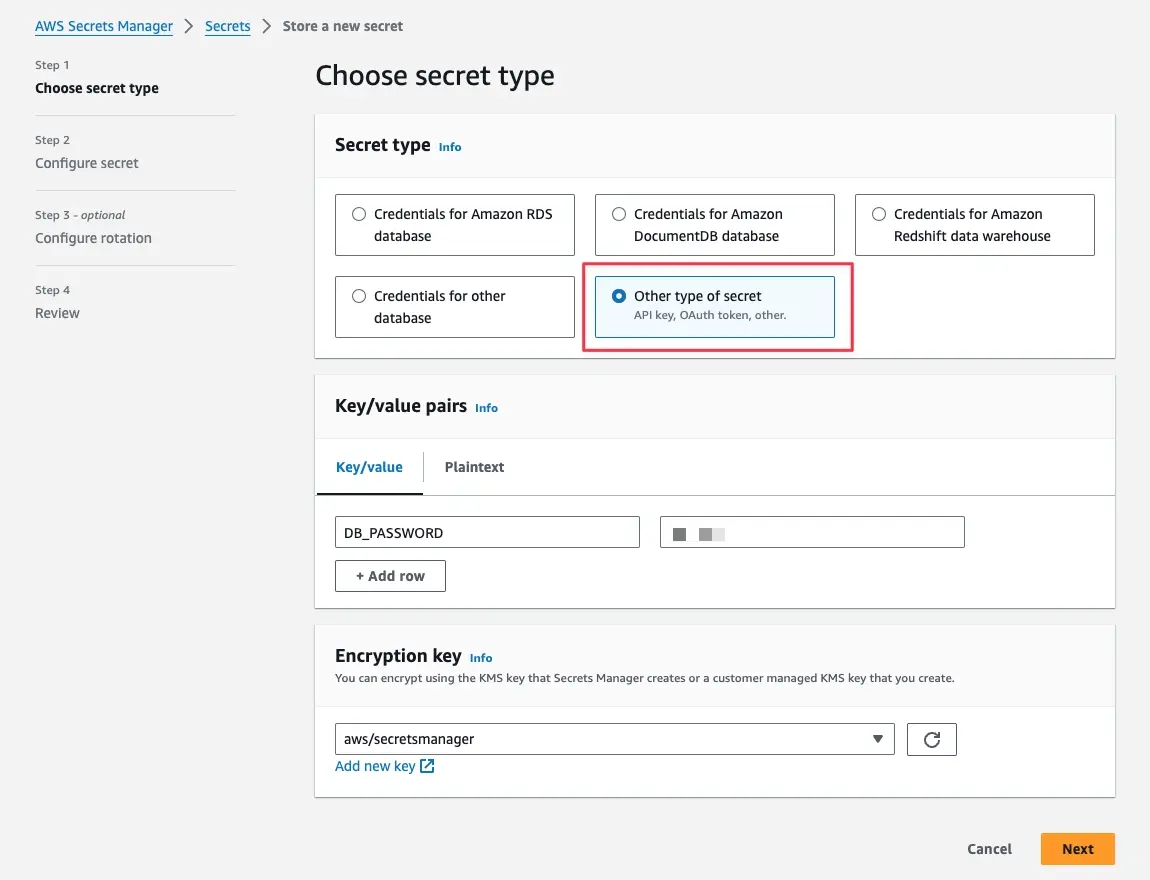
Next to the Configure secret, use bytebase as the Secret name

Skip rotation, review and create the secret.
Use secret in Bytebase
Restart Bytebase with the following environment variables
AWS_REGION=us-east-1AWS_ACCESS_KEY_IDandAWS_SECRET_ACCESS_KEYare the ones you previously created on the IAM user:
AWS_REGION=us-east-1 AWS_ACCESS_KEY_ID=xxx AWS_SECRET_ACCESS_KEY=yyy ./bytebase <<other options>>docker run --init \
-e AWS_REGION=us-east-1 AWS_ACCESS_KEY_ID=xxx AWS_SECRET_ACCESS_KEY=yyy \
--name bytebase \
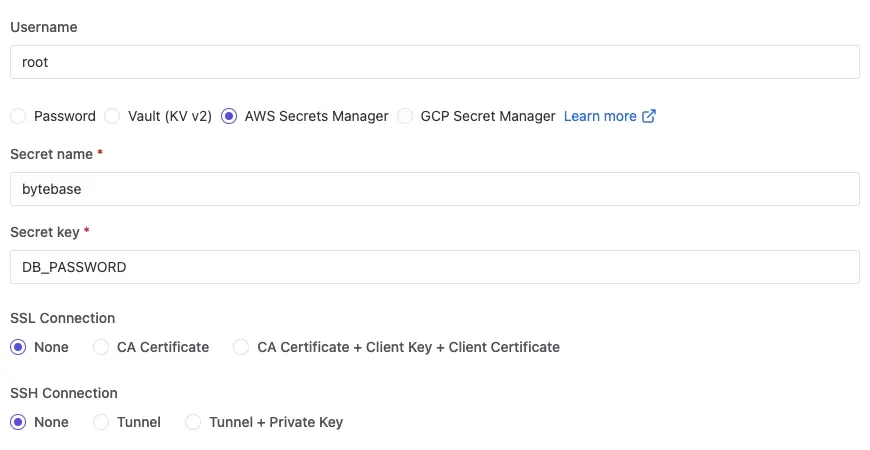
<<other options>>Go to instance setting, specify bytebase as the Secret name and DB_PASSWORD as the Secret key.
These two correspond to the value you created in the AWS Secrets Manager.
GCP Secret Manager
Create a service account to access the Secret Manager
It's recommended to create a dedicated service account for Bytebase to retrieve the secrets. You only need to do this once .
Visit Service accounts to create a new service account.
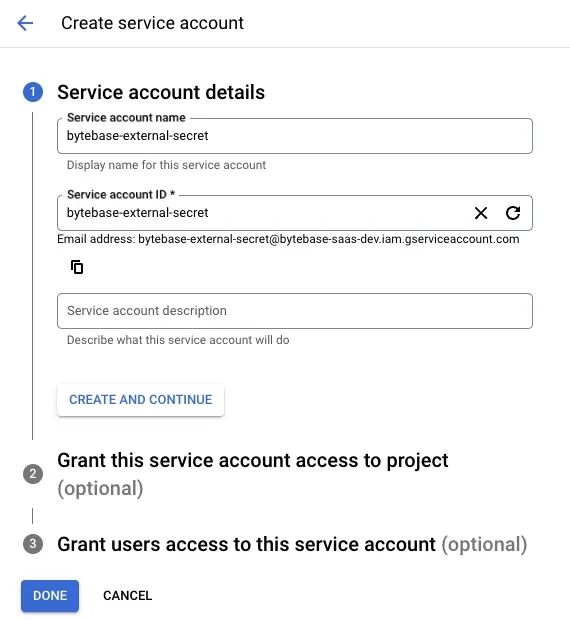
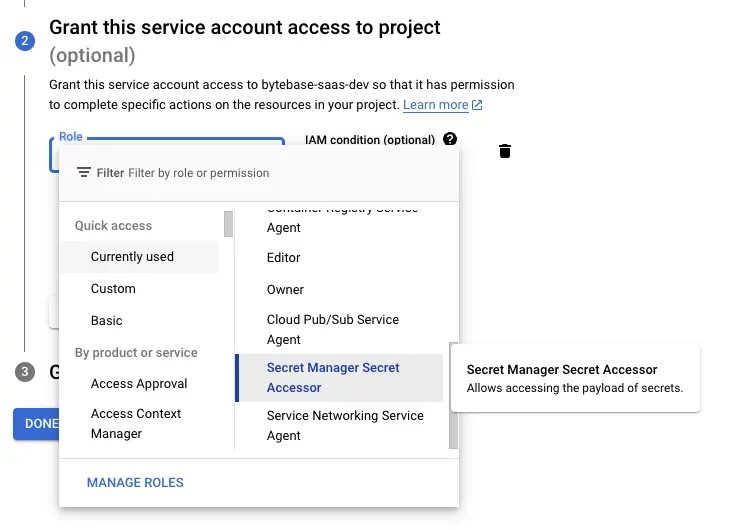
Grant Secret Manager Secret Accessor permission to the service account.
After the service account is created, visit its KEYS page and add a new key.
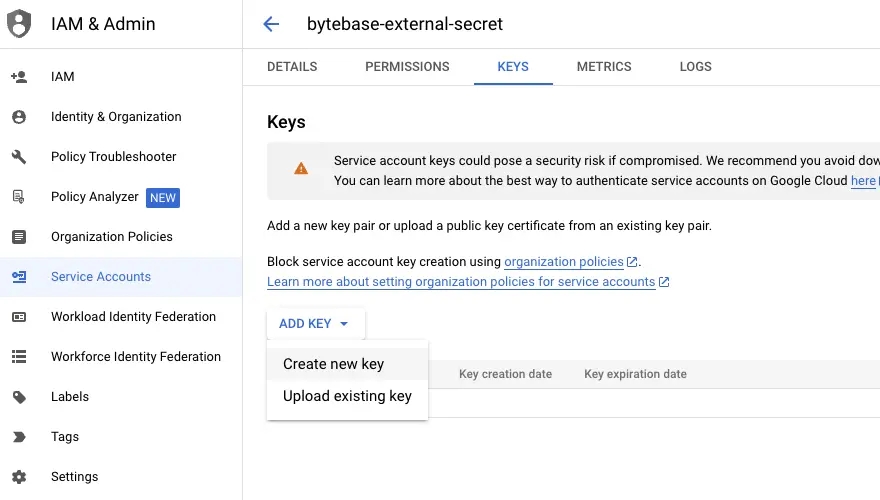
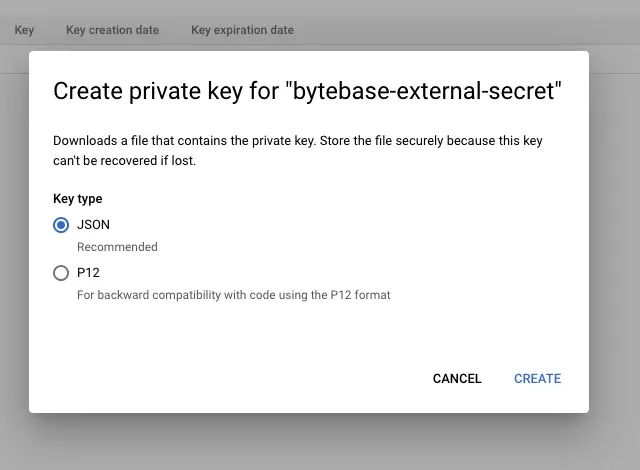
Choose JSON as the key type and create. Keep the downloaded private key file. This will be passed
as environment variables when starting Bytebase.
Create secret
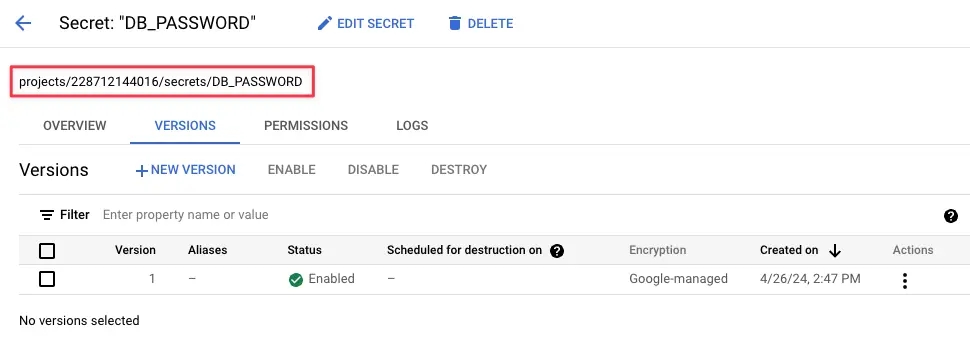
Visit GCP Secret Manager to create a new secret.

After creation, note the fully qualified secret name.
Use secret in Bytebase
Restart Bytebase by specifying GOOGLE_APPLICATION_CREDENTIALS=private key file as an environment variable. The
private key file is the JSON file downloaded before for the service account.
If you run Bytebase in docker, you need to put the JSON file under the mounted directory. Otherwise, Bytebase won't be able to access the key file.
docker run --init \
-e GOOGLE_APPLICATION_CREDENTIALS=/var/opt/bytebase/key.json \
--name bytebase \
--volume ~/.bytebase/data:/var/opt/bytebase \
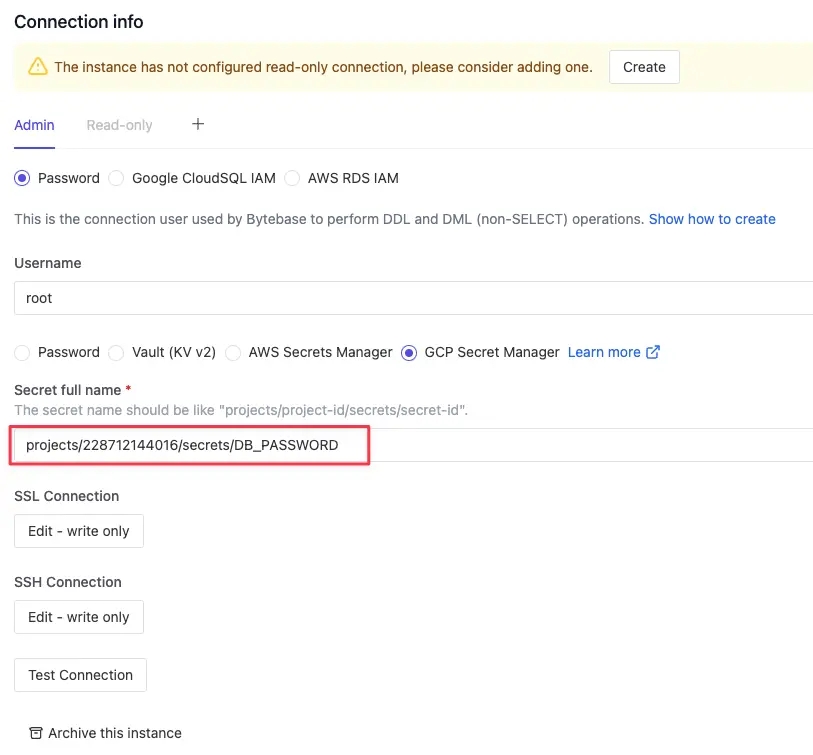
<<other options>>Go to instance setting, specify the fully qualified name such as projects/228712144016/secrets/DB_PASSWORD
as the Secret full name.
Custom endpoint
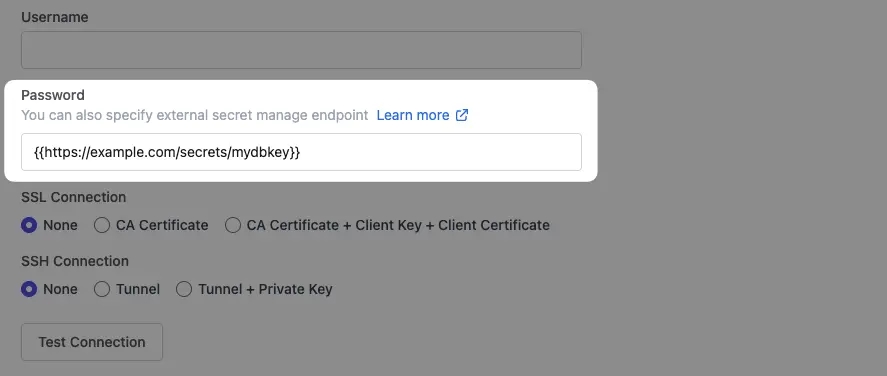
If you have a custom external secret manager, you can supply its API endpoint by enclosing it with the mustache {{ }}, e.g {{http://example.com/secrets/mydbkey}}
Sample request
Usually mydbkey is unique for each database and used for exchanging the password for that database.
curl "http://example.com/secrets/mydbkey"Expected response
Bytebase expects the following JSON response from the external secret manager. The payload.data is the
base64-encoded contents of the database password.
{
  "payload": {
    "data": "xxx"
  }
}
PostgreSQL
If the connecting instance is managed by the cloud provider, then SUPERUSER is not available and you should create the role via that provider's admin console. The created role will have provider specific restricted semi-SUPERUSER privileges:
-
In AWS RDS, the roll is
rds_superuser. -
In Google Cloud SQL, the role is
cloudsqlsuperuser.
You should grant Bytebase privileges with that semi-SUPERUSER role, e.g.:
-- For AWS RDS
GRANT rds_superuser TO bytebase
-- For Google Cloud SQL
GRANT cloudsqlsuperuser TO bytebaseBesides, you may need to grant Bytebase privileges with GRANT role_name TO bytebase; for all existing roles. Otherwise, Bytebase may not access existing databases or tables.
Oracle
For managing Oracle database, Bytebase provides two manage modes: Manage based on database and Manage based on schema. You can choose the manage mode when adding an instance or in the instance detail page.
Manage based on database
In this mode, Bytebase will manage the database as a whole.
- For normal Oracle instance, we treat the Oracle database as a Bytebase database.
- For CDB instance, we treat the CDB and all PDBs as Bytebase databases.
- For PDB instance, we treat the PDB as a Bytebase database.
Manage based on schema
In this mode, Bytebase will manage the schema as a whole.
- For any Oracle database, we treat the Oracle schema as a Bytebase database.
Snowflake

To find the Account Locator, go to your Snowflake account, you can find it in the URL, or from the locator field (but lower case).
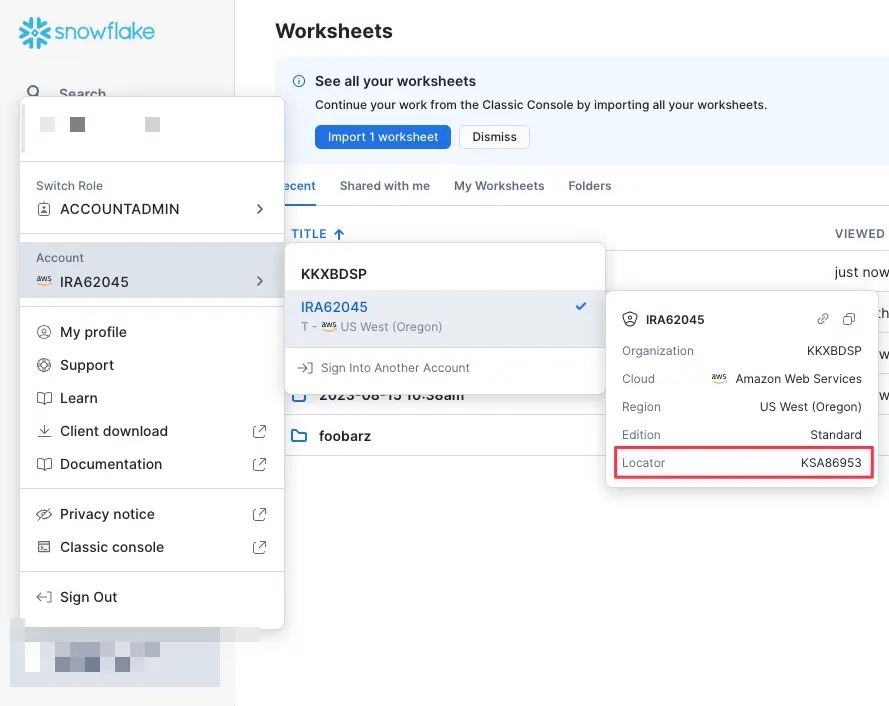
If the account is located in the AWS US West (Oregon) region, then it would be something like xy12345, otherwise, the format will be <<account_locator>>.<<cloud_region_id>>.<<cloud>> such as xy12345.us-east-2.aws. See official doc.
Google Cloud Spanner
For connecting to Google Cloud Spanner, you need to provide the following info:
- Google cloud project ID.
- Google cloud Spanner instance ID.
- Google cloud service account credentials.
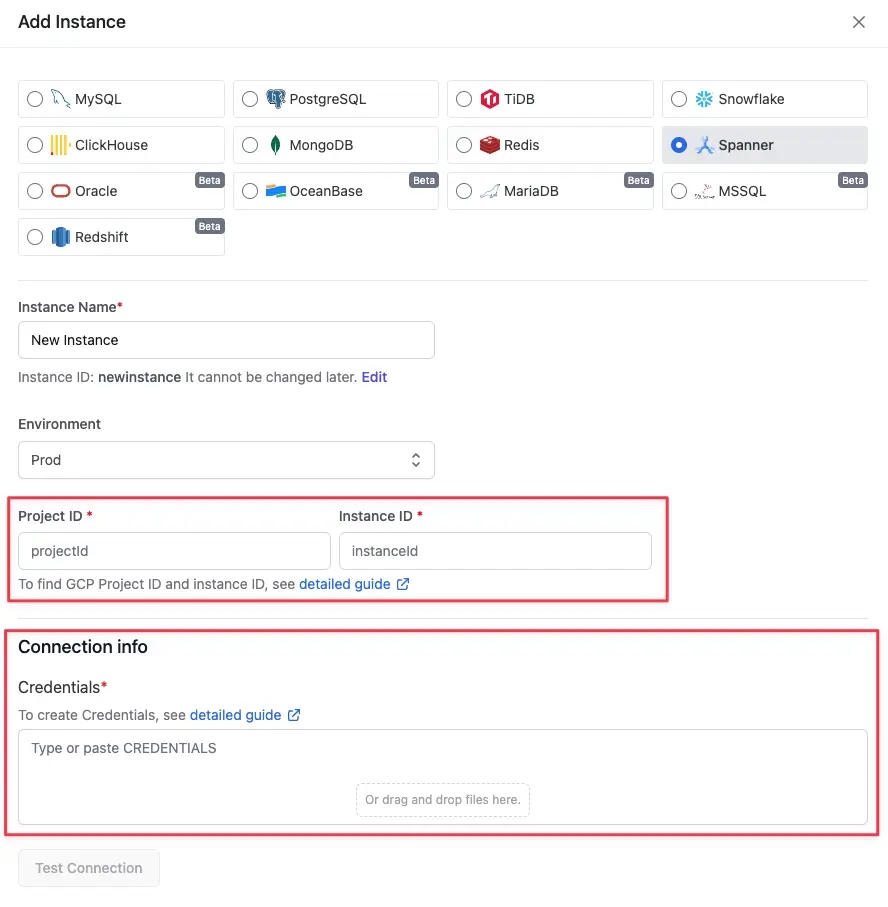
Specify Google Cloud Project ID and Spanner Instance ID
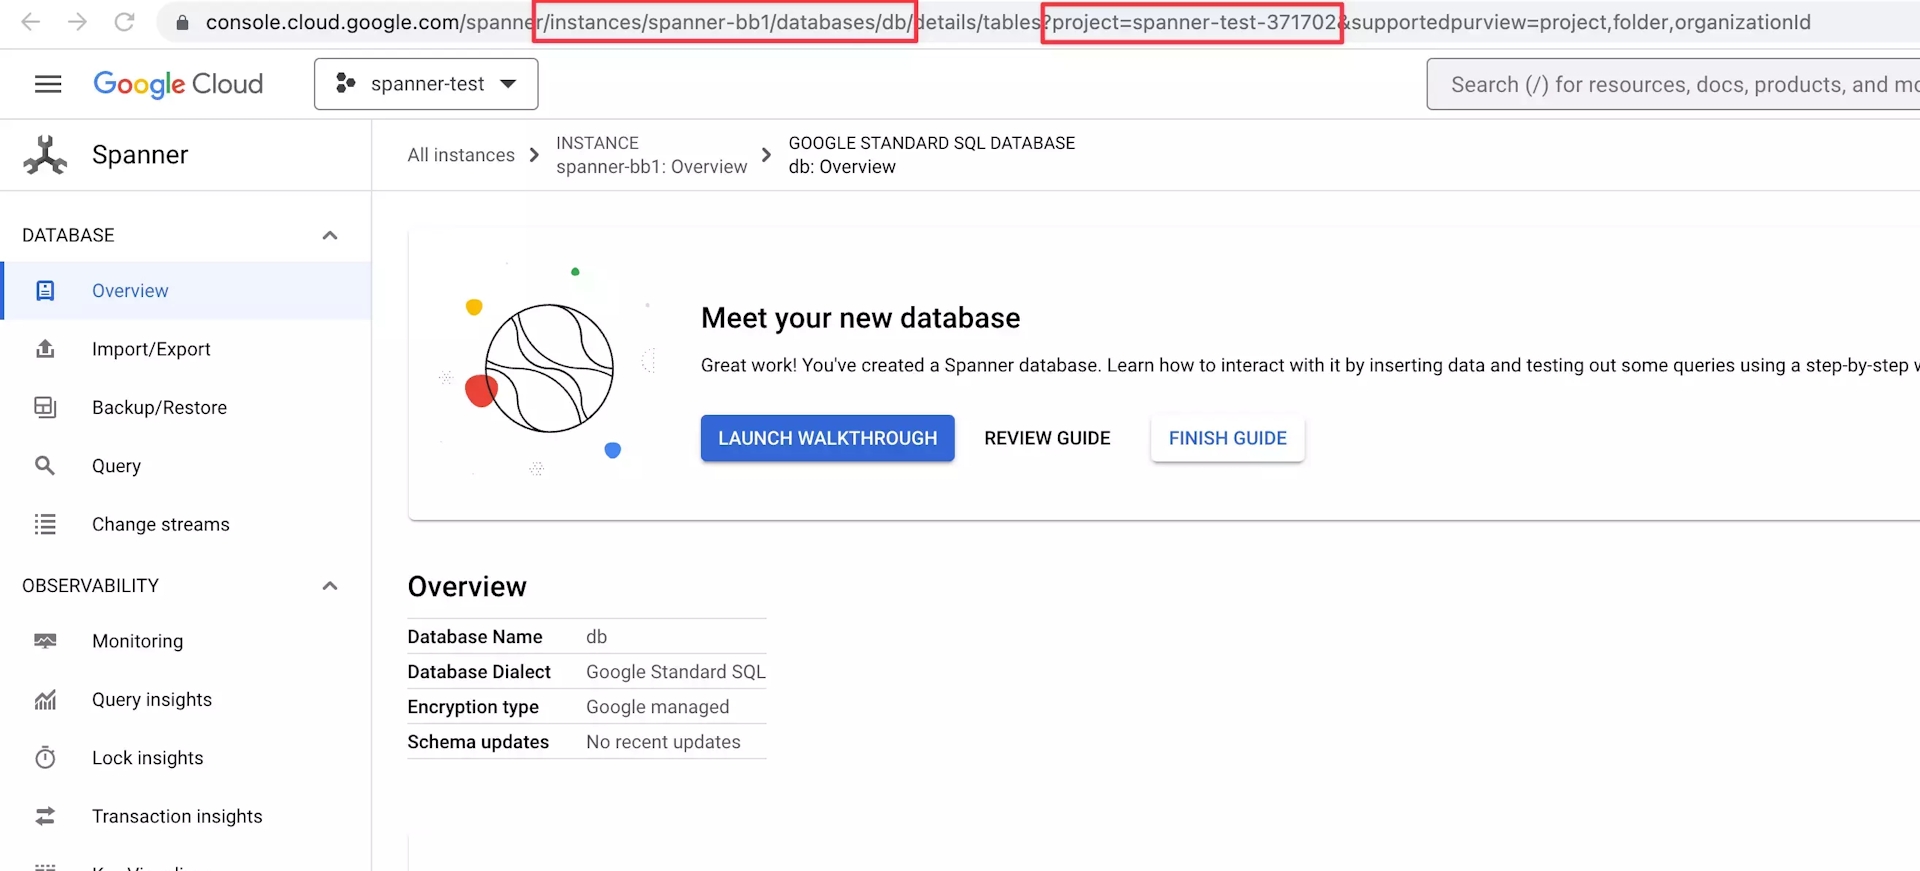
From the Spanner database detail page, you can get the project ID and the instance ID from the URL.
For example, the project ID and instance ID are spanner-test-3717002 and spanner-bb1 respectively for the above database.
Create a Google Cloud Service Account as the Credential
- Go to Google Cloud console.
- Click APIs & Services and then Credentials. You might have to click Menu on the top left first.
- Click Create Credentials and then Service account.
- For Service account name, enter a name for the service account.
- Click Create and Continue.
- For Select a role, select Cloud Spanner Database Admin for the service account.
- Click Done.
- Click the created service account.
- At the top, click Keys and then Add Key and then Create new key. Make sure the key type is set to JSON and click Create.
- You'll get a message that the service account's private key JSON file was downloaded to your computer. Make a note of the file name and where your browser saves it. You'll need it later.
Upload the JSON file to the Credentials input.