Database CI/CD and Schema Migration with Oracle

Oracle Database is a robust, scalable relational database widely used in enterprises. It excels in complex data management, offering high availability, security, and features like cloud integration and machine learning, making it ideal for transaction processing and data warehousing.
This tutorial is a step-by-step guide to set up Database Change Management for Oracle in Bytebase. With Bytebase, a team can have a formalized review and rollout process to make Oracle database schema change and data change.
Bytebase provides a GUI for teams to perform database changes and retain full migration history. Bytebase Free Plan is sufficient for this tutorial.
Prerequisites
Before you start, make sure you have the following downloaded and installed:
- One Oracle instance
- Docker
Step 1 - Deploy Bytebase via Docker
-
Make sure your Docker is running, and start the Bytebase Docker container with the following command:
docker run --rm --init \ --name bytebase \ --publish 8080:8080 --pull always \ --volume ~/.bytebase/data:/var/opt/bytebase \ bytebase/bytebase:2.16.0 -
Bytebase is now running via Docker, and you can access it via
localhost:8080. -
Visit
localhost:8080in your browser. Register an account.
Step 2 - Add a Oracle Instance to Bytebase
In this tutorial, an Instance is your Oracle instance.
-
Login to the Bytebase Console.
-
Click Instances on the left sidebar and click Add Instance.
-
Add an
Oracleinstance. Pay attention to Environment, let's chooseProdfor this tutorial. Because there's a SQL Review policy enabled onProdenvironment. You may go to Environment > Prod > SQL Review Policy to check the details.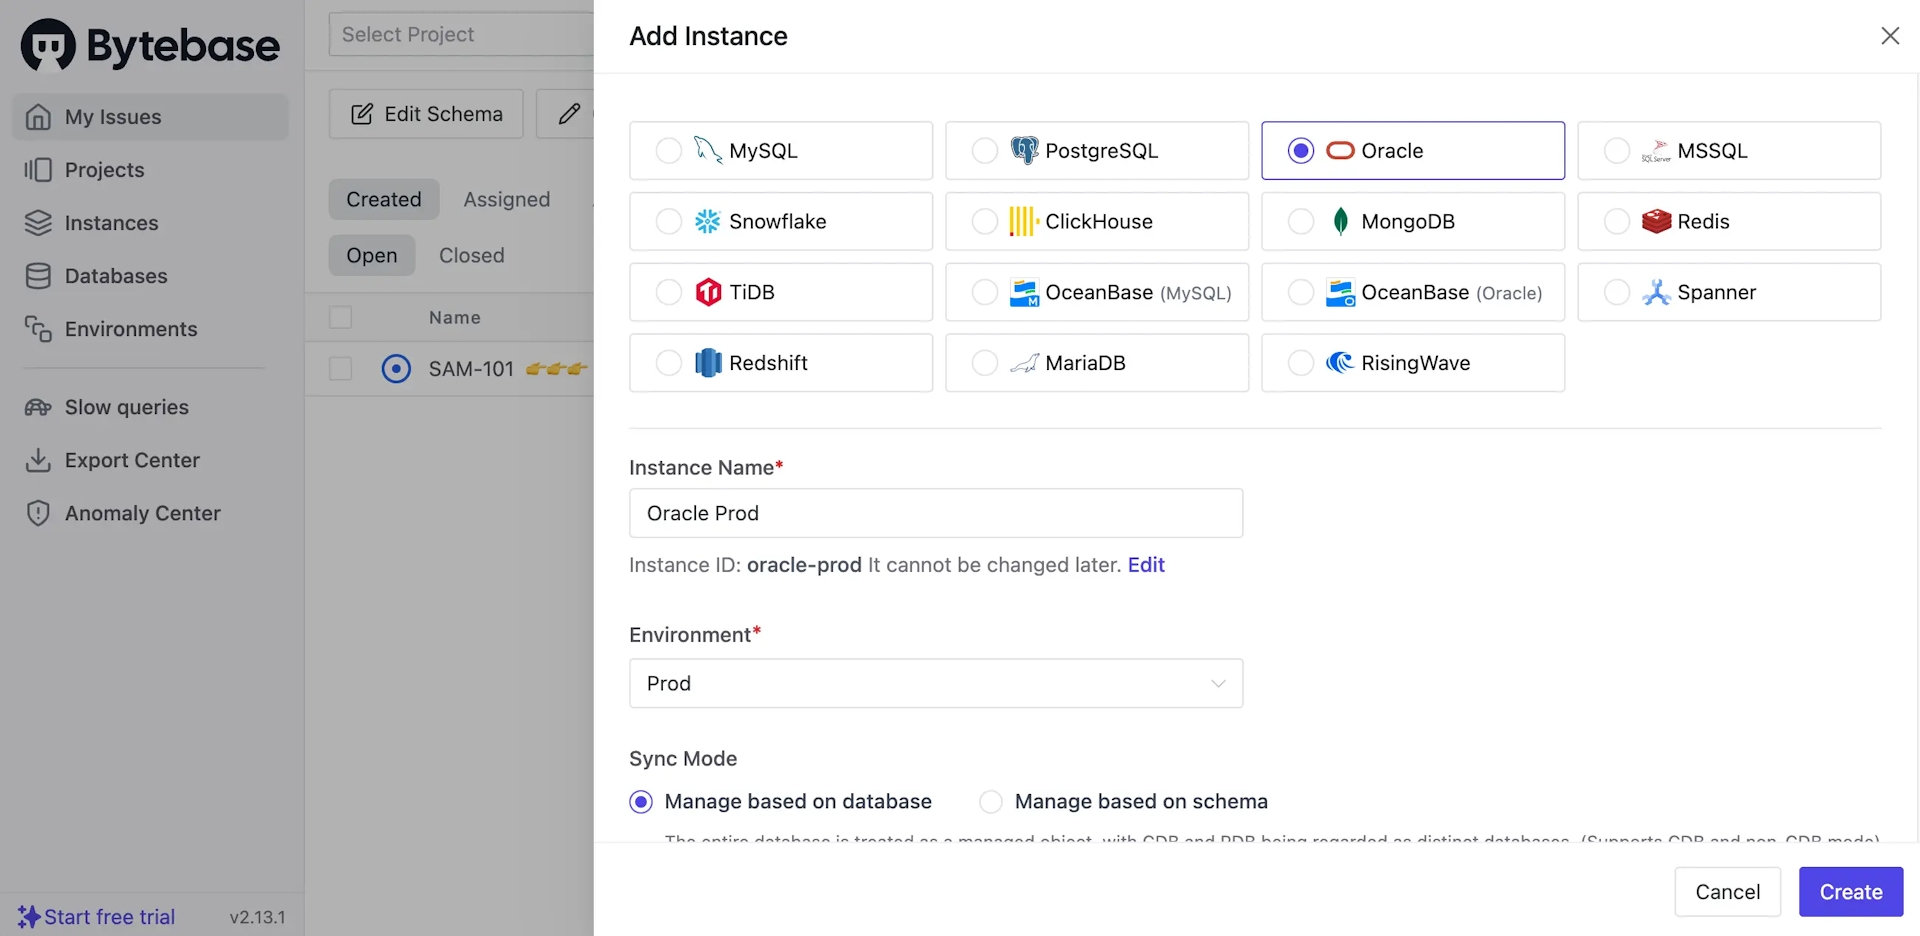

-
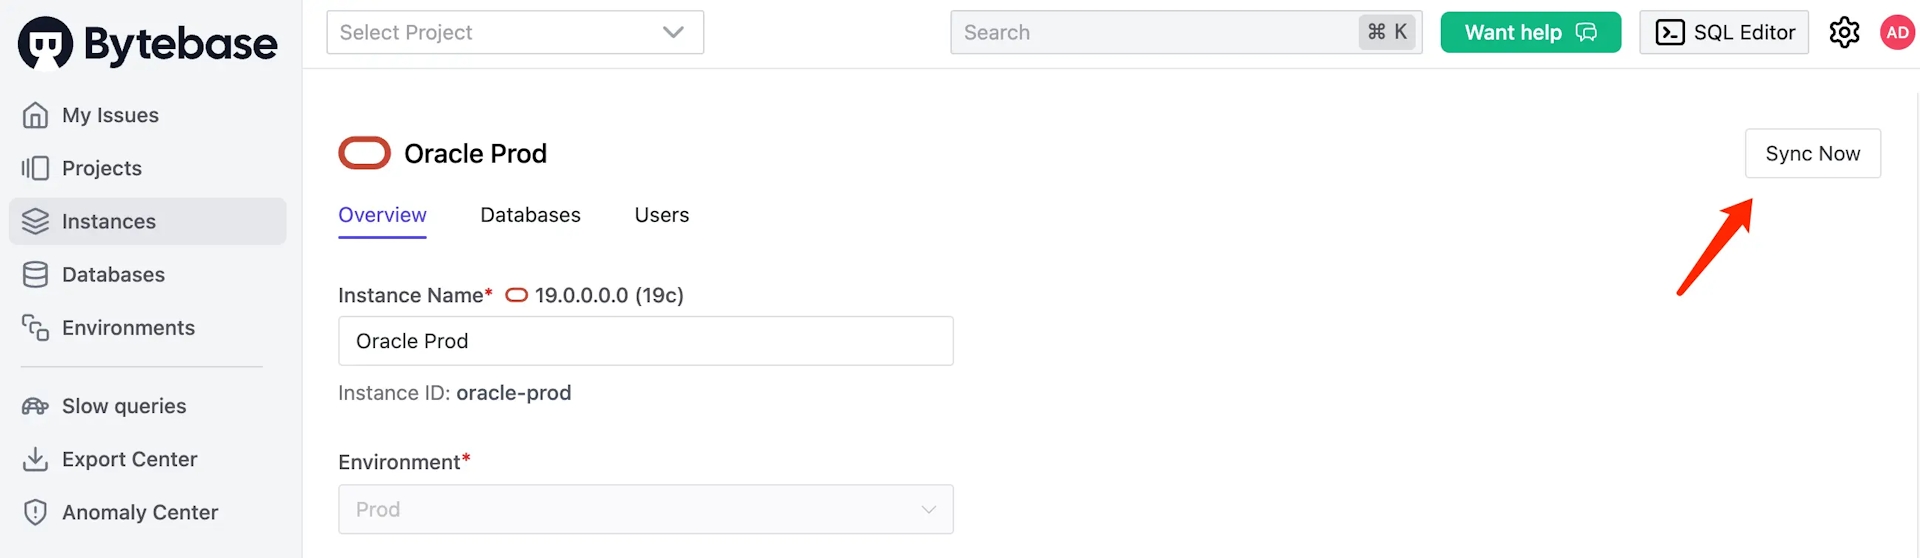
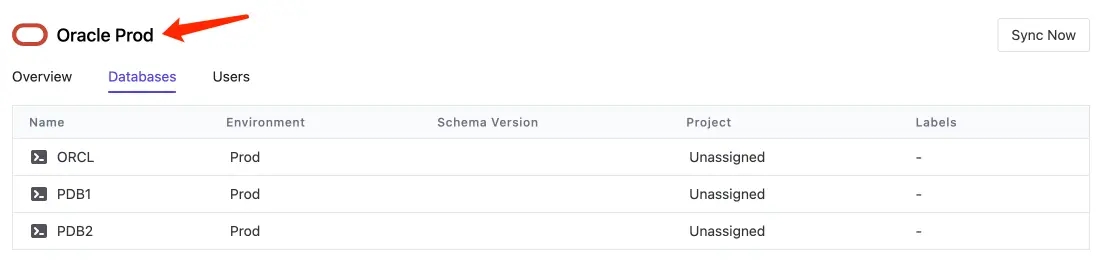
On the instance detail page, click Sync Now and switch to Databases tab. You'll see your existing databases on this instance, which haven't been assigned to any project yet.
Step 3 - Go to a project and transfer in Oracle databases
In Bytebase, Project groups logically related Databases, Issues and Users together, which is similar to the project concept in other DevTools such as Jira and GitLab. So before you deal with the database, a Project must be presented.
In Bytebase, a Database is created by CREATE DATABASE xxx. A database always belongs to a single Project. An Issue represents a specific collaboration activity between Developer and DBA for when creating a database, altering a schema. It's similar to the issue concept in other issue management tools.
-
Go to the Projects tab, and you'll see a default project called
Sample Project. Click it, there are two sample PostgreSQL databases. We'll transfer Oracle databases into this project. -
Stay in the project
Sample Project. Click on Transfer in DB to transfer databases.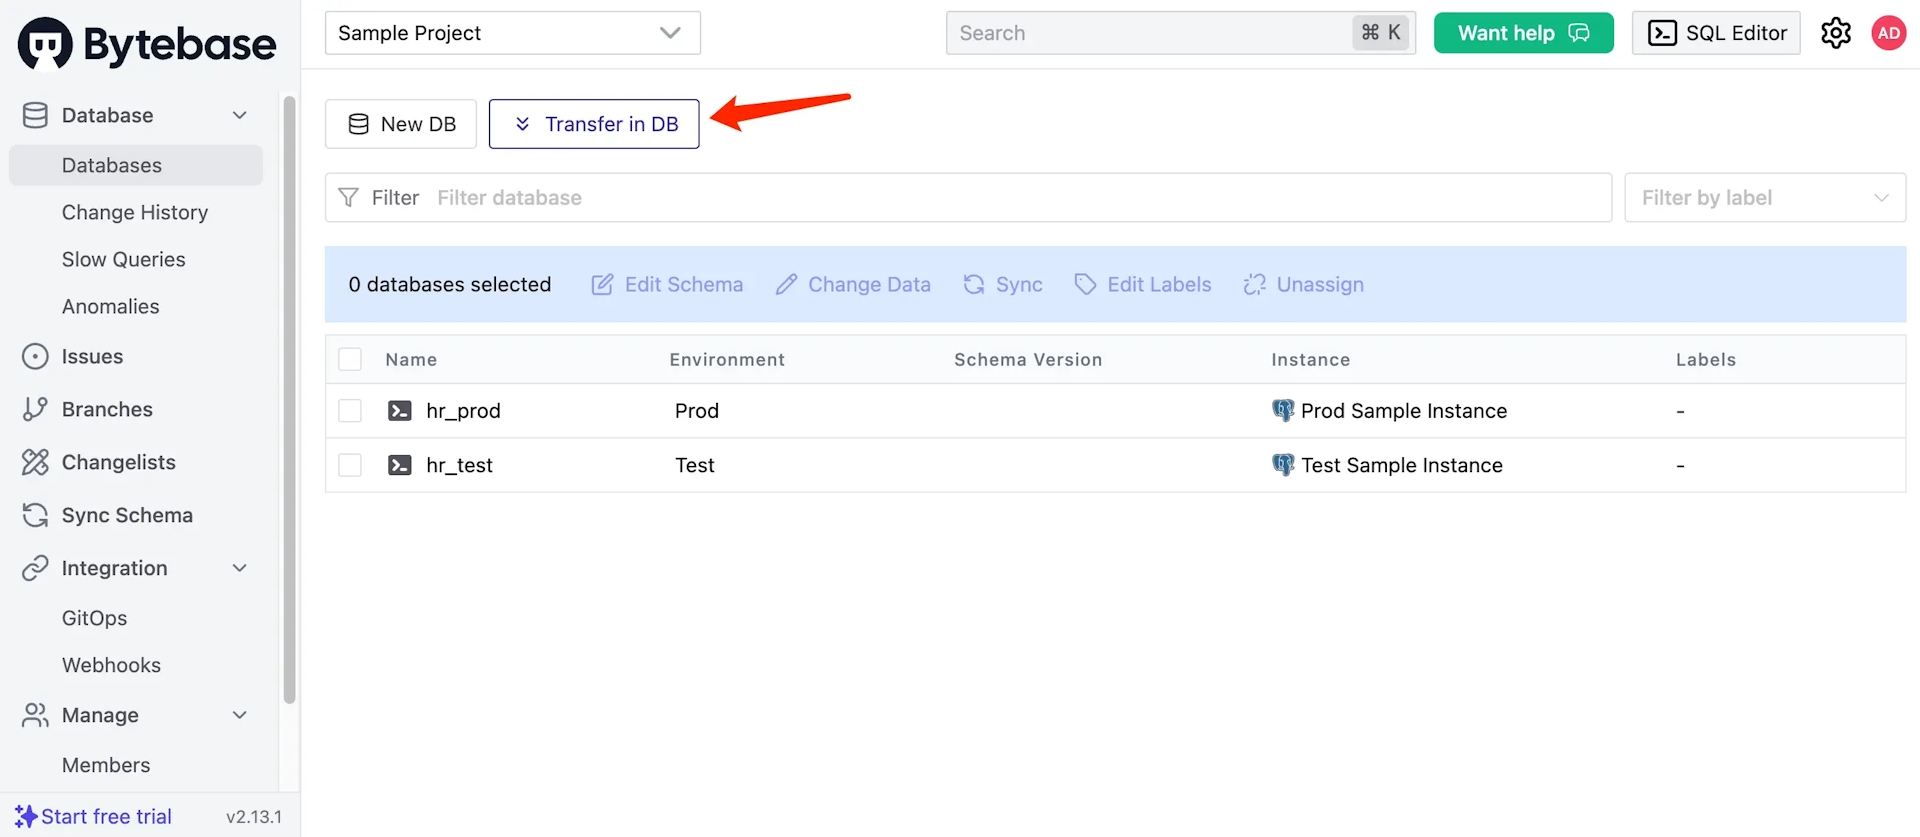
Step 4 - Create a table in Oracle via Bytebase
-
Stay in the project
Sample project, check the database you transferred in and click on Edit Schema. -
You'll be redirected to an issue preview. Fill in the following SQL and click Create.
CREATE TABLE person ( person_id NUMBER GENERATED BY DEFAULT AS IDENTITY, first_name VARCHAR2 (50), last_name VARCHAR2 (50), PRIMARY KEY (person_id) ); -
After automatic checks, there's a pop-up window showing a SQL Review violation --
Enforce NOT NULL constraint for columns.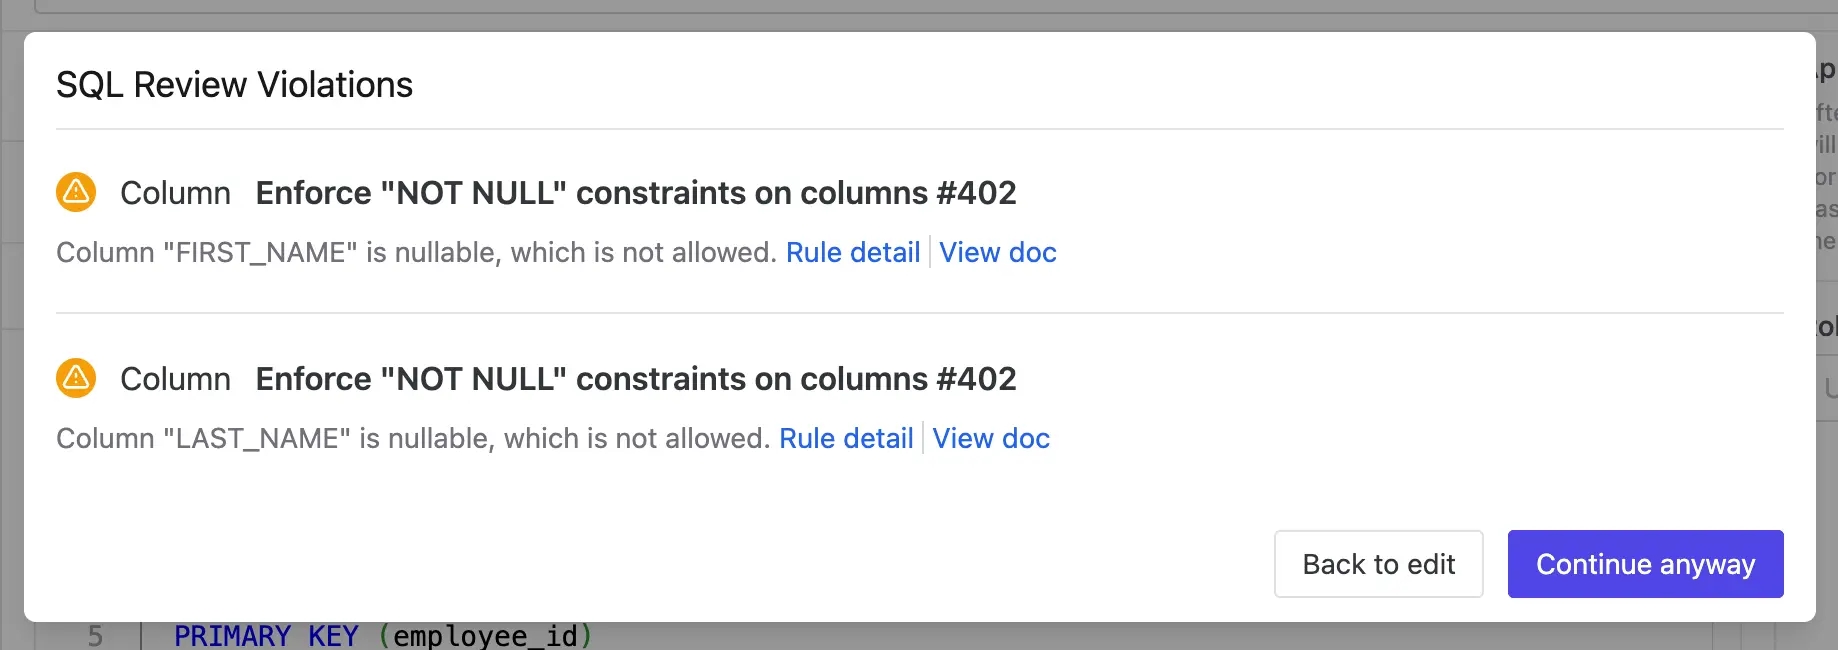
-
Click Back to edit, paste this and click Create again.
CREATE TABLE person ( person_id NUMBER GENERATED BY DEFAULT AS IDENTITY, first_name VARCHAR2 (50) NOT NULL, last_name VARCHAR2 (50) NOT NULL, PRIMARY KEY (person_id) ); -
After passing the automatic checks, the issue executes and the status becomes
Done.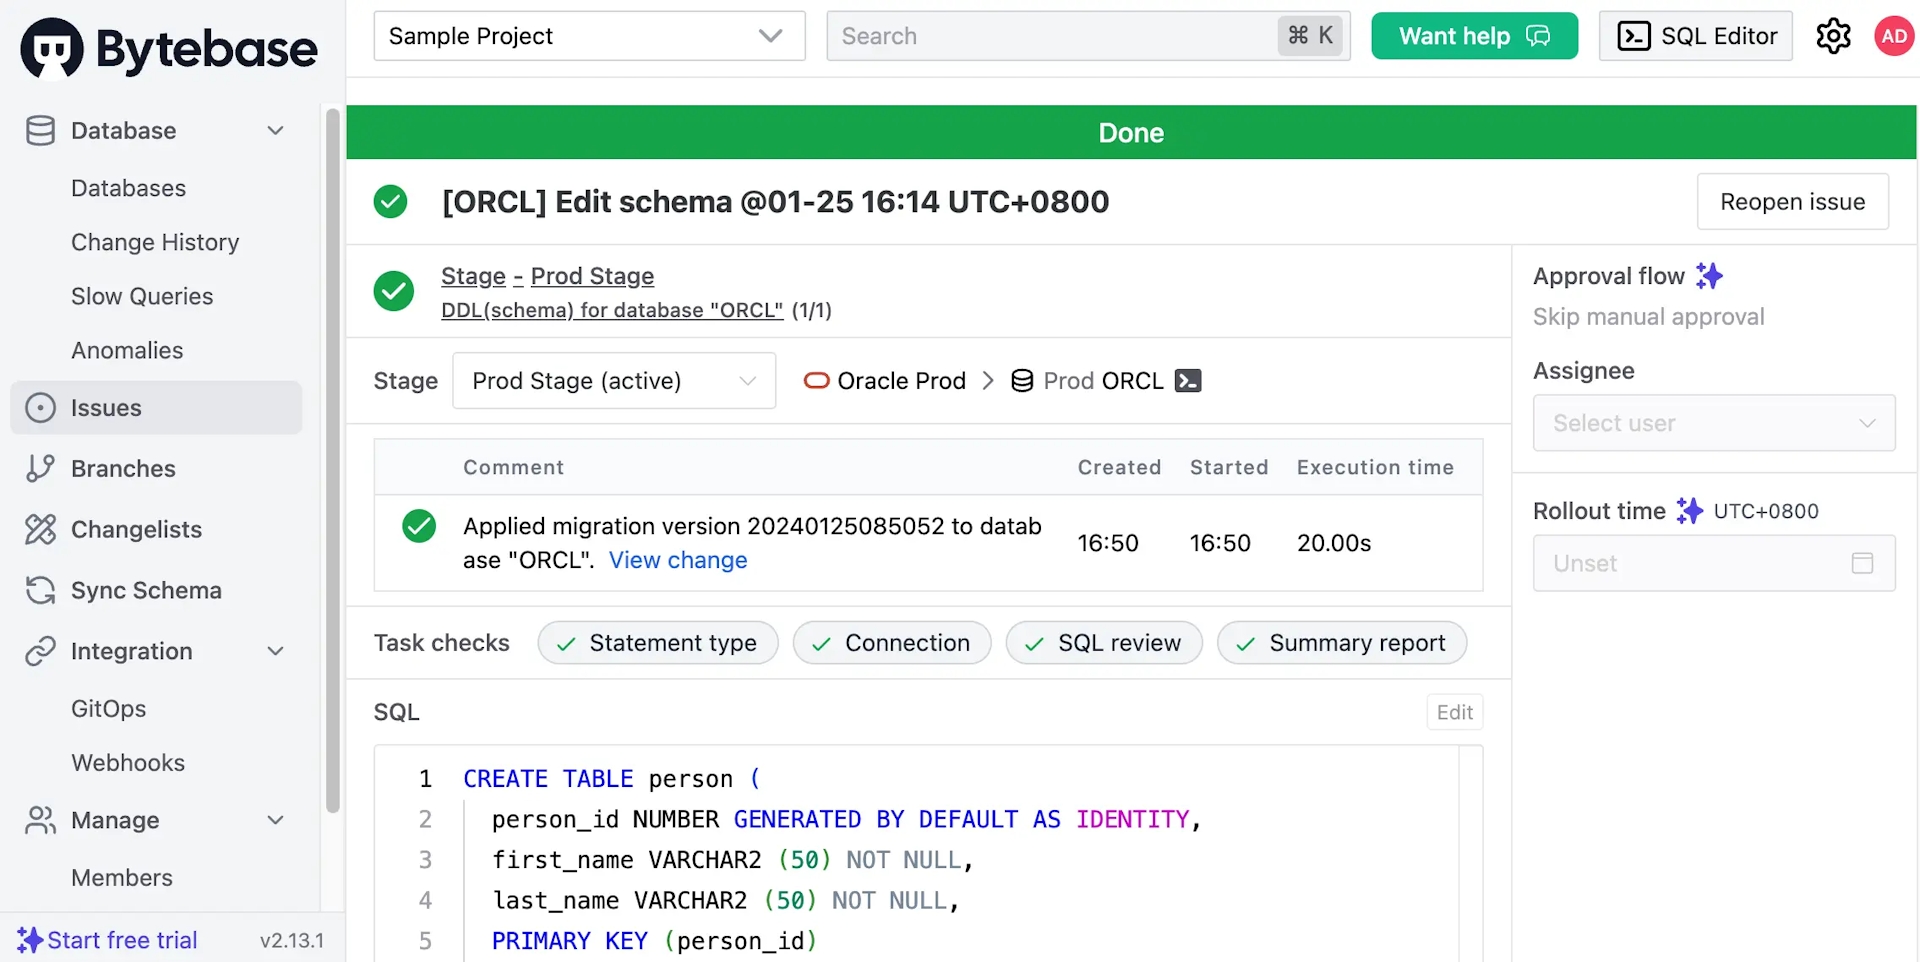
Summary and What's Next
Now you have connected Oracle with Bytebase, and used the UI workflow to accomplish schema change. Bytebase will record the full migration history for you.
You may also try out GitOps workflow: store your Oracle schema in GitHub and Bytebase will pick up the changes to the repo, bringing your Oracle change workflow to the next level, aka Database DevOps - Database as Code.