Database CI/CD and Schema Migration with MariaDB and GitHub
A series of articles about Database CI/CD and Schema Migration with MariaDB
- Database CI/CD and Schema Migration with MariaDB
- Database CI/CD and Schema Migration with MariaDB and GitHub (this one)
In the last article Database CI/CD and Schema Migration with MariaDB, you have tried UI workflow in Bytebase.
This tutorial will bring you to the next level by introducing the GitOps workflow, where you commit the schema change script to the GitHub repository, which will in turn trigger the schema deployment pipeline in Bytebase.
You can use Bytebase free version to finish the tutorial.
Features included
- GitOps Workflow
- Change History
Prerequisites
Before you start this tutorial, make sure:
- You have followed our previous UI-based change tutorial Database CI/CD and Schema Migration with MariaDB.
- You have a GitHub account.
- You have a public GitHub repository, e.g
test-bb-mariadb-gitops. - You have Docker installed locally.
- You have a ngrok account.
Step 1 - Run Bytebase in Docker and set the External URL generated by ngrok
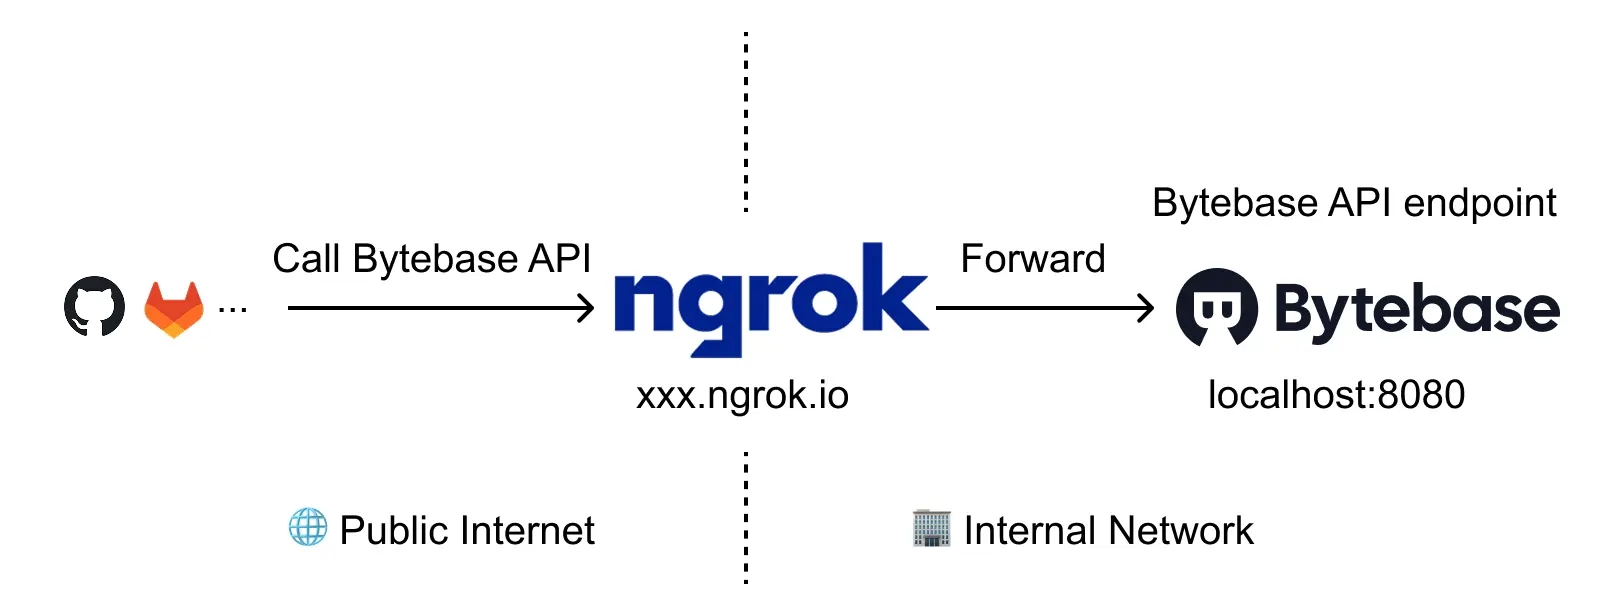
ngrok is a reverse proxy tunnel, and in our case, we need it for a public network address in order to receive webhooks from VCS. ngrok we used here is for demonstration purposes. For production use, we recommend using Caddy.
-
Run Bytebase in Docker with the following command:
docker run --rm --init \ --name bytebase \ --publish 8080:8080 --pull always \ --volume ~/.bytebase/data:/var/opt/bytebase \ bytebase/bytebase:2.16.0 -
Bytebase is running successfully in Docker, and you can visit it via
localhost:8080. Register an admin account and it will be granted theworkspace adminrole automatically. -
Login to ngrok Dashboard and complete the Getting Started steps to install and configure. If you want to use the same domain each time you launch ngrok, go to Cloud Edge > Domains, where you'll find the domain
<<YOURS>>.ngrok-free.applinked to your account. -
Run the ngrok command
ngrok http --domain=<<YOURS>>.ngrok-free.app 8080to start ngrok with your specific domain, and you will see the output displayed below: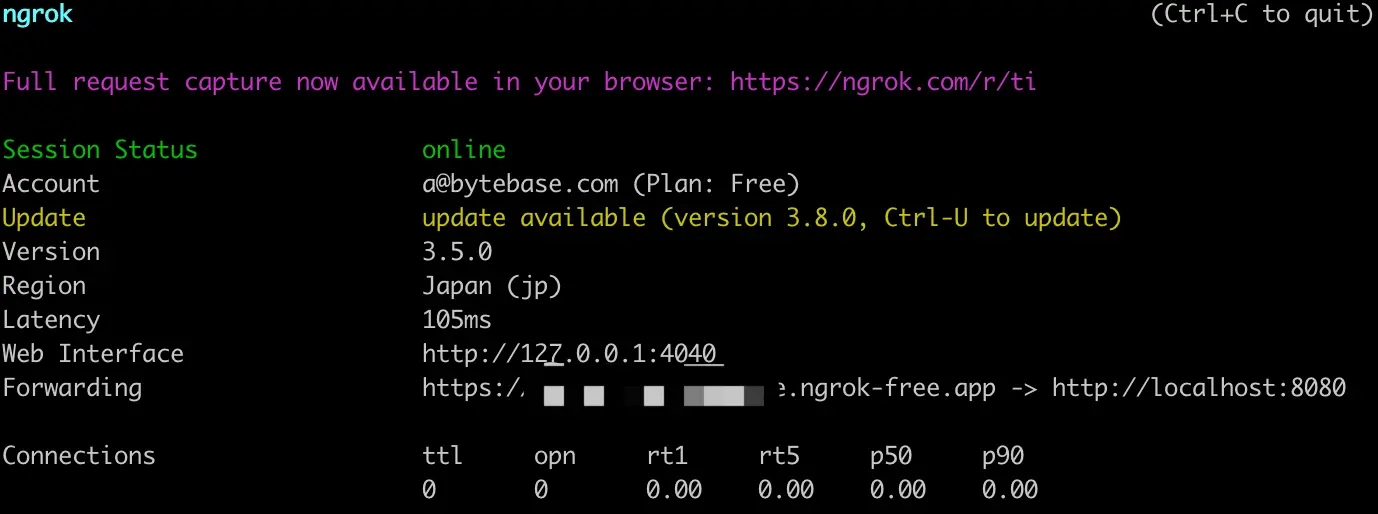
-
Log in Bytebase and click the gear icon (Settings) on the top right. Click General under Workspace. Paste
<<YOURS>>.ngrok-free.appas External URL under Network section and click Update.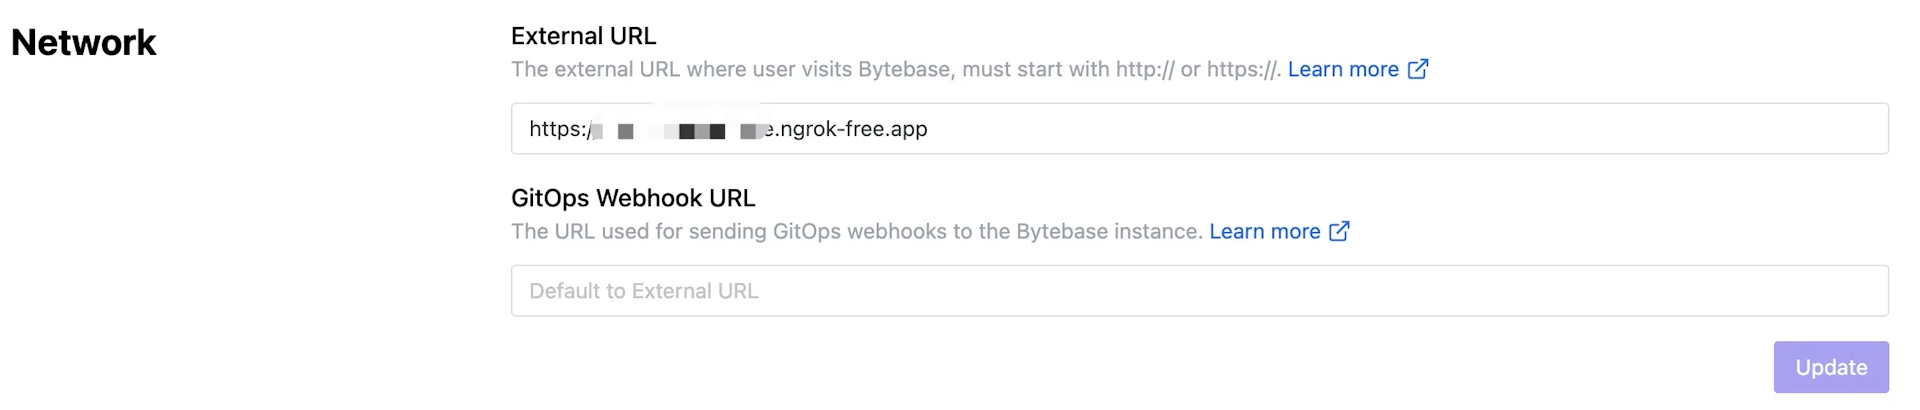
-
Now you can access Bytebase via
<<YOURS>>.ngrok-free.app.
Step 2 - Find your MariaDB instance in Bytebase
-
Visit Bytebase Console through the browser via your ngrok URL. Log in using your account created from the previous tutorial.
-
Click Projects on the top bar, and then click Create Project. Fill in
Demo Gitas Project Name,DGTas Key,Standardas Mode and click Create. -
Go to the
Demo Gitproject, and click New DB. -
Fill the form with the following information and click Create.
- Name:
demo_db_git - Environment:
Test - Instance:
MariaDB testIt will create an issue "CREATE DATABASE …" automatically. Because it’s forTestenvironment, the issue will automatically run then becomesDone. The database is created.
- Name:
-
Click New DB again, fill the form with the following information and click Create.
- Name:
demo_db_git - Environment:
Prod - Instance:
MariaDB prod
It will create an issue "CREATE DATABASE …" automatically. Because it’s for
Prodenvironment, the issue will require manual rollout. Click Rollout to run then becomesDone. The database is created. - Name:
Step 3 - Connect Bytebase with GitHub.com
-
Click Settings on the top bar, and then click Workspace > Version Control. Choose GitHub.com and click Next.

-
Follow the instructions within STEP 2, and in this tutorial, we will use a personal account instead of an organization account. The configuration is similar.

-
Go to your GitHub account. Click Settings on the dropdown menu.

-
Click Developer Settings at the bottom of the left side bar. Click OAuth Apps, and click New OAuth App.

-
Fill Application name and then copy the Homepage and Authorization callback URL in Bytebase and fill them. Click Register application.
-
After the OAuth application is created successfully. Click Generate a new client secret. Copy Client ID and this newly generated client secret and paste them back in Bytebase.


-
Click Next. You will be redirected to the confirmation page. Click Confirm and add, and the Git provider is successfully added.

Step 4 - Enable GitOps workflow with MariaDB
-
Go to project
Demo Git, click GitOps, and choose GitOps Workflow. Click Configure GitOps.
-
Choose GitHub.com - the provider you just added. It will display all the repositories you can manipulate. Choose
test-bb-mariadb-gitops. -
Keep the default setting, and click Finish. The GitOps workflow is successfully enabled.

Step 5 - Change schema for MariaDB by pushing SQL schema change files to GitHub
-
In your GitHub repository
test-bb-mariadb-gitops, create a folderbytebase, then create a subfolderprod, and create an sql file following the pattern{{ENV_ID}}/{{DB_NAME}}##{{VERSION}}##{{TYPE}}##{{DESCRIPTION}}.sql. It is the default configuration for file path template setting under project version control.prod/demo_git_db##2023061614300000##ddl##create_t2.sqlprodcorresponds to{{ENV_ID}}demo_git_dbcorresponds to{{DB_NAME}}2023061614300000corresponds to{{VERSION}}ddlcorresponds to{{TYPE}}create_t2corresponds to{{DESCRIPTION}}
Paste the sql script in it.
CREATE TABLE t2( id INT NOT NULL, PRIMARY KEY(id) ) -
Commit and push this file.
-
Go to Bytebase, and go into project
Demo Git. You’ll find there is a newPush Eventand a new issue created.
-
Click the issue link, and you’ll see:
- The issue is created via
GitHub.com. - The issue is waiting for your rollout because it’s on
Prodenvironment where manual rollout is required by default. - The SQL is exactly the one we have committed to the GitHub repository.
- The Creator is
Workspace Admin, because the GitHub user you use to commit the change has the same email address found in the Bytebase member list.
- The issue is created via
-
Click Rollout, and the SQL will execute. The issue will be
Done. -
Click View change, you could view the schema diff.
-
You may try with your
Testenvironment, the only difference is that you don’t need to rollout the issue manually.
If you have Enterprise Plan. Go to GitHub repository, you will see besides your committed sql, there is a .demo_git_db##LATEST.sql file. Because you have configured Schema path template before, Bytebase will write back the latest schema to that specified path after completing the schema change. Thus you have access to an update-to-date full schema at any time.
Summary and Next
Now you have tried out GitOps workflow, which will store your MariaDB schema in GitHub and trigger the change upon committing the change to the repository, to bring your MariaDB change workflow to the next level of Database DevOps - Database as Code.
In real world scenario, you might have separate features and main branches corresponding to your dev and production environment, you can check out GitOps with Feature Branch Workflow to learn the setup. Have a try and look forward to your feedback!