Database GitOps with GitLab CI
This is part of our database GitOps series with Bytebase:
- Database GitOps with GitHub Actions
- Database GitOps with Azure DevOps Pipeline
- Database GitOps with GitLab CI (this one)
- Database GitOps with Bitbucket Pipelines
This tutorial shows you how to build an database GitOps workflow using GitLab CI and Bytebase API. You'll learn to create a streamlined database release workflow where you can:
- Submit schema migrations through GitLab
- Automatically run SQL reviews on merge requests
- Auto-create and deploy Bytebase releases when merging to
main
While we use GitLab CI in this guide, you can apply these concepts to other CI platforms like GitHub Actions, Bitbucket Pipelines, or Azure DevOps using the Bytebase API.
While we use PostgreSQL with GitLab CI in this guide, you can apply these concepts to other SQL or NoSQL databases with any CI platforms like GitHub Actions, Bitbucket Pipelines, or Azure DevOps using the Bytebase API.
Repository
https://gitlab.com/bytebase-sample/gitops-example
Prerequisites
Automatic Rollout across environments
Step 1 - Start Bytebase with ngrok
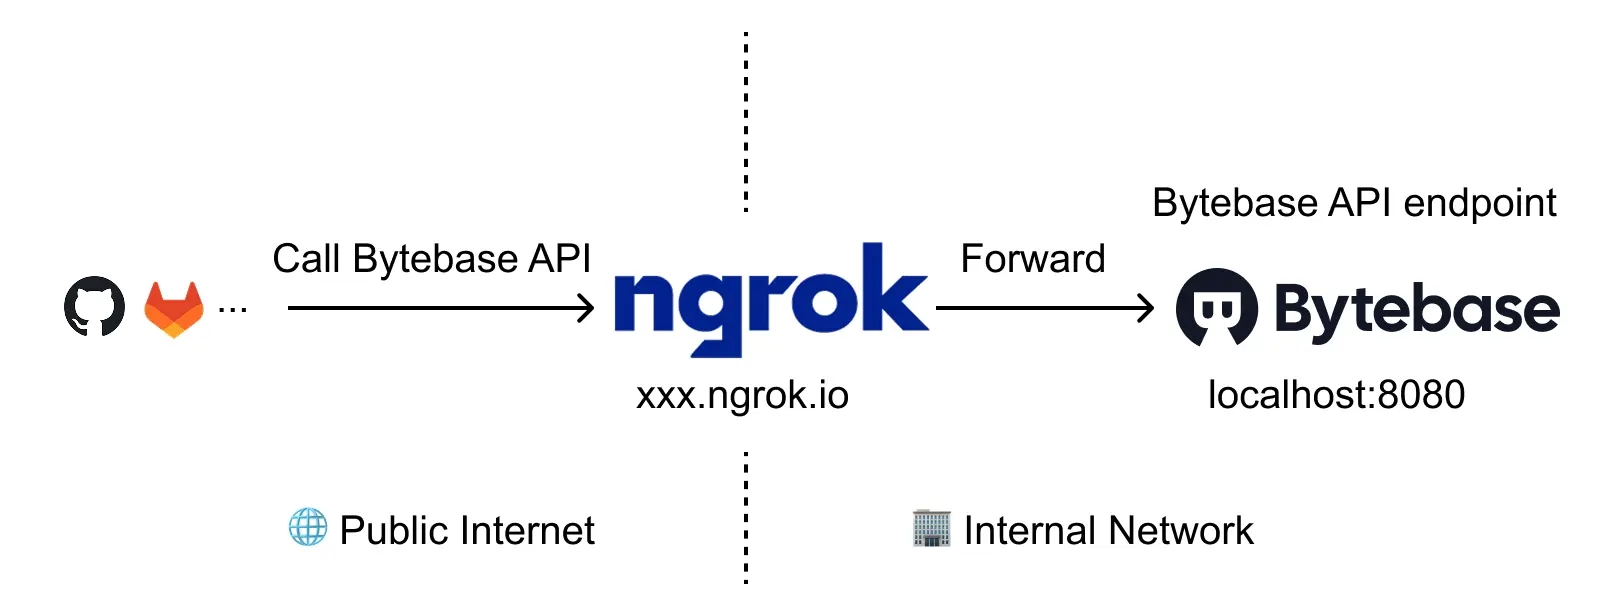
ngrok is a reverse proxy tunnel, and in our case, we need it for a public network address to allow VCS to call the Bytebase API. ngrok we used here is for demonstration purposes.
-
Run Bytebase in Docker with the following command:
docker run --rm --init \ --name bytebase \ --publish 8080:8080 --pull always \ --volume ~/.bytebase/data:/var/opt/bytebase \ bytebase/bytebase:3.6.1 -
Bytebase is running successfully in Docker, and you can visit it via
localhost:8080. Register an admin account and it will be granted theworkspace adminrole automatically. -
Login to ngrok Dashboard and complete the Getting Started steps to install and configure. If you want to use the same domain each time you launch ngrok, go to Cloud Edge > Domains, where you'll find the domain
<<YOURS>>.ngrok-free.applinked to your account. -
Run the ngrok command
ngrok http --domain=<<YOURS>>.ngrok-free.app 8080to start ngrok with your specific domain, and you will see the output displayed below: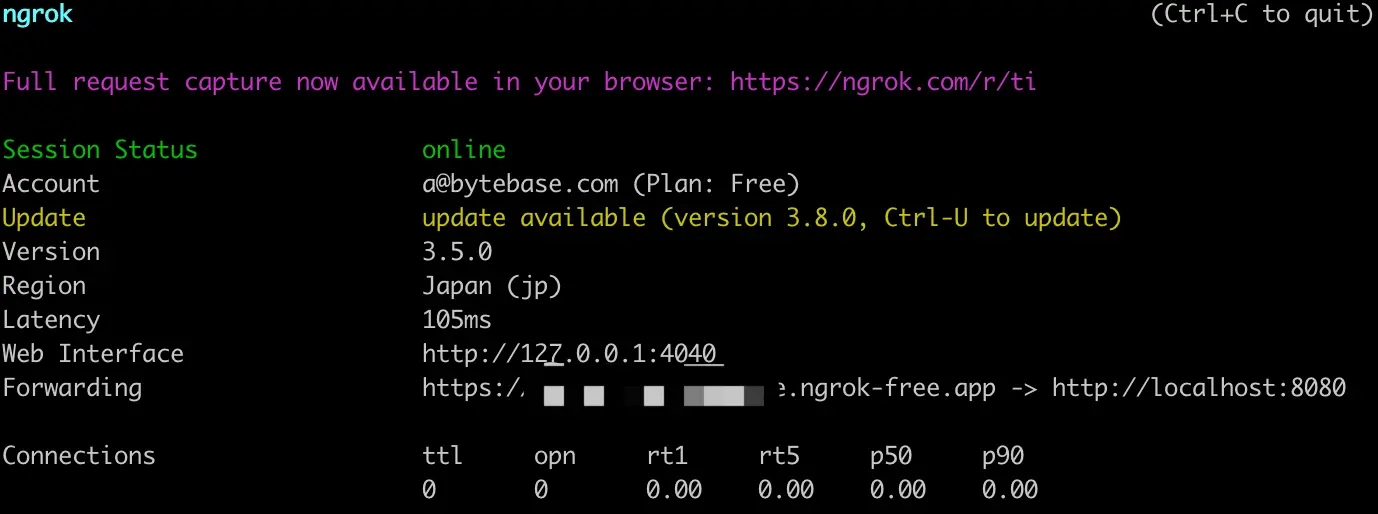
-
Log in Bytebase and click the gear icon (Settings) on the top right. Click General under Workspace. Paste
<<YOURS>>.ngrok-free.appas External URL under Network section and click Update.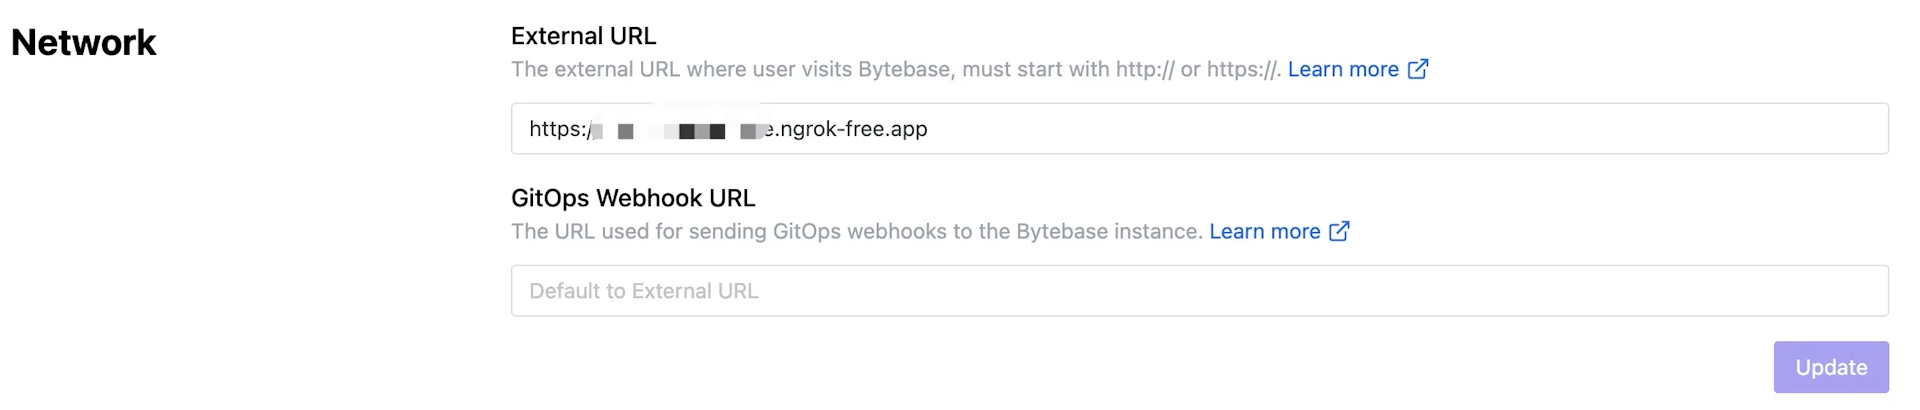
-
Now you can access Bytebase via
<<YOURS>>.ngrok-free.app.
Step 2 - Create Service Account
-
Log in as
Workspace Admin, and go to IAM & Admin > Users & Groups. Click + Add User, fill in withapi-sample, choose theWorkspace DBArole sufficient for this tutorial and click Confirm.
-
Find the newly created service account and Copy Service Key. We will use this token to authenticate the API calls.

If you have Enterprise Plan, you can create a Custom Role for the service account which require fewer permissions, and assign this role instead of DBA:
- plans.create
- plans.get
- plans.preview
- releases.check
- releases.create
- releases.get
- rollouts.create
- rollouts.get
- rollouts.list
- sheets.create
- sheets.get
- taskRuns.create
- planCheckRuns.list
- planCheckRuns.run
Step 3 - Configure SQL Review in Bytebase
Since you will need to run SQL review on your PRs, you need to configure the SQL review in Bytebase.
-
Go to CI/CD > SQL Review, click Create SQL Review.
-
Select the
Sample Templateand click Next.
-
Select
Prodenvironment as the attached resources and click Confirm. Now the SQL review is enabled for theProdenvironment.
Note: Usually we enable SQL review for Prod environment as above. In this demo, we would switch to enable it for Test to fit the following GitLab CI workflow.
Step 4 - Copy the Example Repository and Configure Variables
-
Create a new repository and copy the configuration files from https://gitlab.com/bytebase-sample/gitops-example. There are two ymls in this repository:
.gitlab-ci.yml: The CI pipeline for the repository which includes the SQL review and release creation.bytebase-review.yml: Lint the SQL migration files after the MR is created.bytebase-release.yml: Create a release in Bytebase after the MR is merged to themainbranch.
-
Go into
bytebase-review.ymlandbytebase-release.yml. In theenvsection, replace the variable values with your own and commit the changes.- BYTEBASE_URL: your ngrok url
- BYTEBASE_SERVICE_ACCOUNT:
api-example@service.bytebase.com(the service account you created in the previous step) - BYTEBASE_SERVICE_ACCOUNT_SECRET: the password of the service account
Step 5 - Create the migration files
To create migration files to trigger release creation, the files have to match the following pattern:
- A migration file should start with digits, which is also its version. e.g.
202505121650_create_table_t1.sql. - A migration file may end with
ddlordmlto indicate its change type. If it doesn't end with any of the two, its change type is DDL by default.
-
Within your repository, create the following migration files under
migrationdirectory:- 202505121650_create_table_t1.sql
CREATE TABLE t1 ( id SERIAL PRIMARY KEY, name TEXT ); -
Commit to a new branch and create a merge request, the
sql-reviewpipeline will be triggered. There will be a warning in the SQL review result.
-
According to the SQL review result, you can do some changes to the SQL files and push to the branch. Then you should see the SQL review has passed. There are no warnings in the SQL review result.
CREATE TABLE t1 ( id SERIAL PRIMARY KEY, name TEXT NOT NULL ); -
When the SQL review is passed, you can merge the merge request. The
releasepipeline will be triggered to create a release in Bytebase and then roll out automatically. -
Click into the pipelines, you can see the release pipeline is triggered and passed. Click the number of the pipeline, you can see the stages.


-
If you click the
deploy-to-testand expand the logs, you can follow the links to Bytebase.
Summary
Now you have learned how to database GitOps with GitLab CI. If you want to trigger a release creation with other git providers (e.g. GitHub, Bitbucket, Azure DevOps), you may customize the workflow file.