Online Schema Migration for MySQL
gh-ost is a triggerless online schema migration tool for MySQL. Bytebase leverages gh-ost to migrate MySQL table schemas with little downtime.
All existing online schema change tools operate similarly:
- Create a ghost table in the likeness of your original table.
- Migrate that table while empty, slowly and incrementally copy data from your original table to the ghost table, meanwhile propagating ongoing changes (any
INSERT,DELETE,UPDATEapplied to your table) to the ghost table. - Finally, they replace your original table with the ghost table at the right time.
Requirements and limitations
- MySQL versions 5.7 or greater.
- Enable row-based logging.
- Bytebase currently only supports migrating on the primary.
- Foreign key constraints are not supported.
- Triggers are not supported.
For an exhaustive list, please refer to this doc.
How to use
Step 1 - Create an edit schema issue
- Click Edit Schema, choose the database, input SQL and click Preview issue.
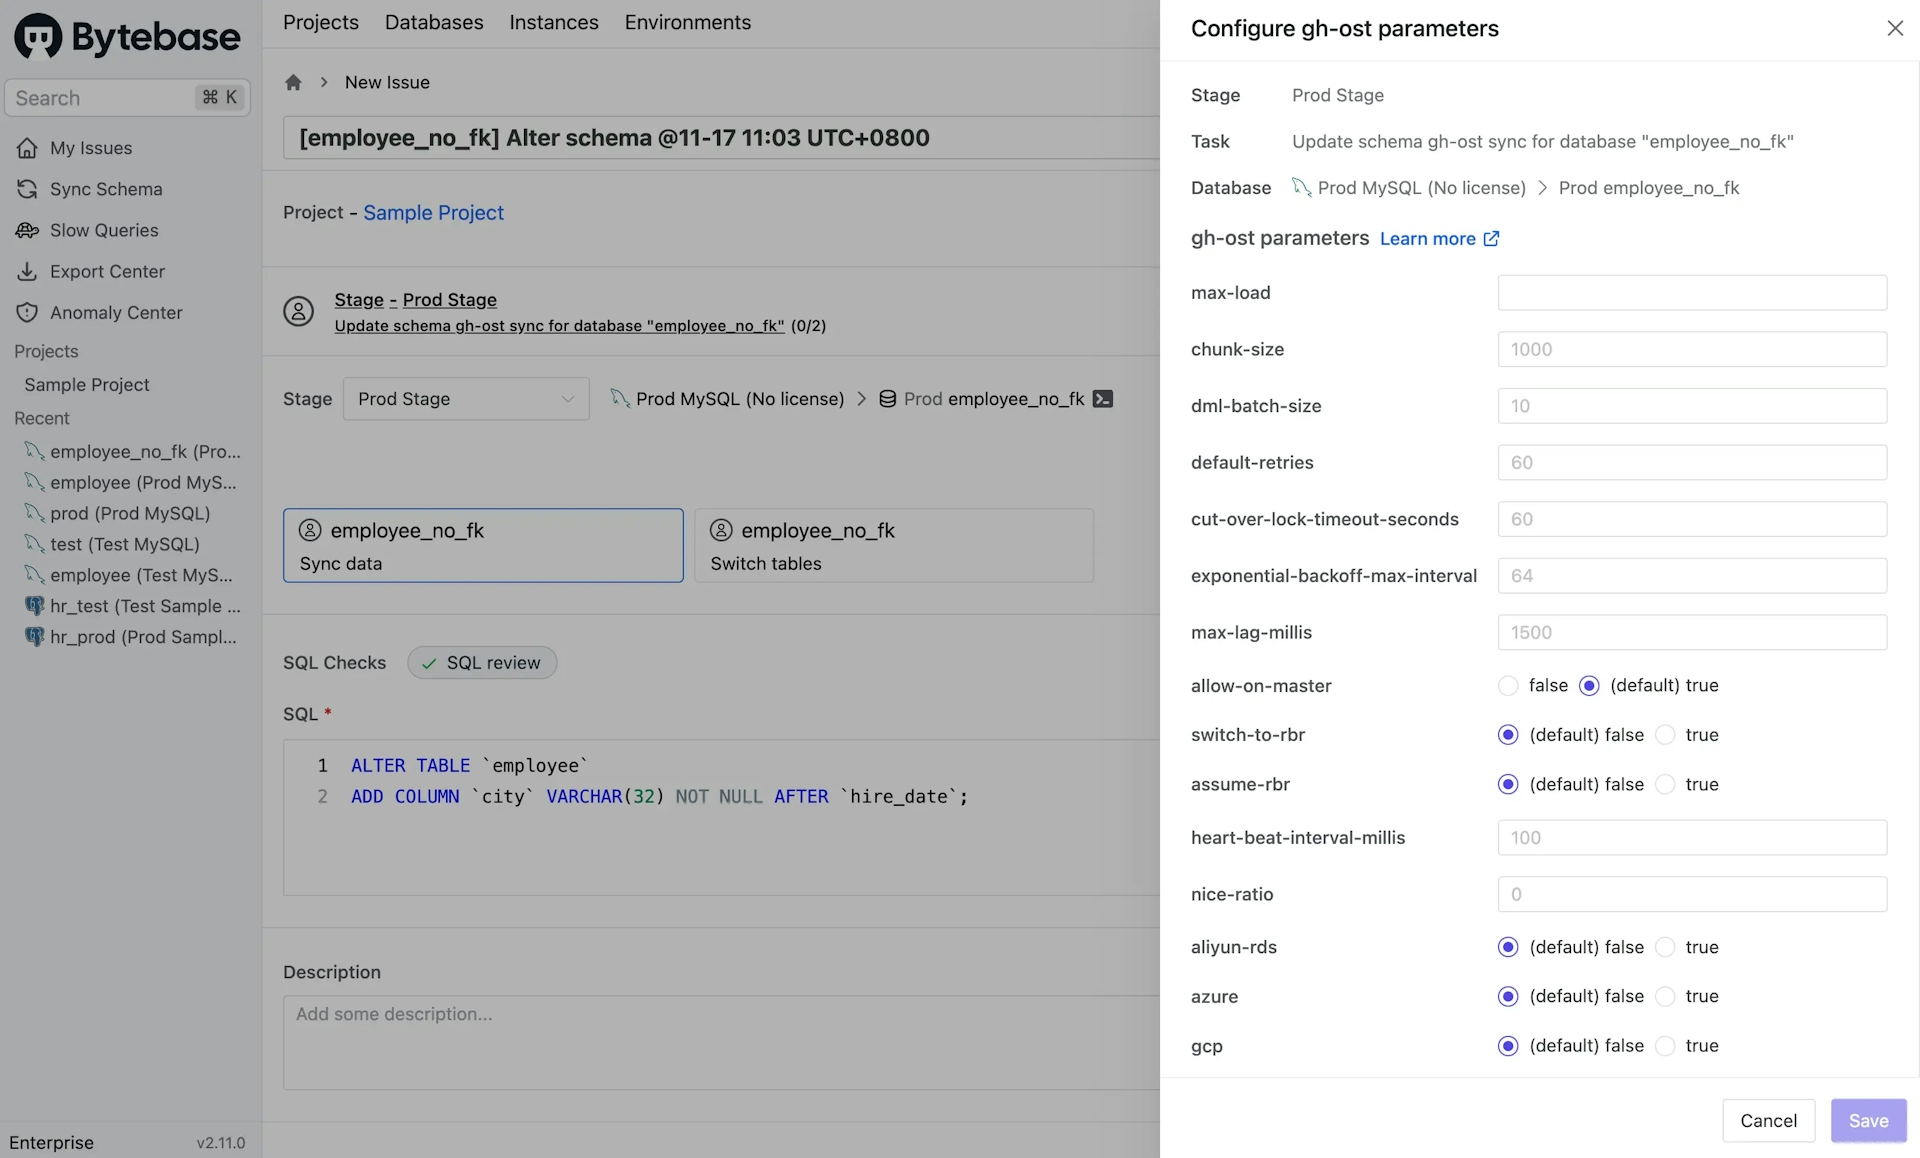
- Before clicking Create, turn on Online migration. You may click Configure to customize the parameters.
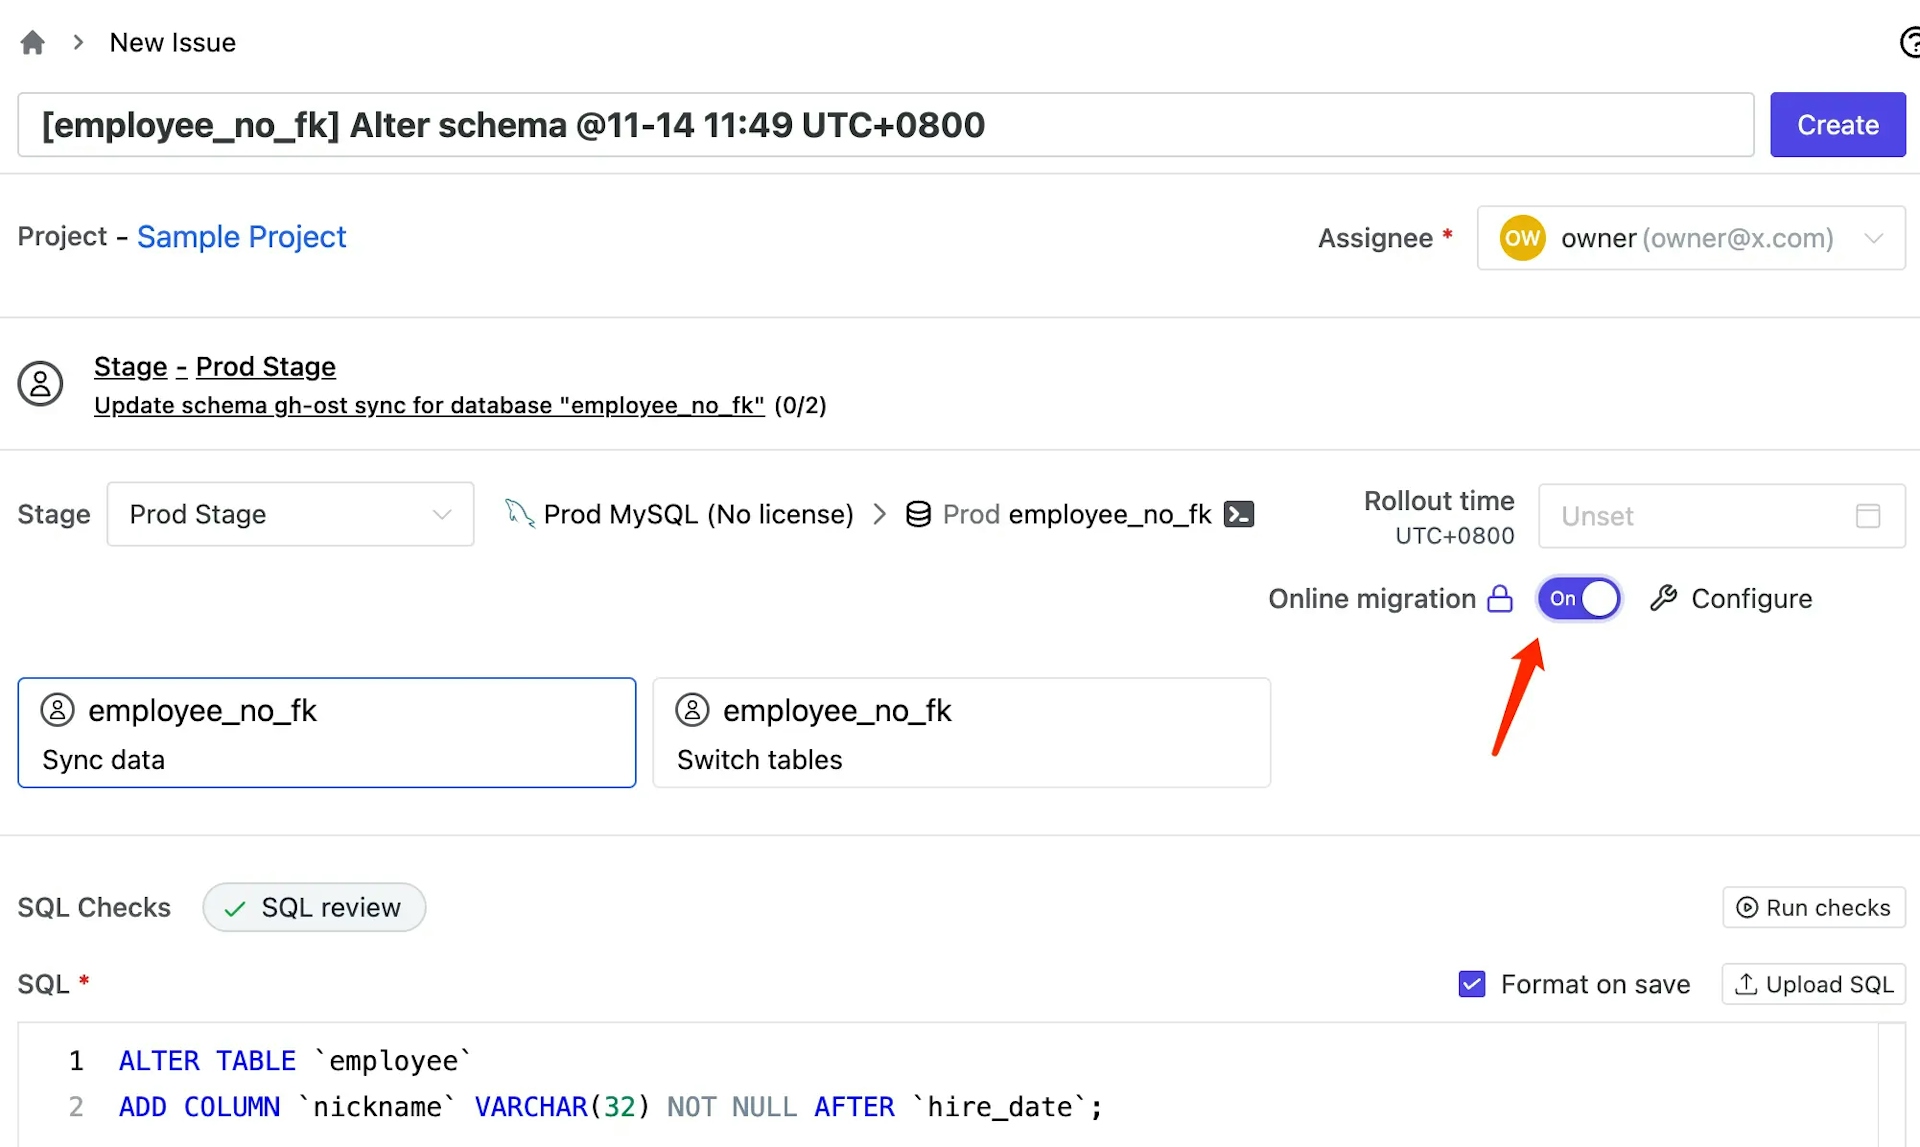
The online migration mode has two tasks:
- Sync data: sync your data to the ghost table.
- Switch tables: replace your original table with the ghost table.
- Click Sync data and you'll find your SQL in the editor. After verifying that, click Create.
Step 2 - Rollout the sync data task
After creating the issue, the Sync data task is waiting for approval (if custom approval flow is configured) or waiting for rollout. Follow the order to roll out the task.
The Sync data task reads rows on the original table and writes them to the ghost table, meanwhile propagating changes in the original table to the ghost table so that the ghost table can catch up with the original table.
Behind the scenes, gh-ost will create two tables:
- The changelog table:
~yourtablename_{timestamp}_ghc - The ghost table:
~yourtablename_{timestamp}_gho
If anything goes wrong, manually drop these two tables: ~yourtablename_{timestamp}_gho and ~yourtablename_{timestamp}_ghc, then retry.
Step 3 - Rollout the switch tables task
Depending on your table size, the Sync data task could take some time to process. When the difference between the ghost table and the original table is small enough, the task automatically completes.
The Switch tables task automatically renames yourtablename, ~yourtablename_{timestamp}_gho to ~yourtablename_{timestamp}_del, yourtablename respectively to switch the original table and the ghost table.
After the Sync data task completes, the Switch tables task is waiting for approval (if custom approval flow is configured) or waiting for rollout. Follow the order to roll out the task.
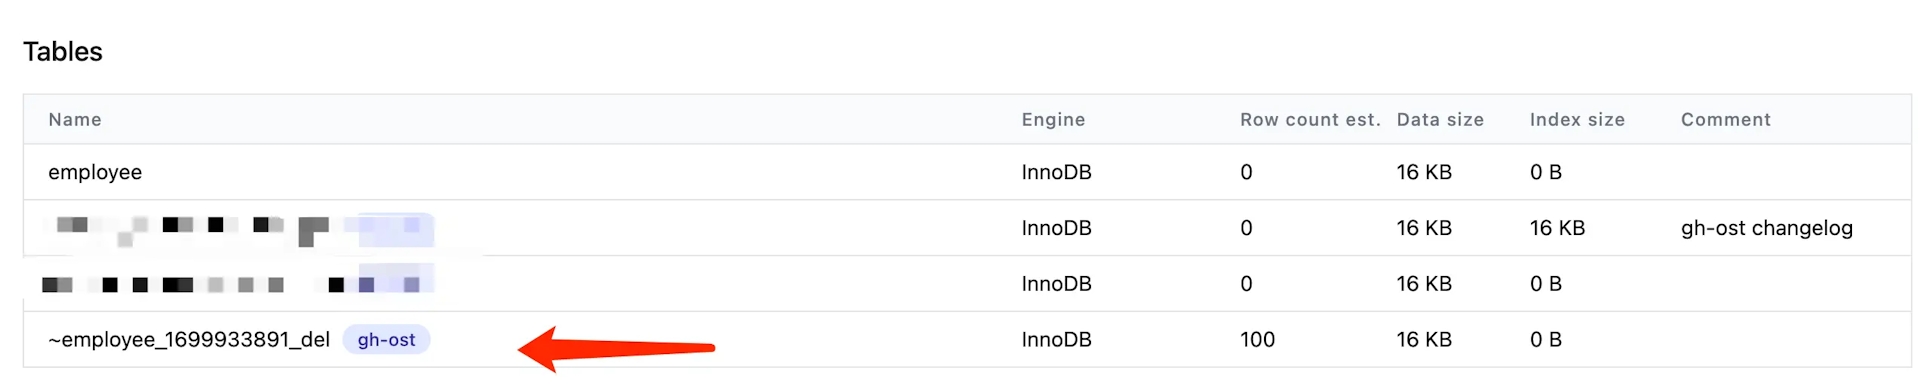
Step 4 - Delete ~yourtablename_{timestamp}_del after migration
After migration, the original table is renamed to ~yourtablename_{timestamp}_del. Make sure there is no data loss, then manually drop the original table if you wish. You can check the table by clicking Show Bytebase reserved tables on the database page.

Interact with gh-ost
Gh-ost listens on a UNIX socket file.
The UNIX socket file name is /tmp/gh-ost.{taskID}.{databaseID}.{databaseName}.{tableName}.sock
To find the UNIX socket file, you must acquire the database and task id.
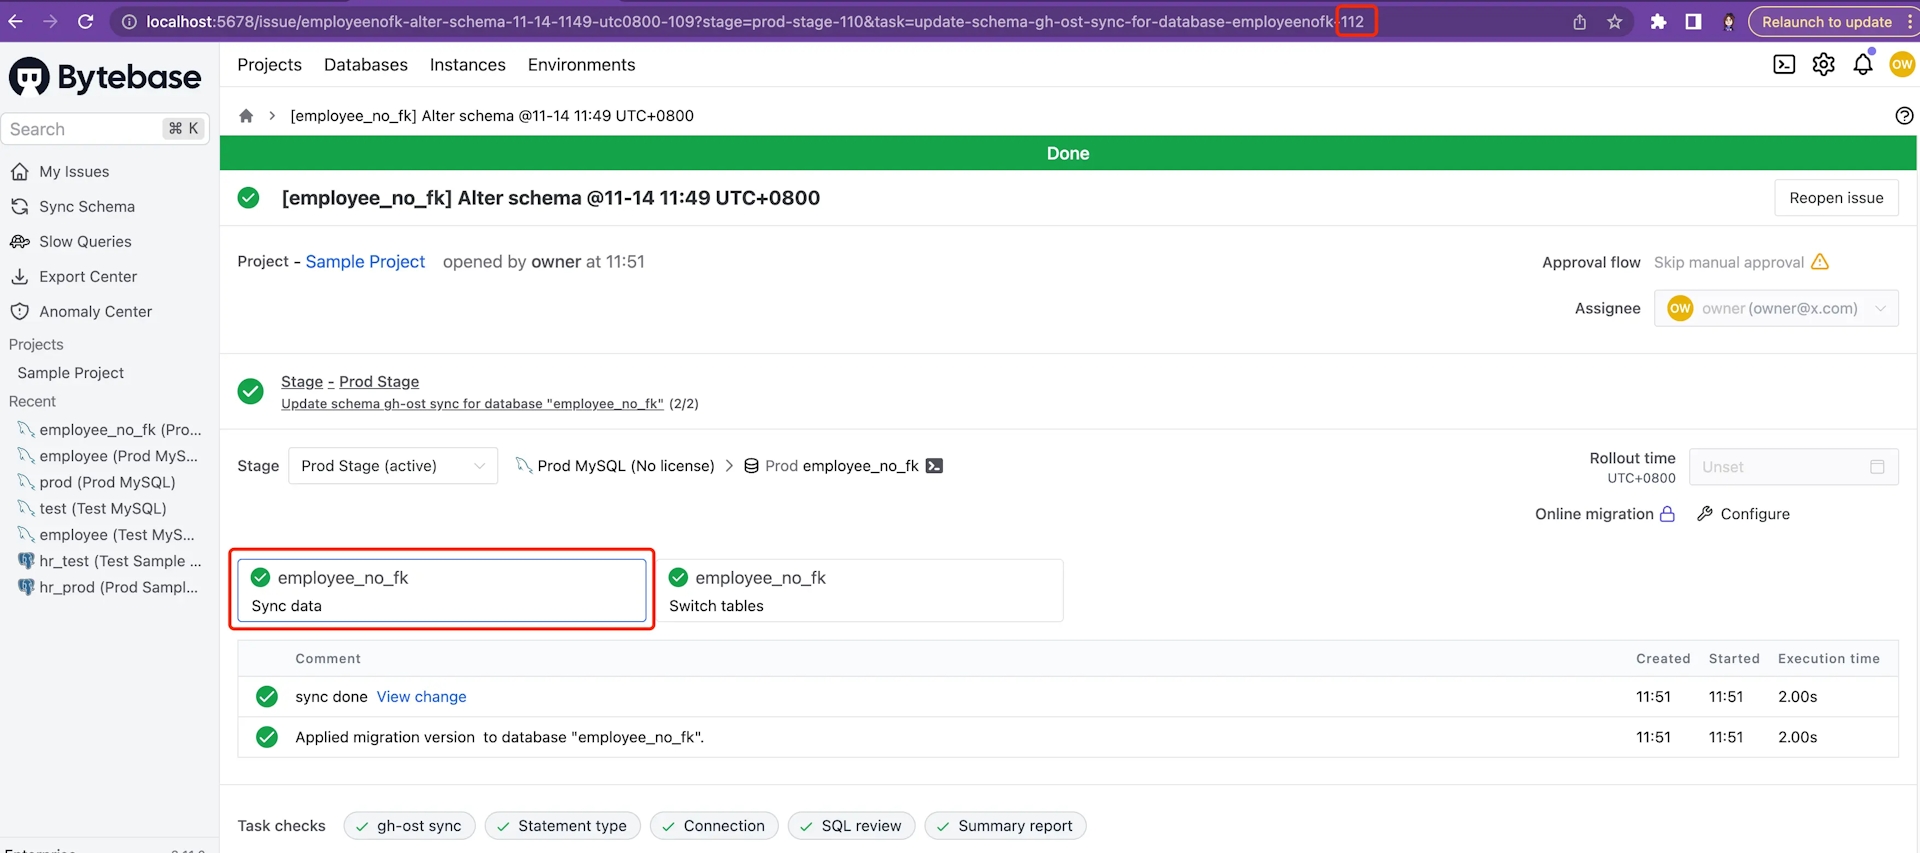
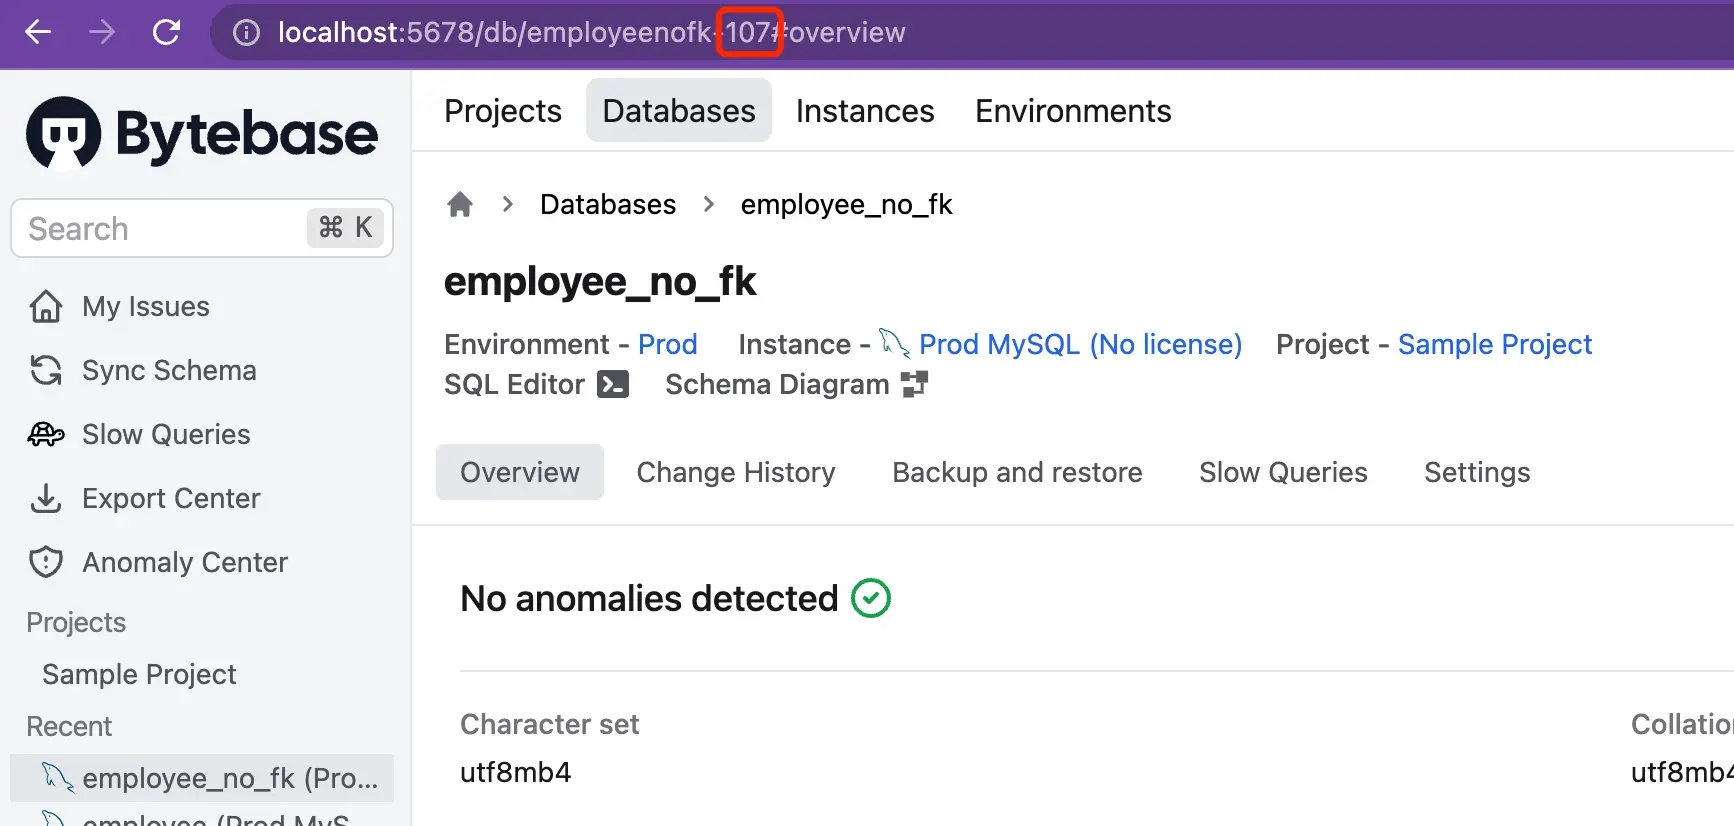
In this example, my socket file name is /tmp/gh-ost.112.107.employeenofk.employee.sock
Show gh-ost status
Replace taskID, databaseID, databaseName and tableName accordingly.
If Bytebase is running on docker, show gh-ost status with the command below:
docker exec -it bytebase /bin/shecho "status" | nc local:/tmp/gh-ost.taskID.databaseID.databaseName.tableName.sockOtherwise, execute the command below:
echo "status" | nc -U /tmp/gh-ost.taskID.databaseID.databaseName.tableName.sockKill gh-ost manually
Replace taskID, databaseID, databaseName and tableName accordingly.
Sometimes you want to kill gh-ost. Maybe it’s because gh-ost is so slow, or you find a typo in your sql statement. To kill gh-ost, you issue "panic" to the UNIX socket file on which gh-ost listens.
If Bytebase is running on docker, execute the command below to kill gh-ost:
docker exec -it bytebase /bin/shecho "panic" | nc local:/tmp/gh-ost.taskID.databaseID.databaseName.tableName.sockOtherwise, run the command below:
echo "panic" | nc -U /tmp/gh-ost.taskID.databaseID.databaseName.tableName.sockAfter that, you have to do the cleanup.
Remove these two files:
/tmp/gh-ost.taskID.databaseID.databaseName.tableName.sock/tmp/gh-ost.taskID.databaseID.databaseName.tableName.postponeFlag
Drop these two tables:
~yourtablename_{timestamp}_gho~yourtablename_{timestamp}_ghc