Database Change Management with Risk-Adjusted Approval Flow
Bytebase provides a basic yet configurable rollout mechanism by default. This means that manual rollout is skipped for Test environments and required for Prod environments.
However, for more complicated enterprise-level cases, users may need different approval flows to handle database changes according to different potential risks. For example, DDL in Prod environments is considered high risk, while DML in Test environments is low risk. Additionally, users may need to involve roles other than DBA/Developer/Project Leader, such as Testers.
This tutorial will walk you through how to create custom approval flows based on self-defined risk rules and how to add new roles to be involved.
Feature included
- Custom approval flow
- Risk center
- Custom roles
Prerequisites
- Have Docker installed.
Step 1 Prepare the databases and users
-
While the docker is running, run this following command to start a Bytebase instance. Here we name it
bytebase-afand use~/.bytebase/data-affolder to store the meta data.docker run --rm --init \ --name bytebase \ --publish 8080:8080 --pull always \ --volume ~/.bytebase/data:/var/opt/bytebase \ bytebase/bytebase:2.15.0 -
Start two MySQL instances by running these two commands:
mysqld-test,3307mysqld-prod,3308
docker run --name mysqld-test \
  --publish 3307:3306 \
  -e MYSQL_ROOT_HOST=172.17.0.1 \
  -e MYSQL_ROOT_PASSWORD=testpwd1 \
  mysql/mysql-server:8.0
docker run --name mysqld-prod\
--publish 3308:3306 \
-e MYSQL_ROOT_HOST=172.17.0.1 \
-e MYSQL_ROOT_PASSWORD=testpwd1 \
mysql/mysql-server:8.0- Open
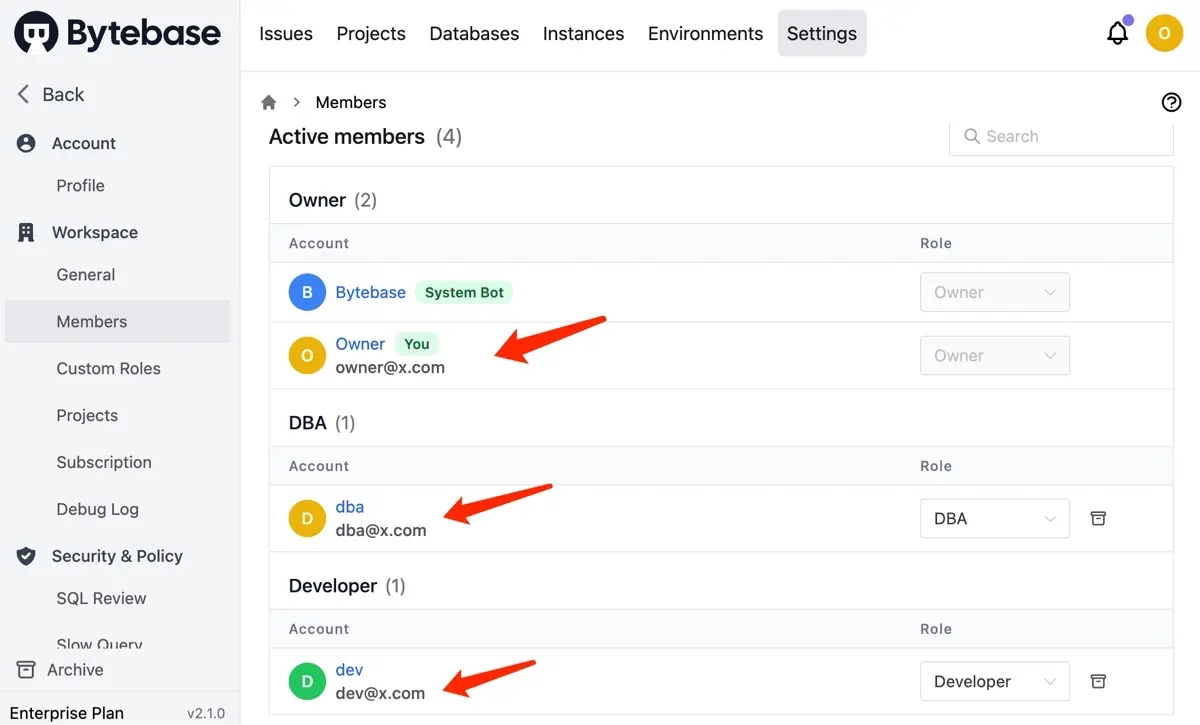
localhost:8080in a browser, register as an admin and you will be granted as Workspace Admin role. Click the avatar on the right top, and click Settings. You'll see you have the roleOwner. Click Start free trial on the left bottom to upgrade to Enterprise Plan. - Click Workspace > Members on the left bar. Add one
[email protected]as DBA, and one[email protected]as Developer. You need click them and give the default password12345.
-
Click Instances on the top bar and then click Add instance, choose
MySQL. Here you need to add two instances:- Instance Name:
MySQL Test/MySQL Prod - Environment:
Test/Prod - Host or Socket:
host.docker.internal - Port:
3307/3308 - Username:
root - Password:
testpwd1
- Instance Name:
-
Click Projects on the top bar and then click New Project. Name it
Demo AF, KeyDAPand click Create. -
Go into the project
Demo AF, and click New DB. Fill in with New database name:test_db/ Environment:Test/ Instance:MySQL Testand click Create. It'll create an issue, by default, there isn't any approval flow and since it's for Test environment, it will rollout automatically.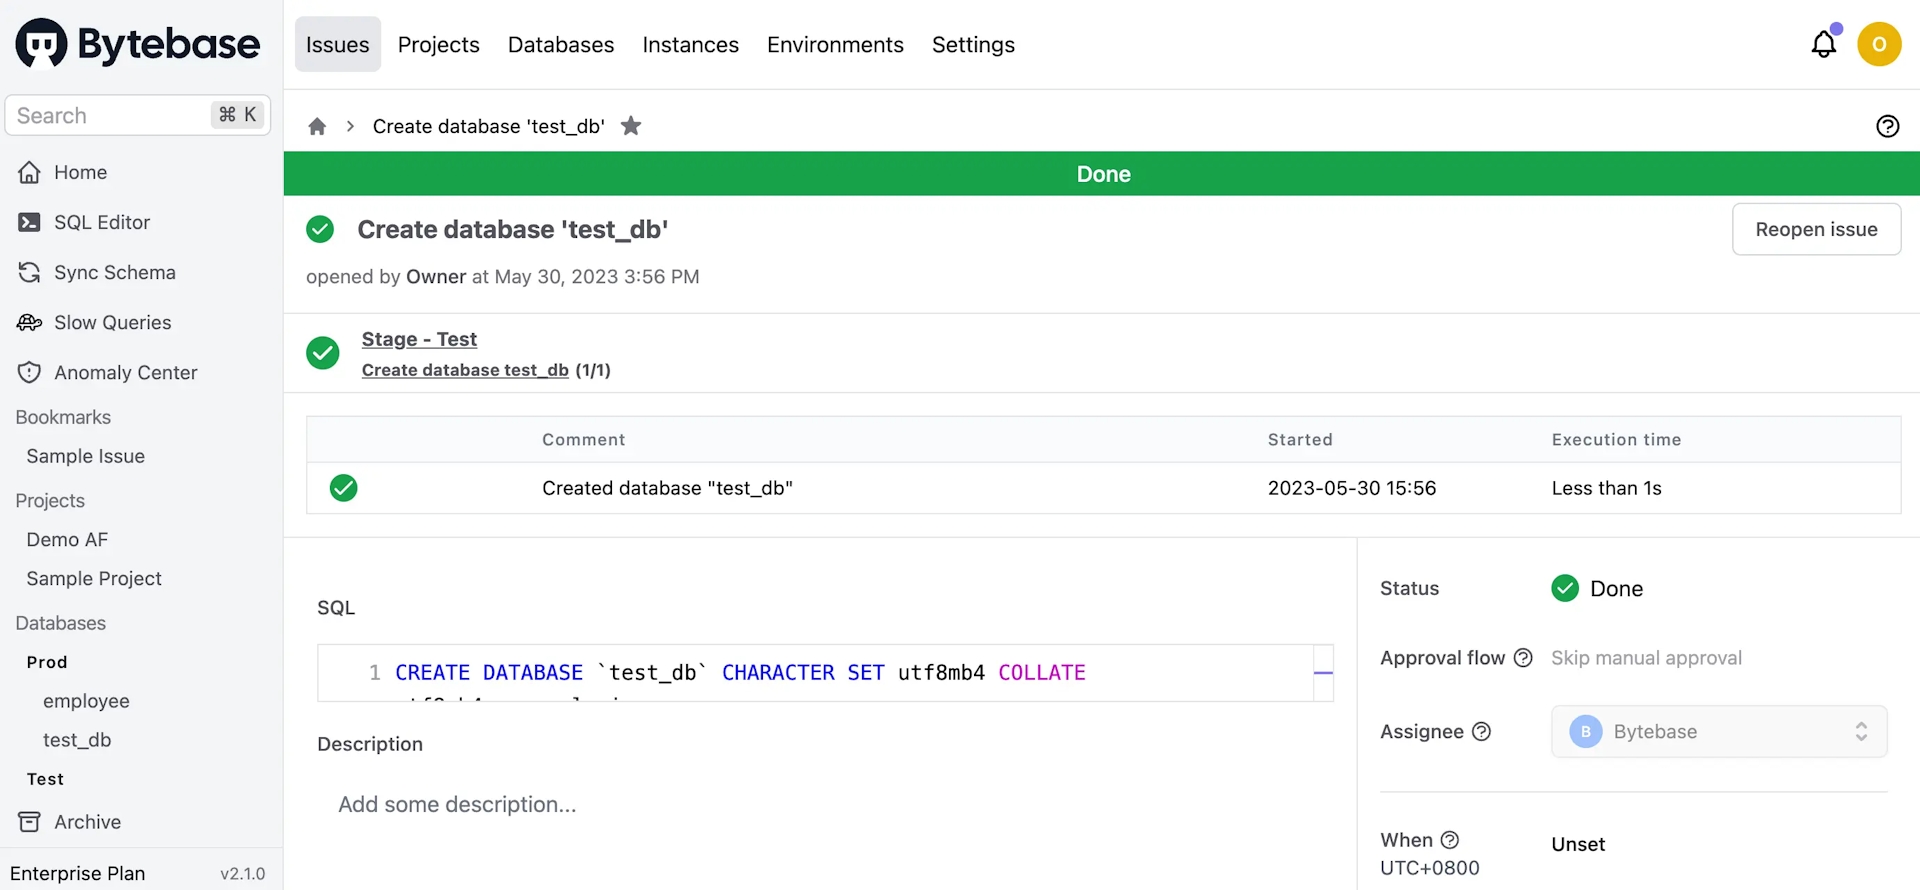
-
Click New DB again. Fill in with New database name:
test_db/ Environment:Prod/ Instance:MySQL Prodand click Create. It'll create an issue, by default there is no approval flow and since it's for Prod environment, you will need to click Rollout. -
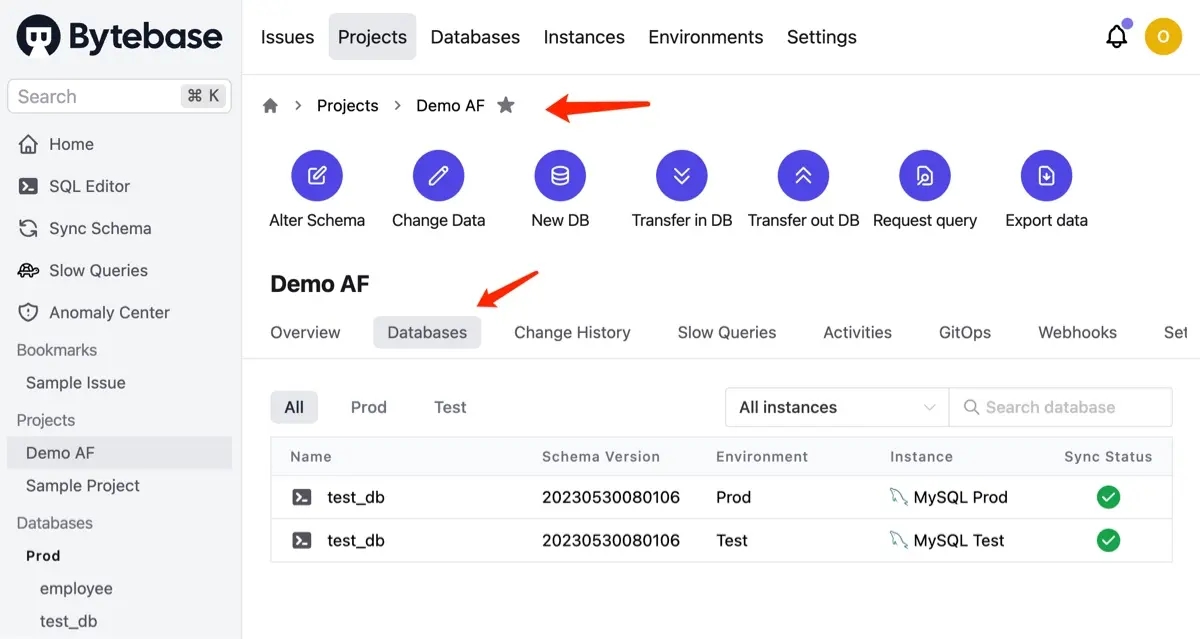
Go back to the project, click Databases. You'll see there're two databases.
Step 2 Run schema change without custom approval flow
-
Logout and login as Developer. Go into the project
Demo AF, click Alter Schema, select both databases, and click Next. -
Click Raw SQL, paste the following SQL and click Preview issue.
CREATE TABLE `t1` (
  `id` INT COMMENT 'ID' NOT NULL,
  `name` VARCHAR(255) NOT NULL,
  PRIMARY KEY (`id`)
);-
It'll redirect to the issue page. Click Apply to other tasks, and click Create. By default, there isn't any approval flow and since it's for Test environment, it will rollout automatically. But for Prod environment, you will need to wait for the Assignee
Ownerto rollout. You can click Environments to see the difference for default configuration.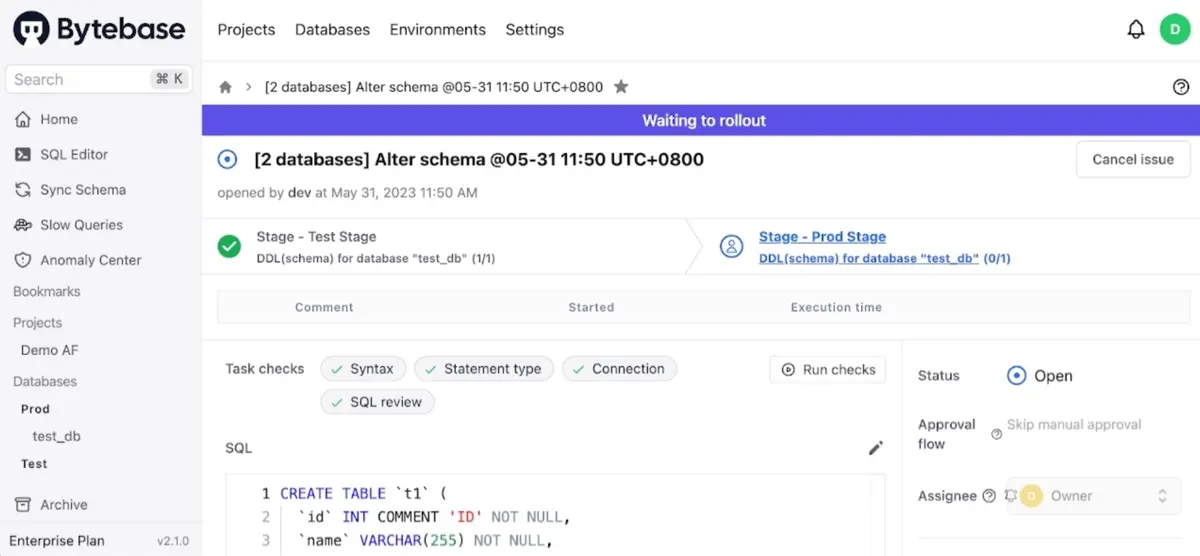
-
Logout and login as Owner. Go into the project
Demo AF, find the issue and click Rollout. You can click the View change to see the difference.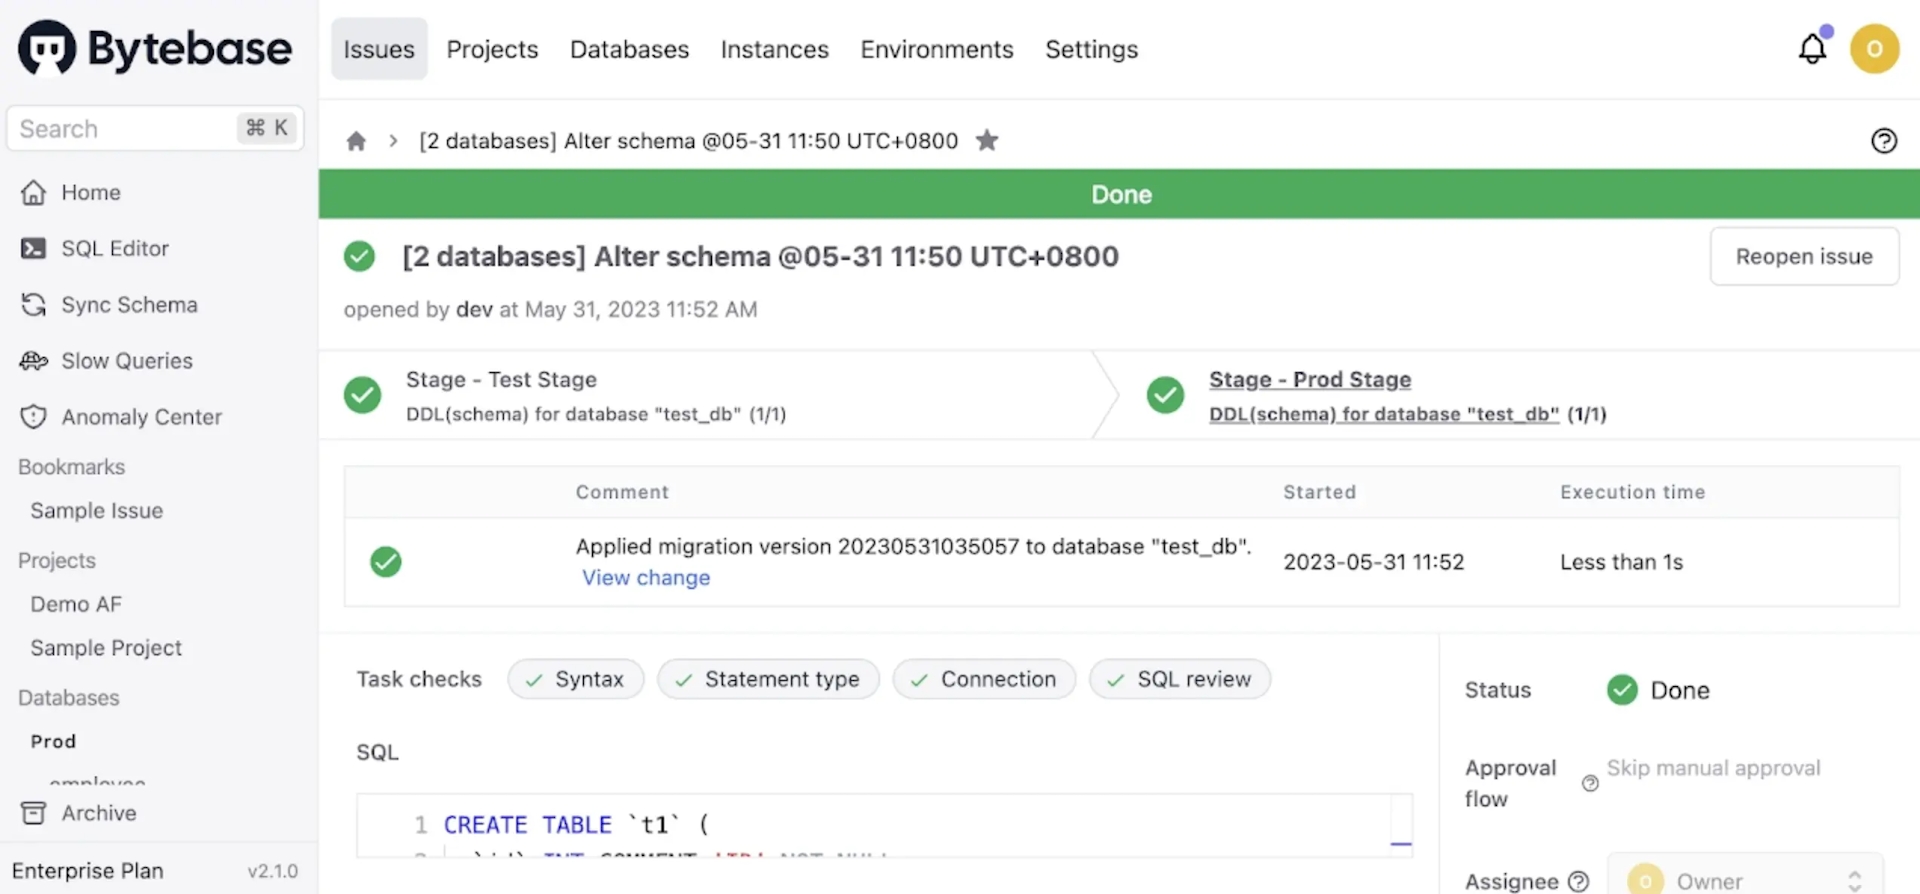
Step 3 Configure a custom approval flow and run a schema change
-
Click Settings on the top bar, and then click Security & Policy > Custom Approval. Choose
Project Owner → DBAfor DDL > High Risk instead ofSkip manual approval.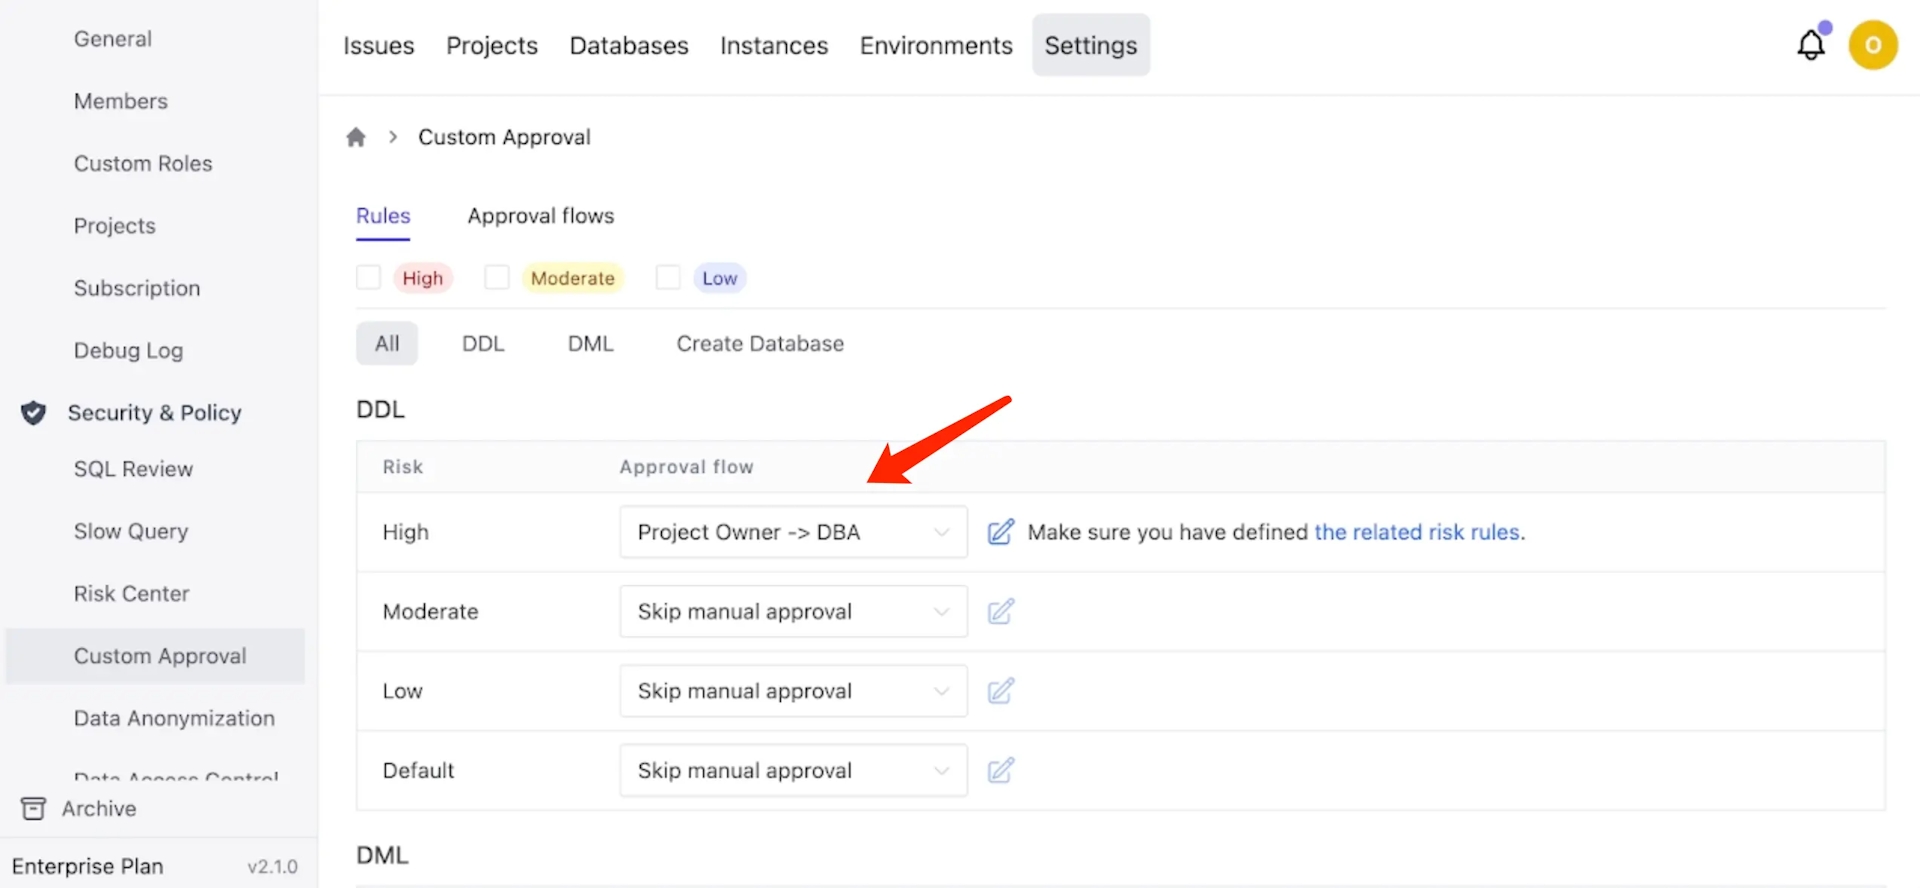
-
Click the related risk rules or Security & Policy > Risk Center. Click Add rule and then click Load on the first row in Templates section. This rule is assigning
Highrisk to all DDL on Prod environment, which will map the corresponding issue to pick the approval flow we just defined under Custom Approval. Click Add.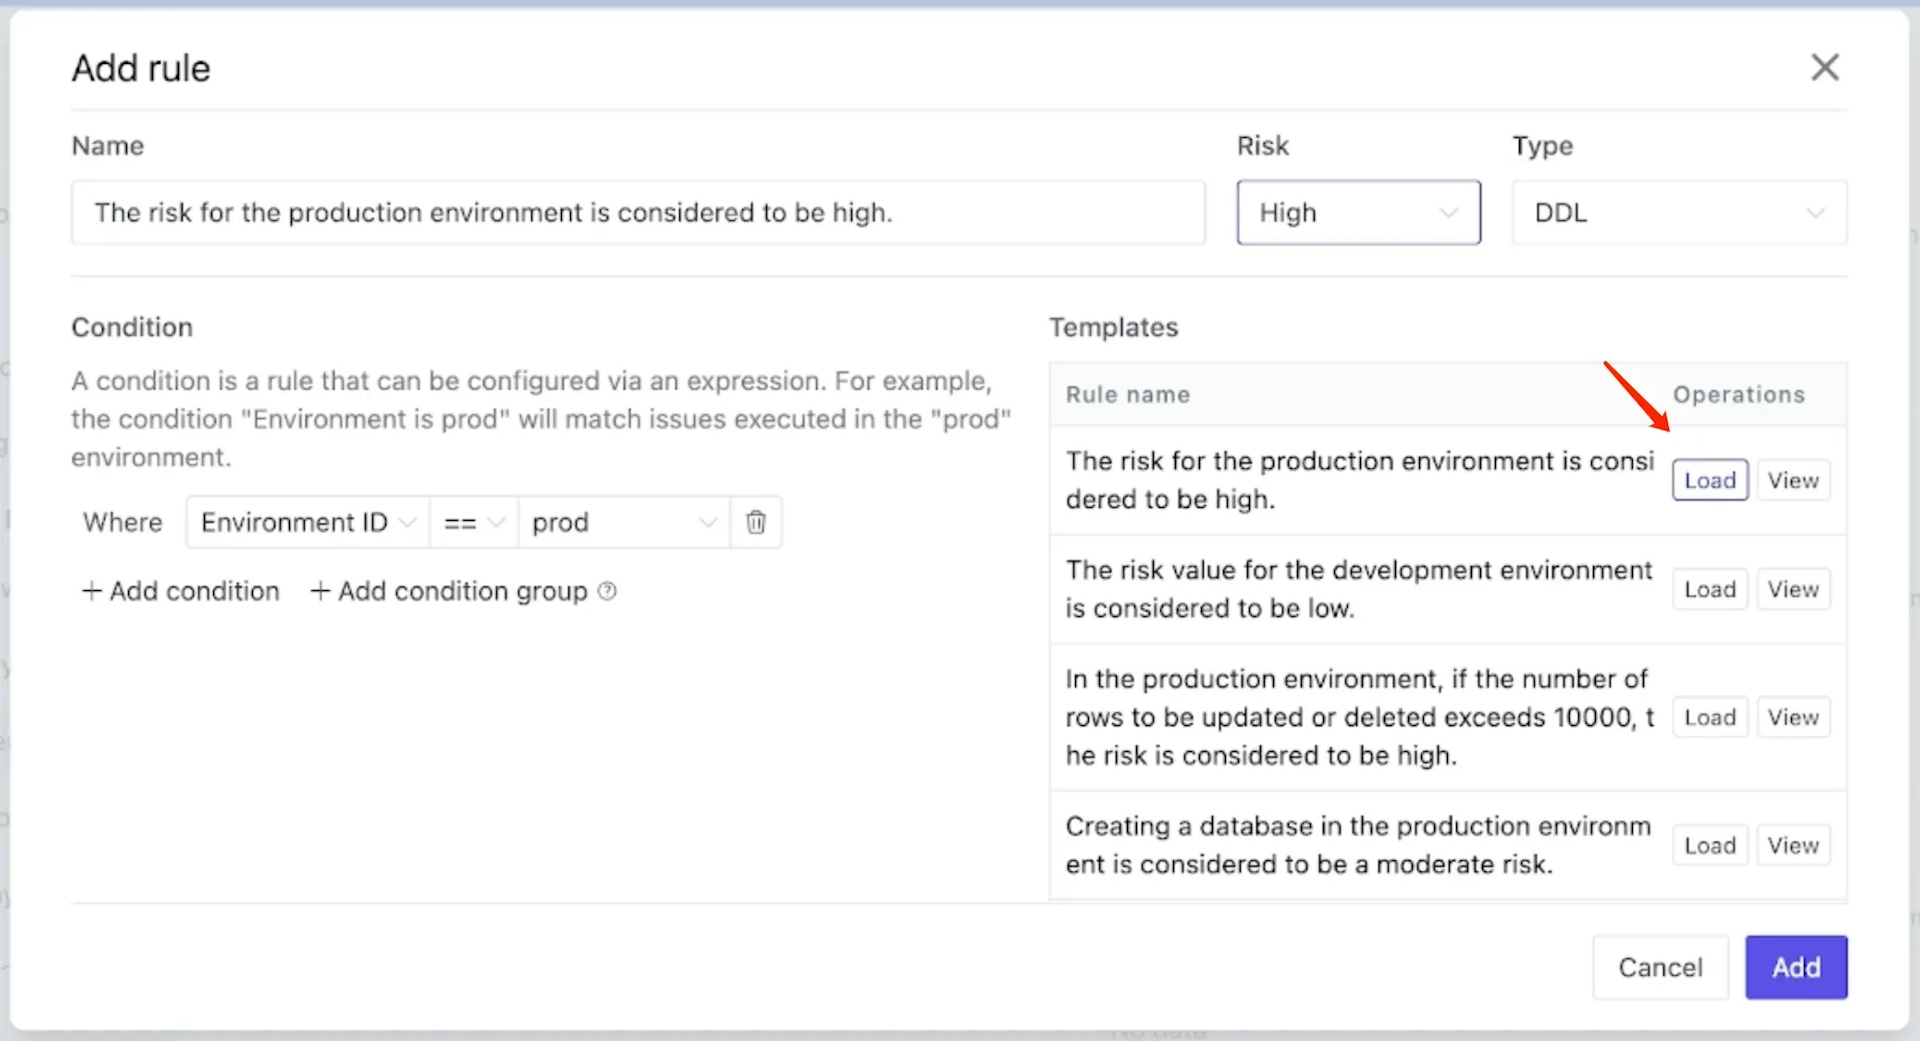
-
Logout and login as Developer. Go into the project
Demo AF, click Alter Schema, select both databases, and click Next. -
Click Raw SQL, paste the following snippet and click Preview issue.
ALTER TABLE `t1` ADD COLUMN (`age` INT NOT NULL);-
It'll redirect to the issue page. Click Apply to other tasks, and click Create. This time, you can see there is an approval flow which follows
Project Owner → DBA. Here comes a question: "But it's not on the Prod environment!" The answer is, since we only do approval flow once, when there is a pipeline, we always take the highest risk one.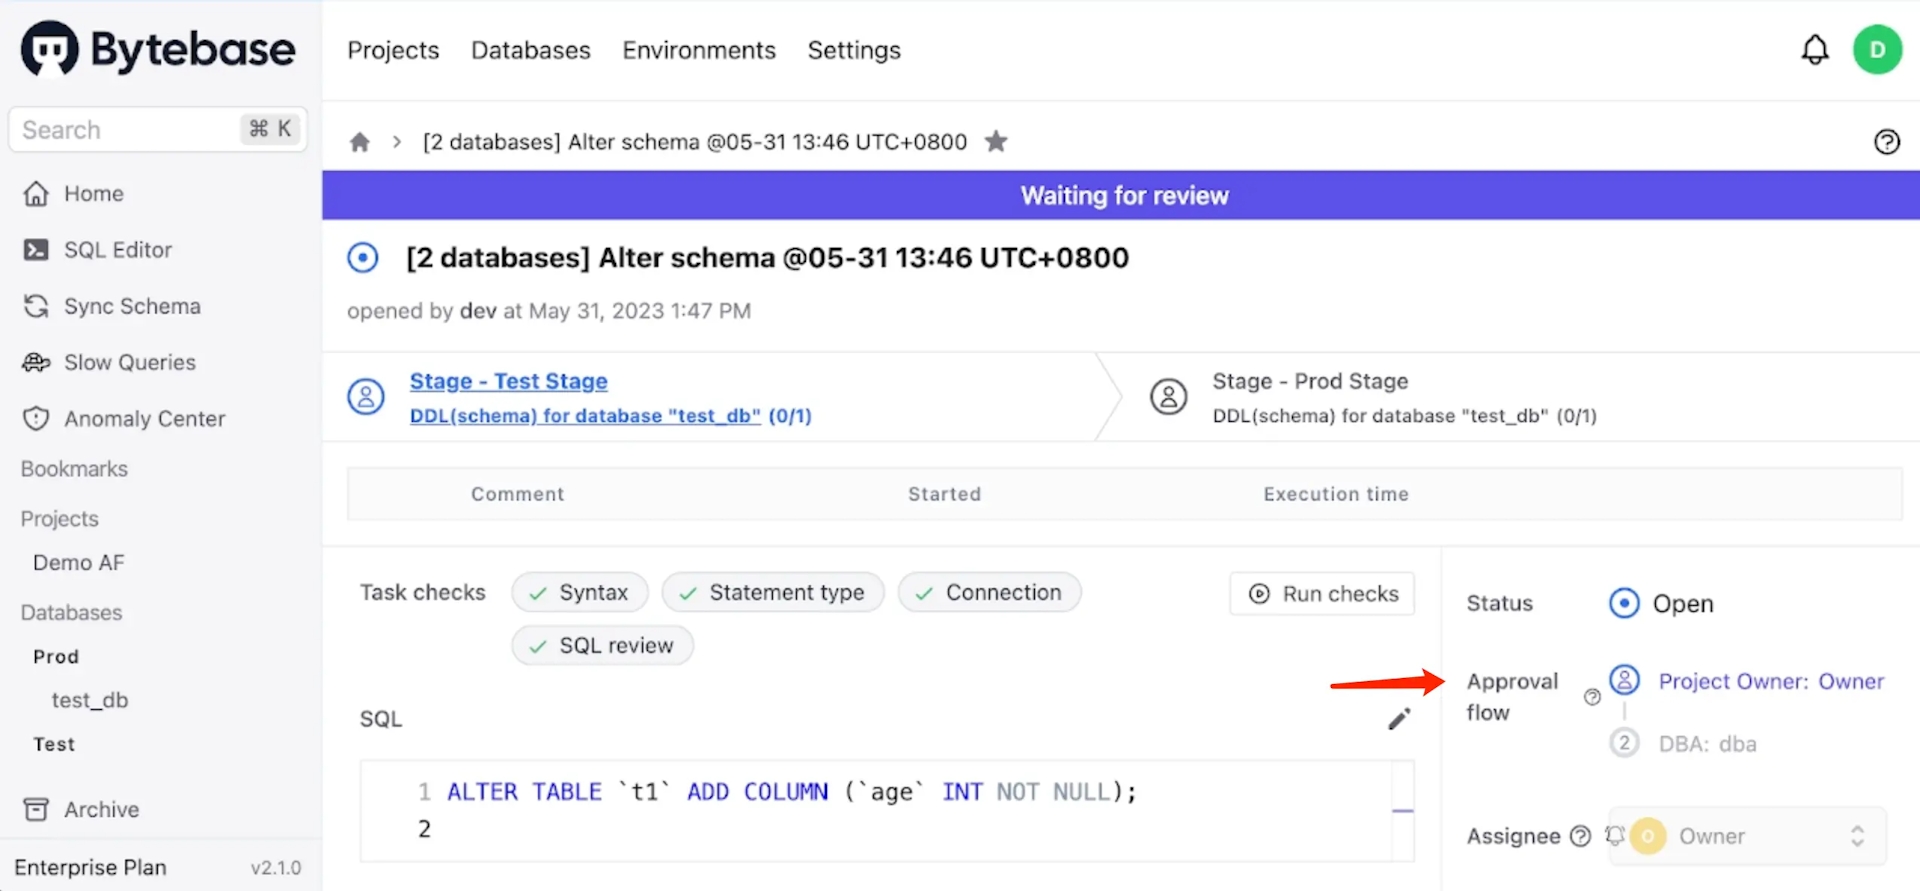
-
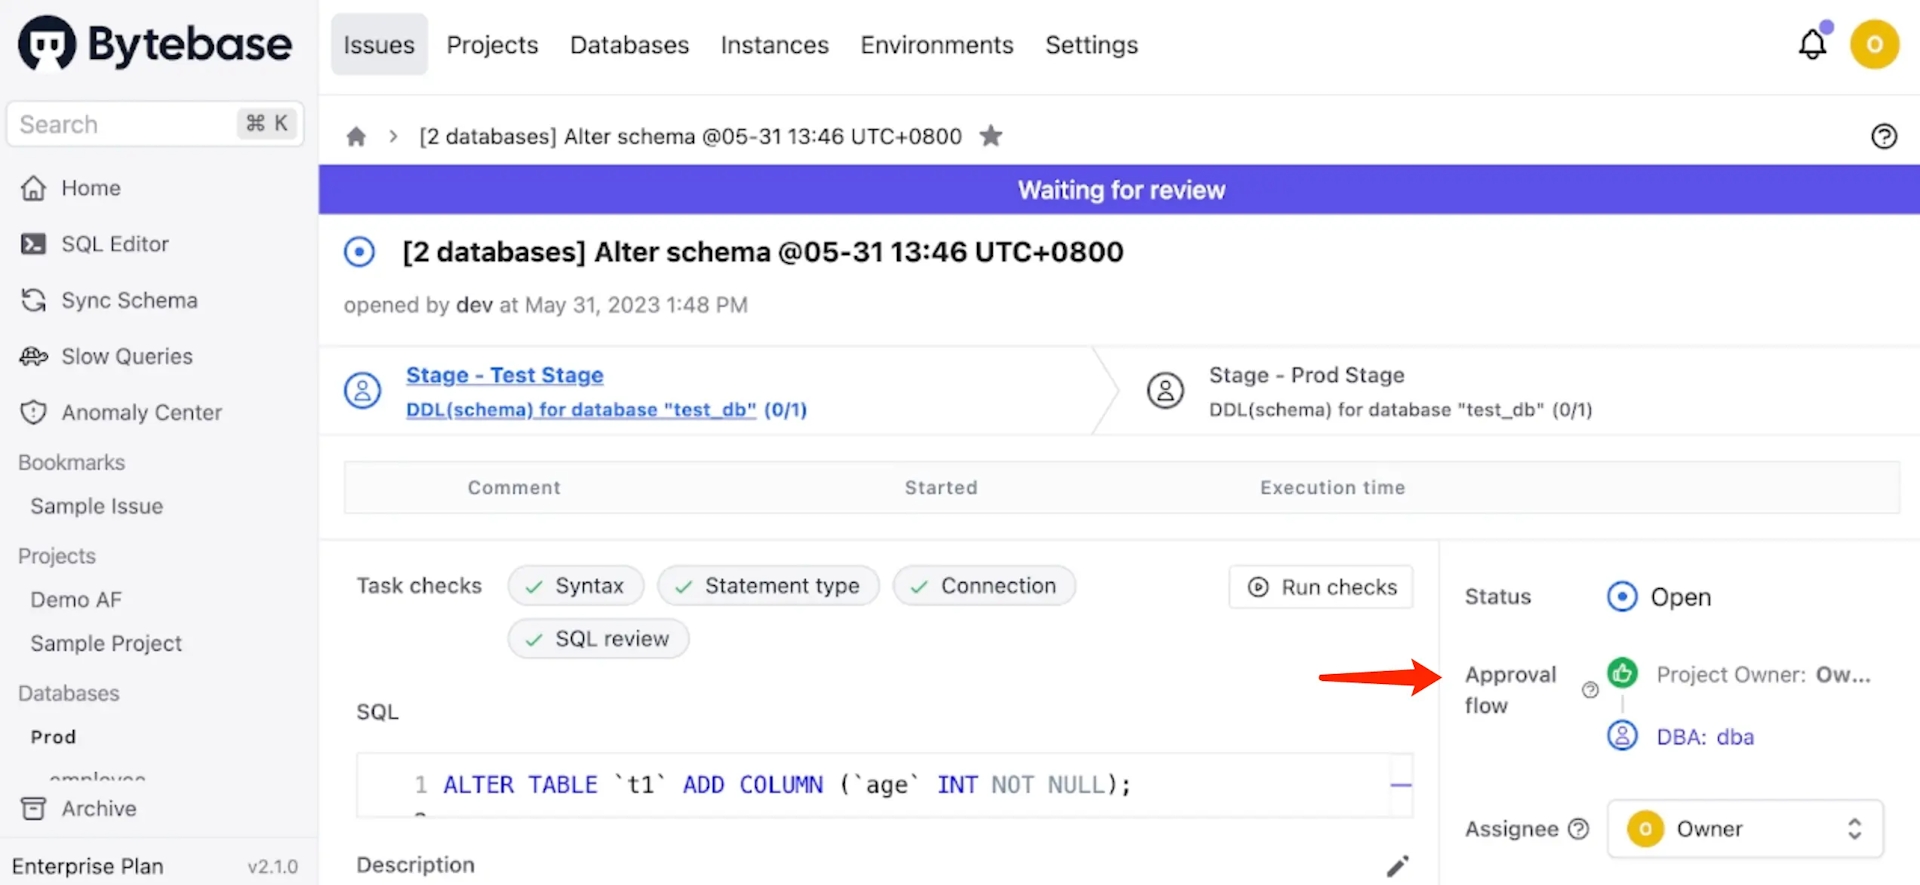
Logout and login as Owner. Find the issue and click Approve.
-
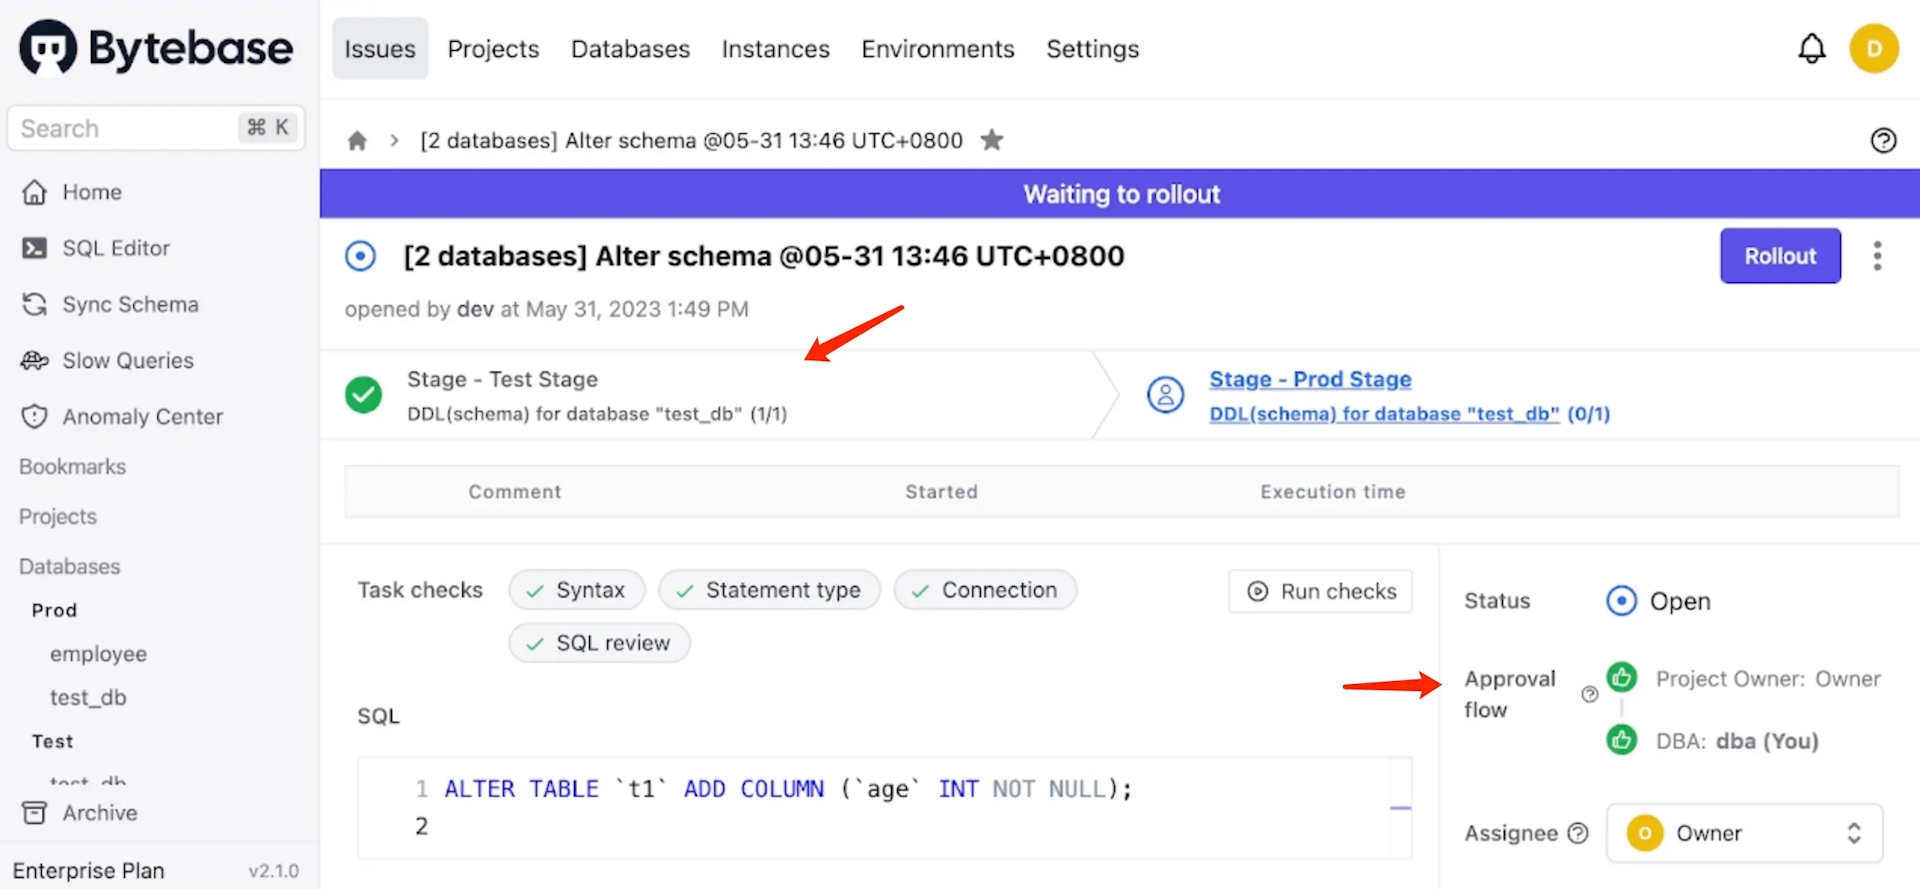
Logout and login as DBA. Find the issue and click Approve. Since Test environment will skip manual rollout, after the approval flow, the SQL will execute automatically. It's time for Owner or DBA to click Rollout to execute it on Prod environment.
-
After the rollout, this issue is
Done.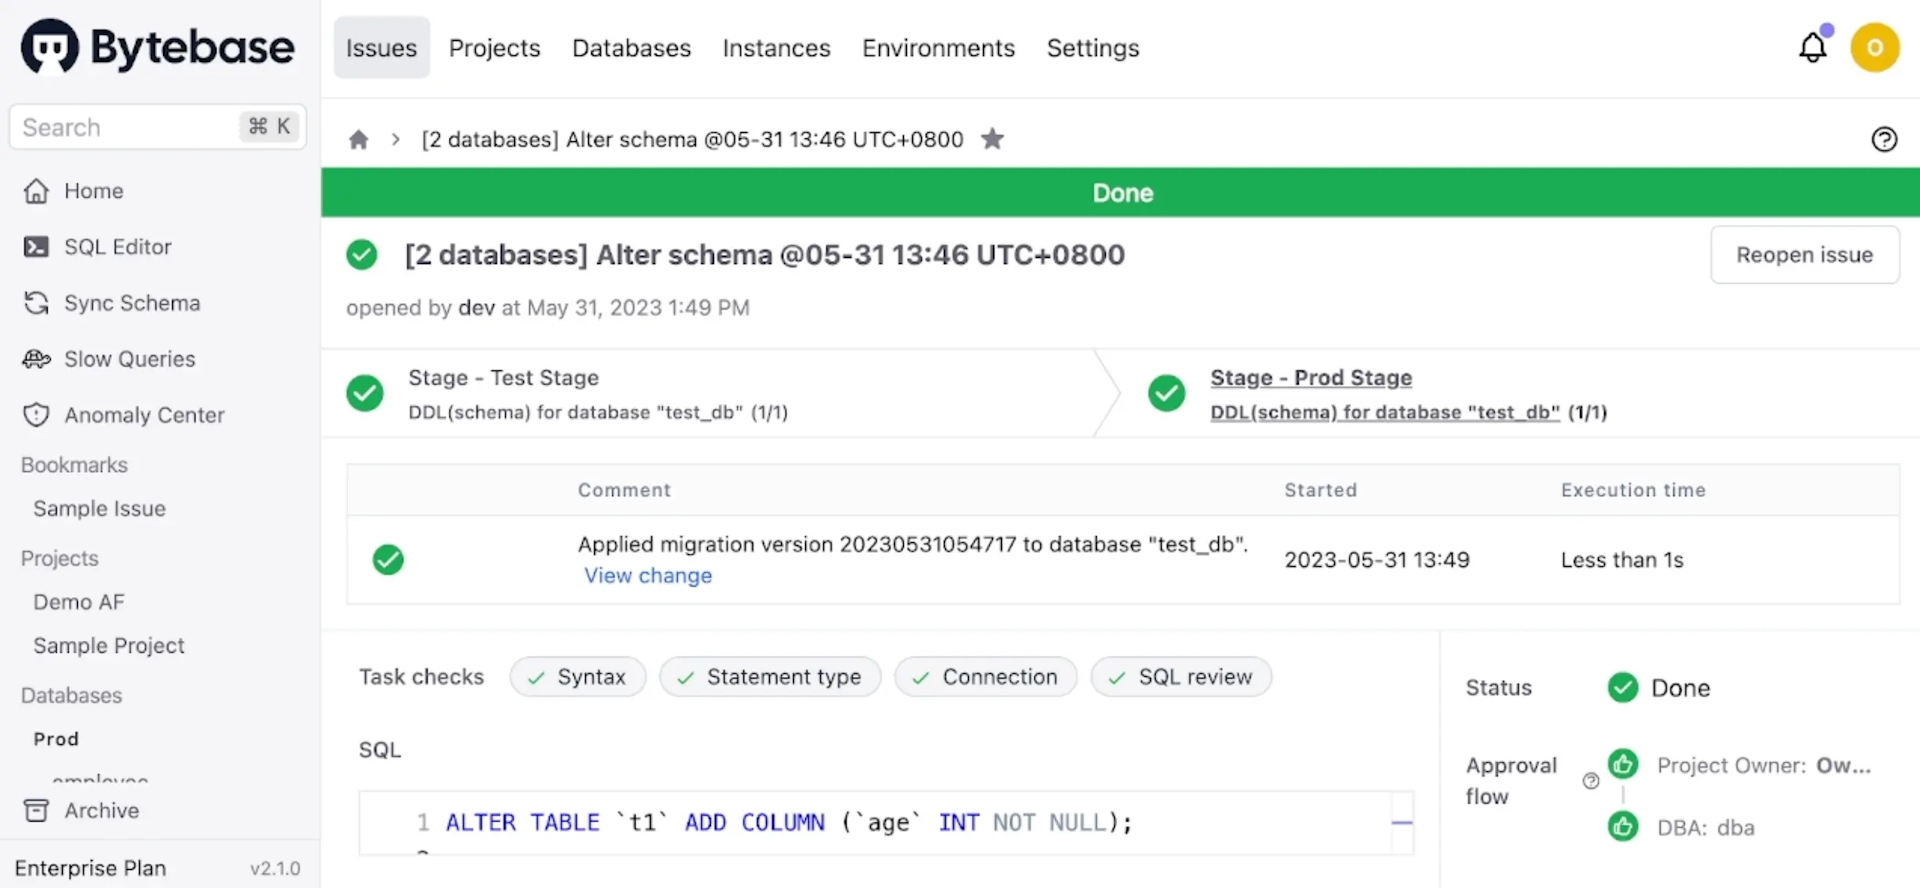
Step 4 Add custom roles and build your own approval flow
What if there is other roles in the team, for example, a Tester . Bytebase has another feature called Custom Roles.
-
Login as Owner. Click Settings on the top bar, and then click Workspace > Custom Roles. Click Add role and fill in with
Testerandcustom tester.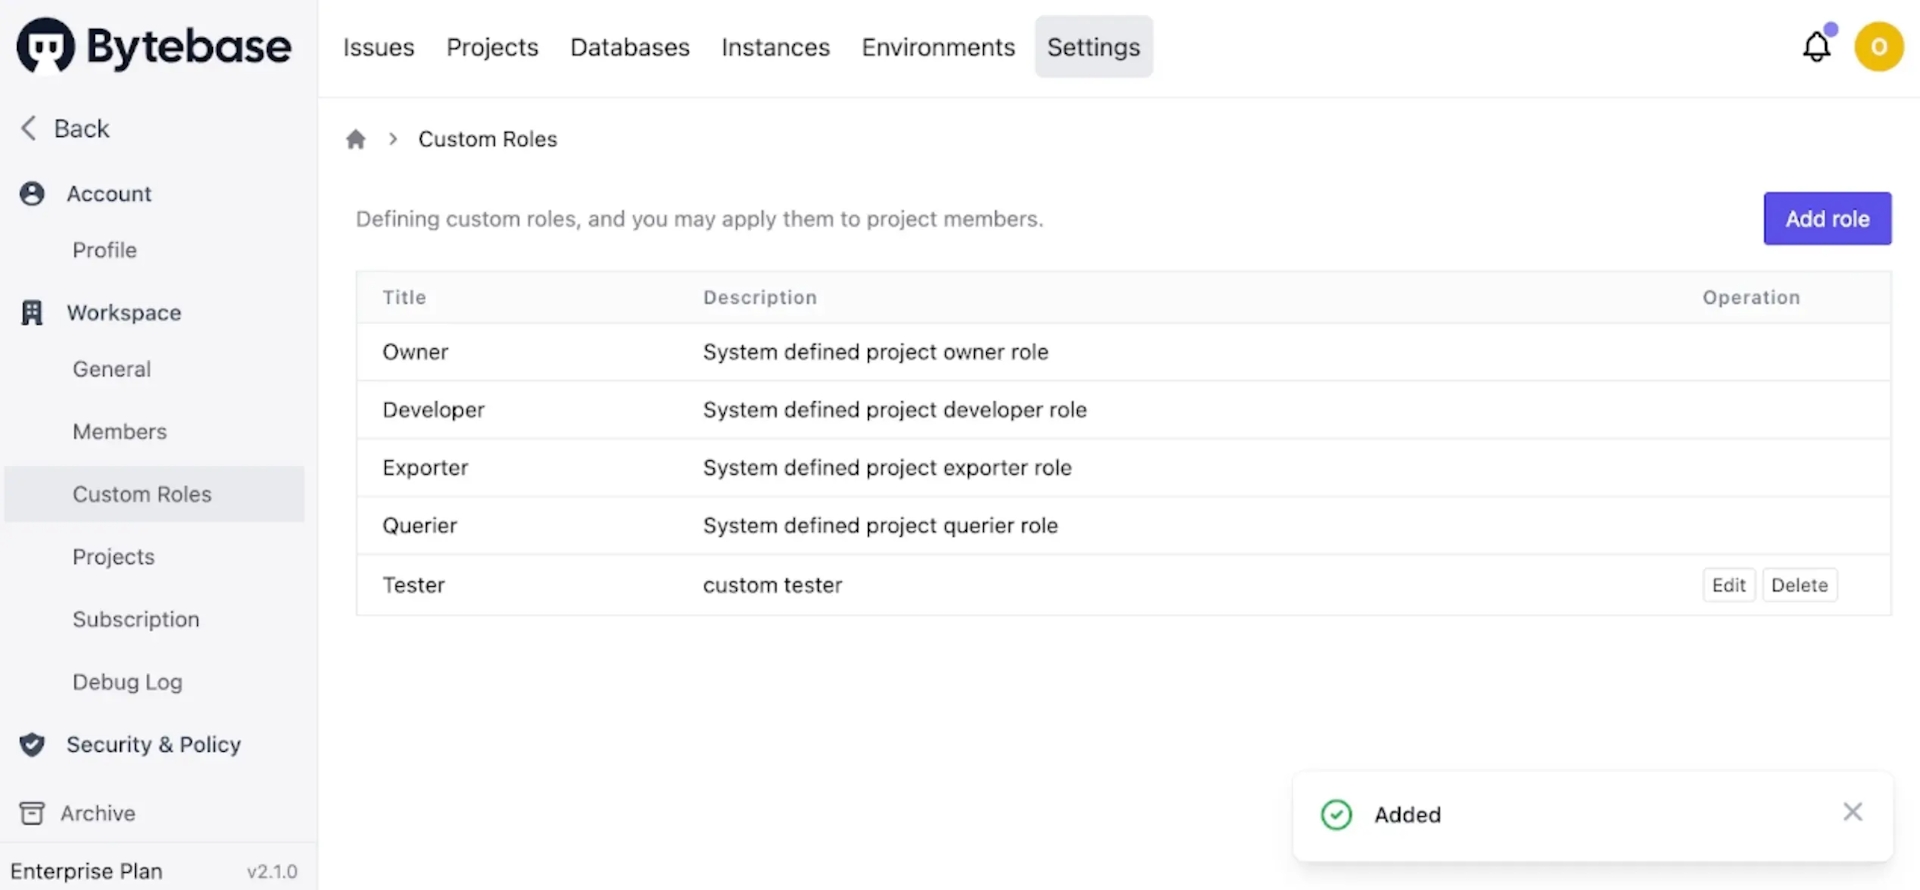
-
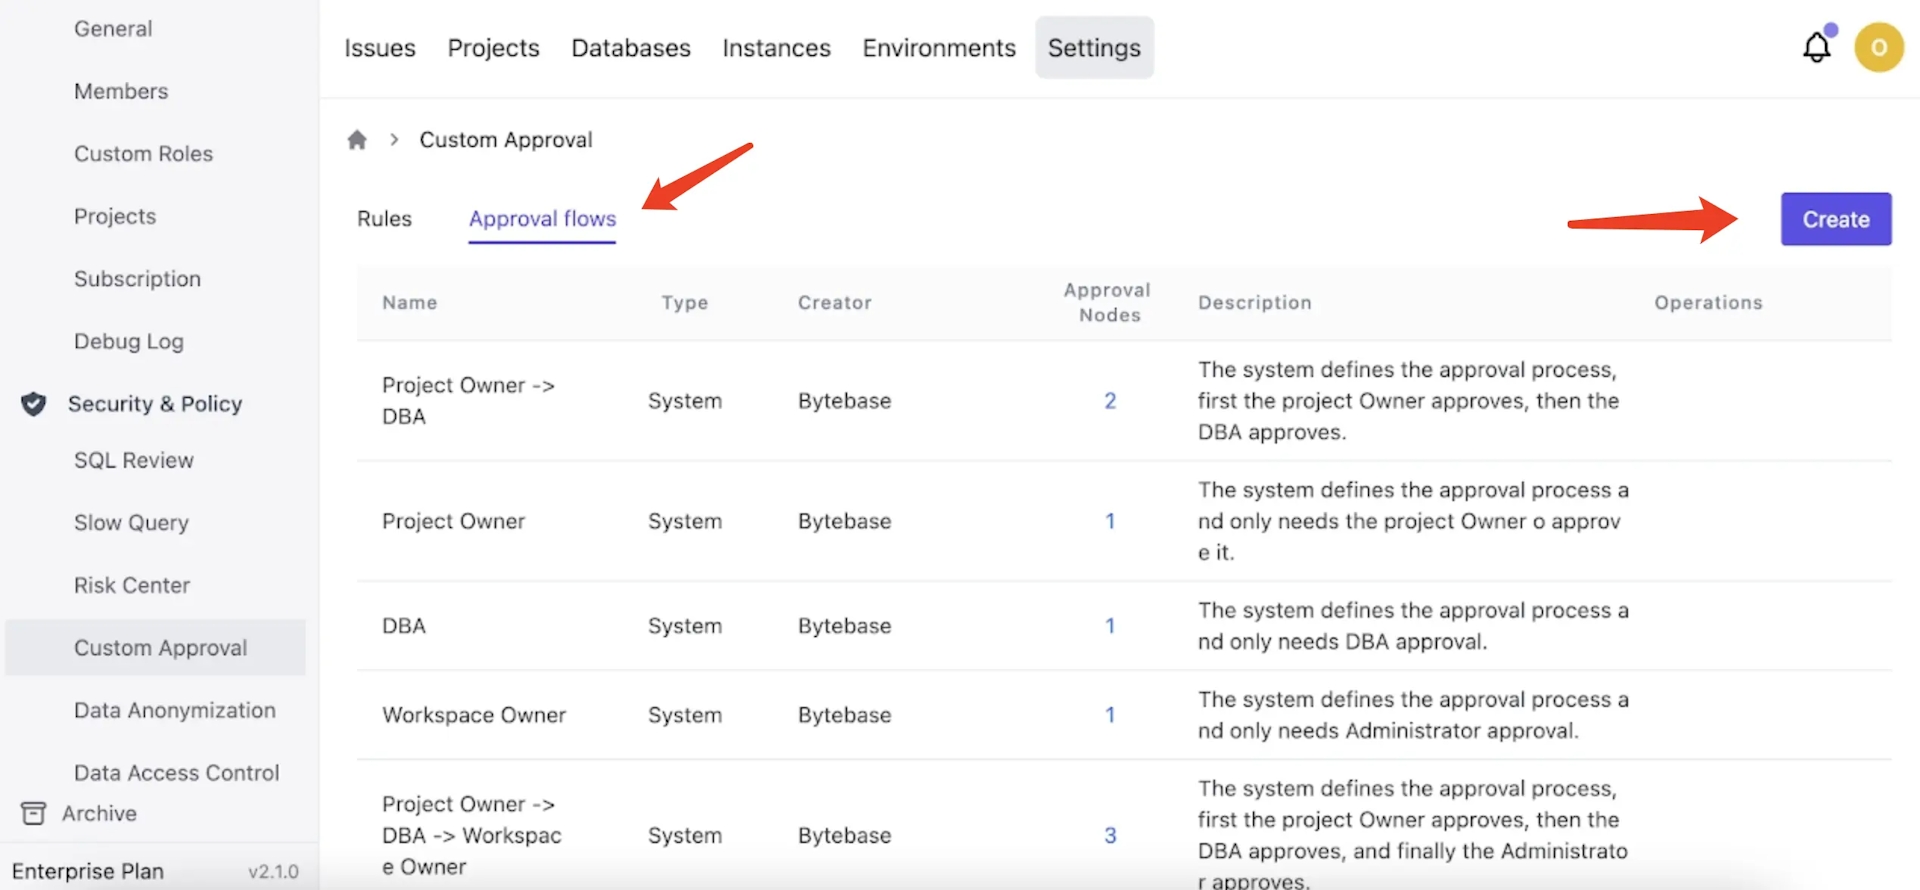
Click Settings on the top bar, and then click Security & Policy > Custom Approval. Click Approval flows, and then click Create.
-
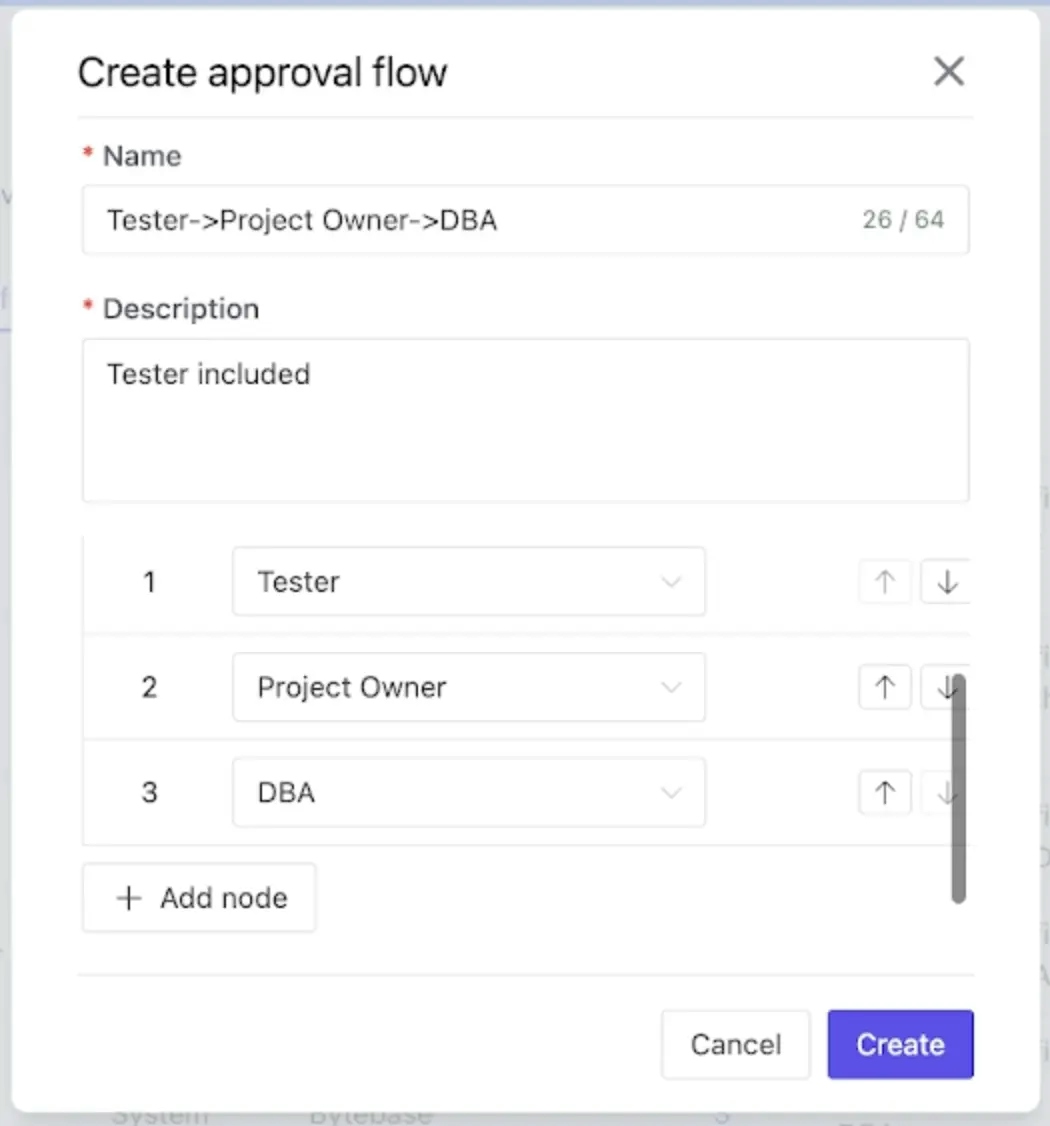
Fill in the form like this, and click Create.
-
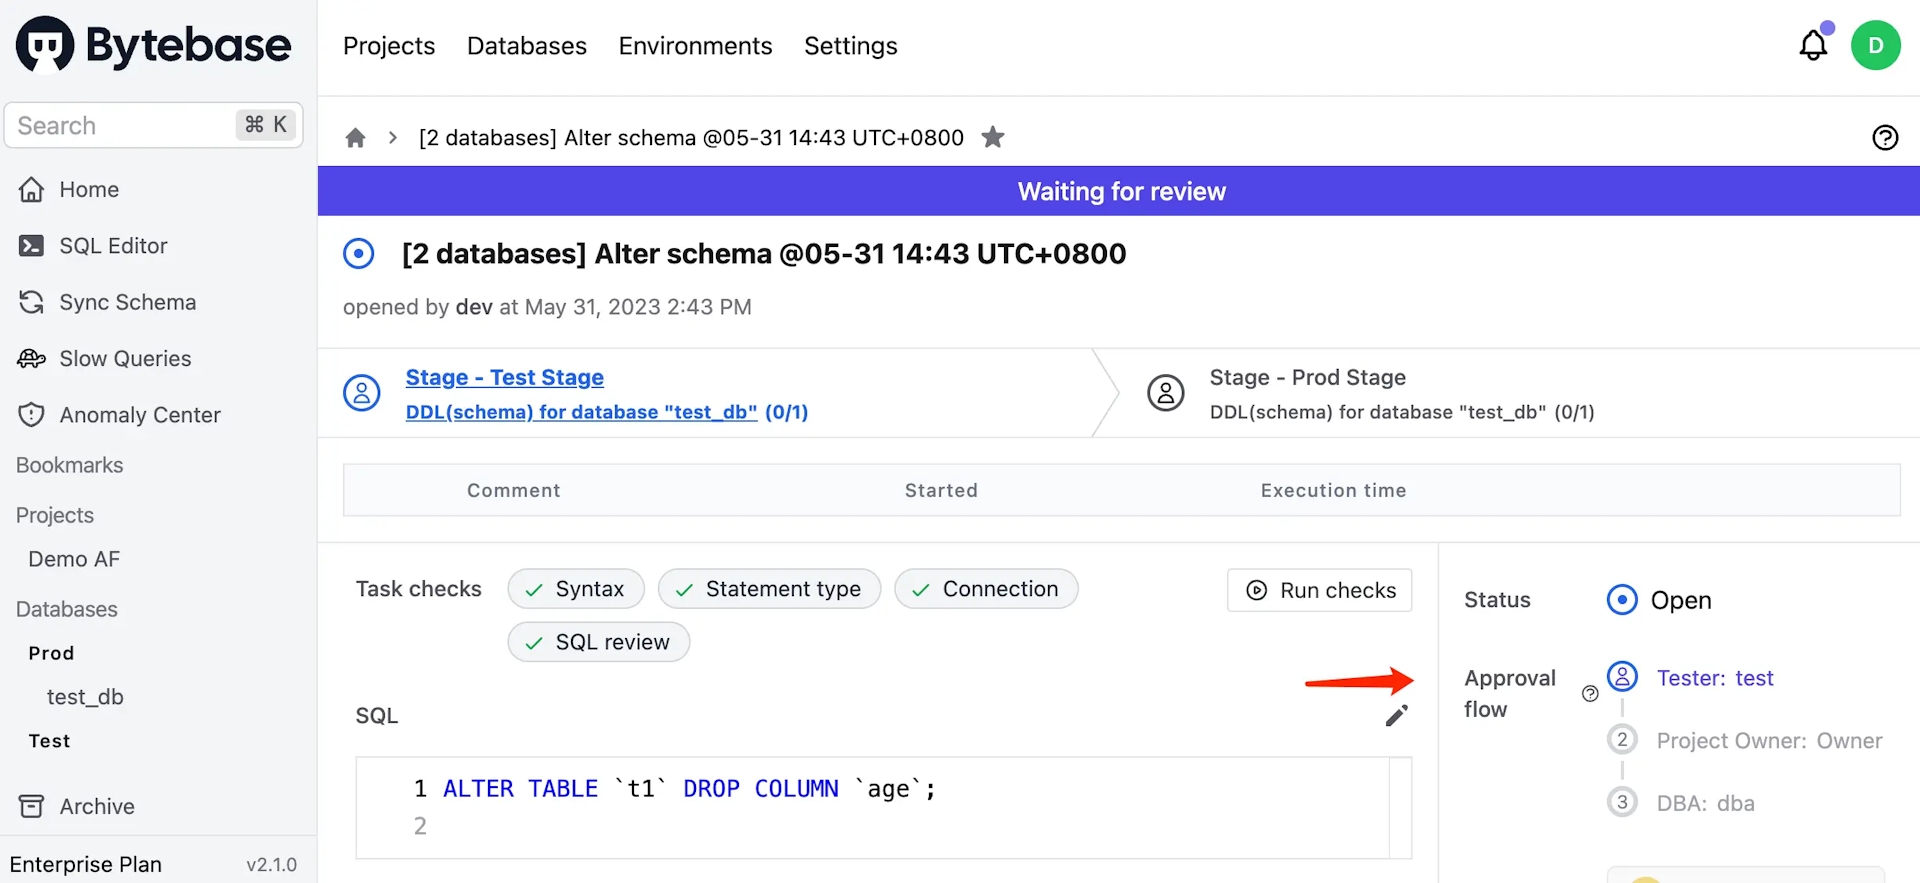
Choose the approval flow
Tester->Project Owner->DBA.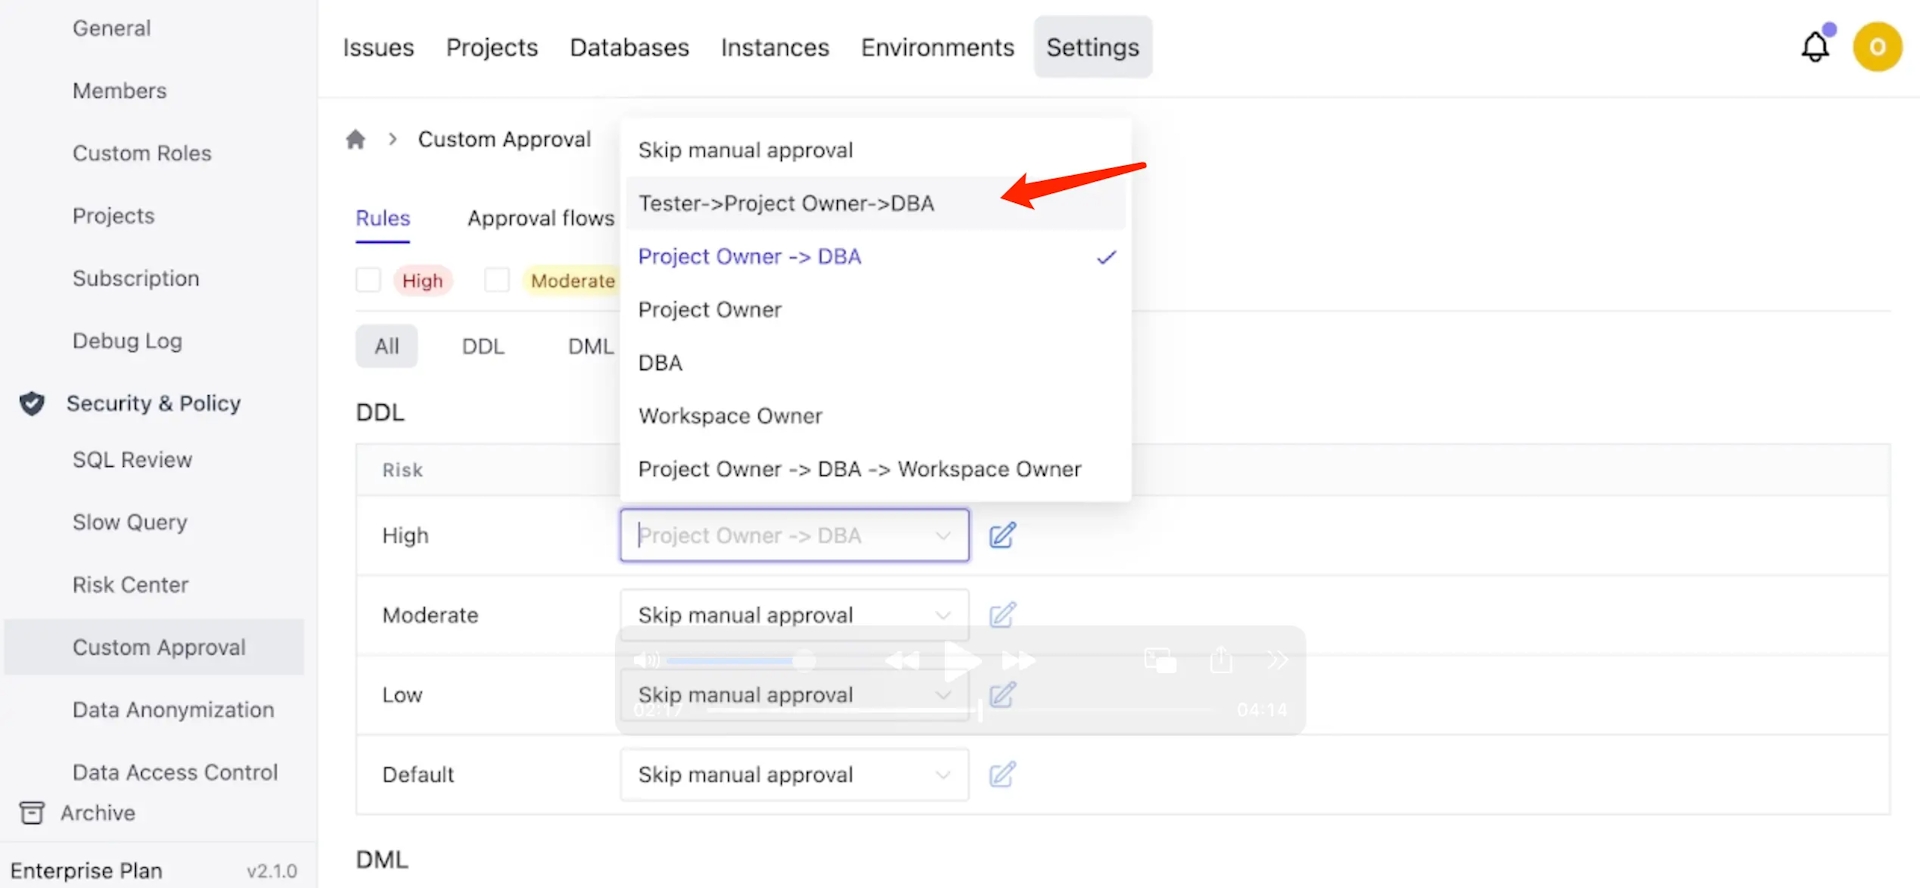
-
Go to Settings > Workspace > Members, add
[email protected]as a new Developer. Go to projectDemo AF, choose roleTester.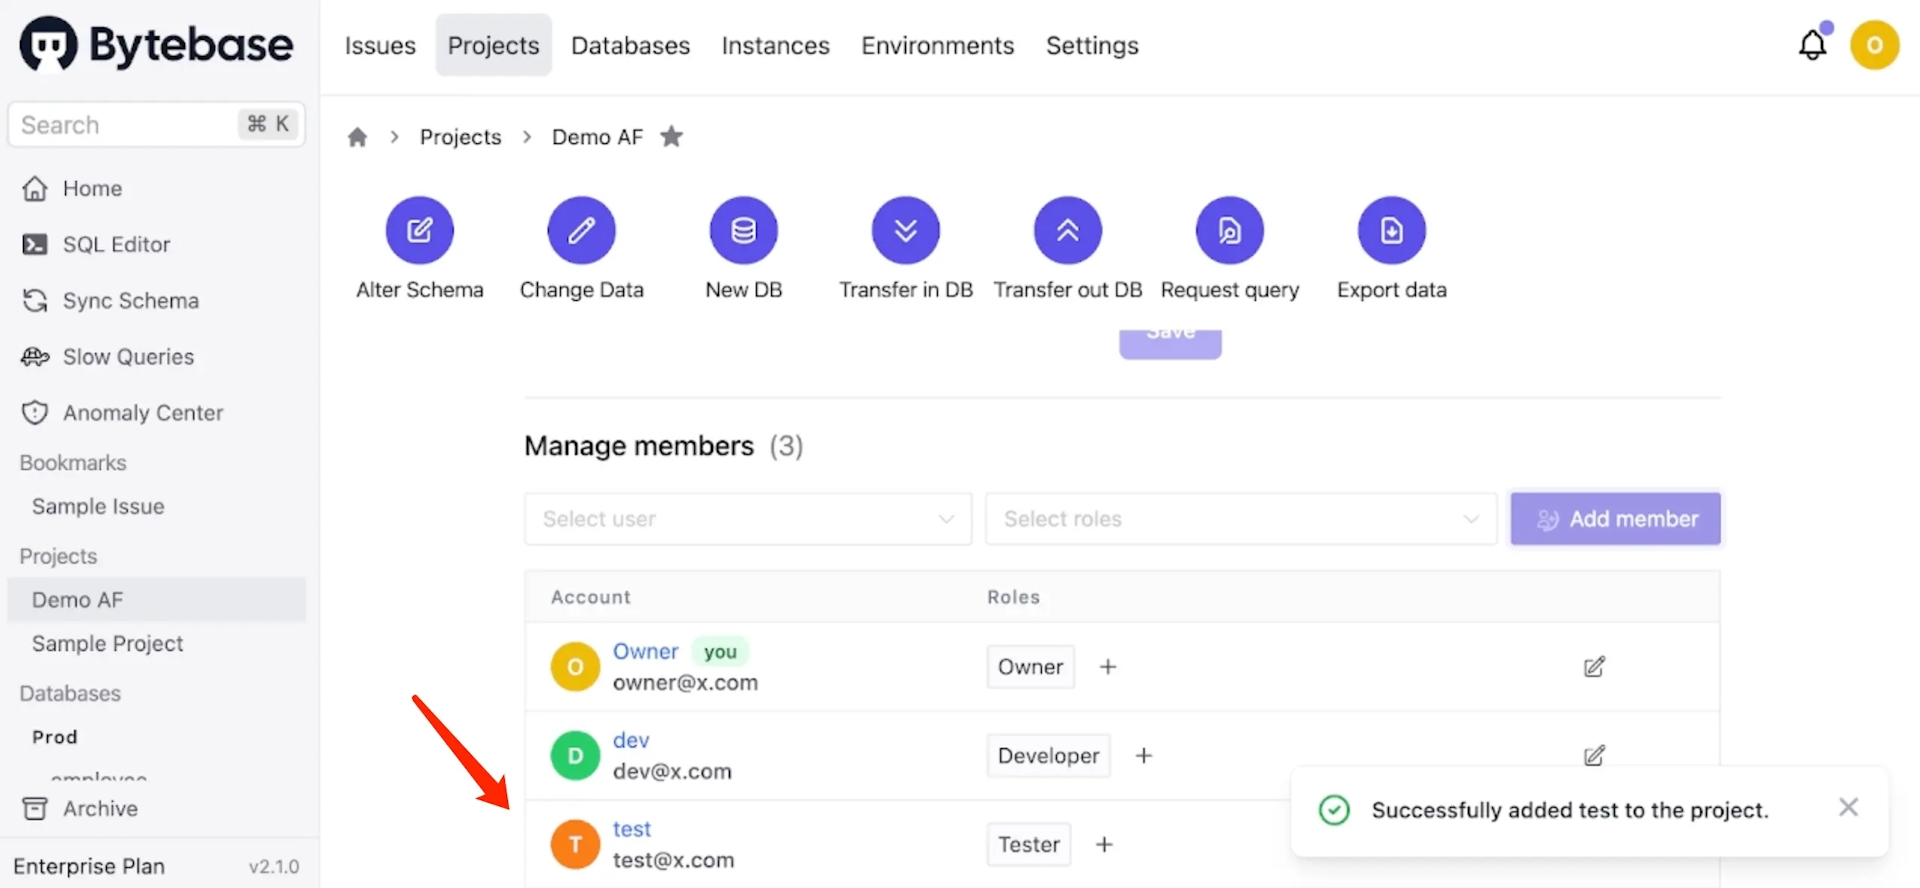
-
Logout and login as Developer. Go into the project
Demo AF, click Alter Schema, select both databases, and click Next. -
Click Raw SQL, paste the following snippet and click Preview issue. You'll see the approval flow.
Summary
Now you have tried database change with risk-adjusted custom approval flow, and also create your own custom roles as well. Bytebase provides more enterprise-level features regarding data security and data access control. If you're interested in that, read this article as well How to Configure Database Access Control and Data Masking for Developer.